How to use the Journey Workspaces 23.10 demo
WorkspacesThis topic relates to Journey Workspaces | Workspaces UserIncludes bank staff, helpdesk, relationship managers, and managers | This feature relates to the 23.10 release
Every Journey Workspaces portal comes with a pre-defined configuration that makes all Workspaces features available via controlled user access to a set of role-specific spaces. While this default configuration can be used as the basis for your own Journey Workspaces portal, you need additional elements like forms, roles and users in order to access the spaces and features in a meaningful way. The Journey Workspaces demo provides these additional elements in a sandboxed organization, giving you everything you need to experience the full application journey from start to finish in a safe environment that won't interfere with development and production systems.
This topic describes the application journey demonstrated in the video Workspaces: An Application Journey. This video follows an application as it takes a journey via Workspaces from creation to completion. This journey passes through several stages, each of which focuses on an activity that involves specific Workspaces users, spaces, and features.
- Start an application in the Assisted Channel space.
- Initial application processing in the Review and Document Requests spaces.
- Interaction between the applicant and processing staff about uploading required documents.
- Provide customer support in the Helpdesk space.
- Perform application management activities such as task assignment in the Manage space.
- Complete application processing: create a review checklist, re-run background checks, and approve the application.
- Applicant completes funding of the application.
Getting started
The Workspaces demo can be set up in your Journey Manager environment so that you can investigate all that Workspaces has to offer. Contact your TJM representative to request a Workspaces demo in your Journey Manager environment.
Demo users
At the core of the Workspaces demo is a set of user ids that provide access to various spaces. Each space in turn provides access to features and a subset of application data that are relevant to the role performed by the user. The demo user ids are as follows:
| Role | User ID | Available spaces |
|---|---|---|
| Assisted Channel* | [email protected]
|
Assisted Channel |
| Helpdesk | [email protected]
|
Helpdesk |
| Application Processing | [email protected]
|
Review, Document Requests |
| Manager | [email protected]
|
Manage |
* In some regions, this role corresponds to a relationship manager.
In addition to these space-restricted user ids, there is a super-user user id ([email protected]) that has access to all of the spaces mentioned above.
As shown above, most of the users created for this demonstration are configured with access for just one space. This allows us to focus on role-specific features and workflow as we move through the demonstration. A consequence of this is that the is hidden most of the time, only being displayed when multiple spaces are available.
Accessing a Workspaces portal
To access a Workspaces portal, you need to find the portal's form URL in Journey Manager and browse to it.
To find a portal's form URL, follow these steps.
- Login to Journey Manager and select Forms > Forms.
- Locate Journey Workspaces in the list of forms.
- On the same row, click
 Form Test Render
Alternatively, you can copy the URL from the
Form Test Render . For example, in Google Chrome, right-click Form Test Render and select Copy link address from the menu.
The same steps can be used to find the Journey Applicants portal's form URL by locating Journey Applicants at step 2 instead.
Once you have the portal's form URL, paste it into a new browser tab or window to access the portal.
Conventions
Conventions used in this topic are designed to help you understand where you are in the demo.
- Throughout the demo, you will need to login as different users. To help you identify when you need to switch to a different user, look for the and icons.
Note You need to clear your browser's application cache each time you login using a different user id. This is because Workspaces stores data in the application cache that is incompatible between different users.
While this can cause problems in a Workspaces (demo) system where you login with different user ids in the same browser, it is not an issue in a production system where each user logs in to their own computer with their own user id only.
- Each time you need to login as a different user or switch to a different space, we'll show you a graphic like this:
Application Processing (
[email protected])The items displayed are:
- A role and the corresponding user id to login with.
- An app in the Journey Workspaces suite.
- A space in Journey Workspaces (omitted for Journey Applicants).
Start an application
The application journey begins in the Assisted Channel space. Follow these steps.
To learn about the Assisted Channel space, see Workspaces Assisted Channel.
-
: Clear your browser cache, and login to Journey Workspaces as the Assisted Channel user.
Assisted Channel (
[email protected])The Assisted Channel space is selected because this is the only space available for this user.
local_libraryTo learn about spaces, see Workspaces core concepts > Roles and spaces.
- Start a new application.local_library
To learn about starting an application, see New Form: Start a new application.
Info The demo application form is US-centric; for example, it uses SSN and US-format phone numbers. If you're interested in having a demo application form for another locale, contact your TJM representative to register your interest.
- Fill in the application form.
At the Deposit details page, enter an amount between $1,000 and $100,000 to progress the application to the manual review step.
Note In the demo system, the amount entered on the Deposit details page controls the application journey as follows:
- < $1,000: The application is rejected.
- > $100,000: The application is approved.
- Otherwise: The application proceeds to the manual review step.
When you reach the Supporting documents (Optional) page, don't upload any documents for now. We'll come back and do this later.
Save the application and close the modal window.
local_libraryTo learn about modal windows, see Workspaces UI tour > Modal windows.
Closing the modal window returns to the List screen where the saved application is available in the My Saved view. Other views allow you to focus on tasks in different states.
local_libraryTo learn about views, see Workspaces core concepts > Views.
- Select the saved application to open the Details screen where you can preview the information entered so far and any system-generated data. Note that none of the milestones on the progress stepper are marked as done yet as the application is saved, not yet submitted.
 local_library
To learn about the progress stepper, see The application Details screen > Progress stepper.
- Open the application form again, and submit it without uploading any of the required documents.local_library
To learn about opening a saved application, see View Form: Re-open an application form.
Now that the application has been submitted, it is no longer available in the My Saved view. Instead, you can find it in the All applications view where all applications are visible to all Assisted Channel users.
-
Select the application to view it on the Details screen again.
Note that the current task is disabled. This is because the task is now at the Manual Review step, as shown in the Application Timeline, and the Assisted Channel user doesn't have permission to act on this task at this step.
local_libraryTo learn about the Application Timeline, see The application Details screen > Application timeline.
Looking at the progress stepper, it reveals that not only has the application been submitted, but it has completed an automated decision step and is currently under review.

-
of Journey Workspaces.
There's nothing else the Assisted Channel user can do at this stage, so it's time to begin processing the application.
Initial processing
The application journey continues to the application processing stage. An initial review of the application checks that all required information and documents are available.
-
: Clear your browser cache, and login to Journey Workspaces as the Application Processing user.
Application Processing (
[email protected])Several spaces are available under the Process space group:
- Review: The main application processing space where all application review occurs.
- Information Requests: Request-for-information tasks assigned to the applicant.
- Ad hoc Requests: Ad-hoc tasks created by someone else and assigned to the logged-in user.
- Received Applications: All applications, saved and submitted, open and closed, while they continue to exist in the system (subject to any data retention policy).
We'll look at all these spaces throughout the demo.
Usually, the Review space is selected by default. If another space is active, select the Review space.
local_libraryTo learn about space groups, see Workspaces core concepts > Roles and spaces.
To learn about the Review space, see Reviewing applications. - When the Review space is selected, the All outstanding view is active by default. However, if the All outstanding view is not active , select it.
Our new application is available in the item list.
- Notice the Queue selector. Queues act as the source of application and task information. A user's access to queues, controlled by configured permissions, determines which applications and tasks they can see.
In the demo system, the queues correspond to user groups with different responsibilities: Error Group and Manual Group. Users with access to the Manual Group queue are responsible for handling manual review tasks. We can see our application when this queue (or the All queue) is selected.
- Select the application to view it on the Details screen. Inspect the application's details.
The goal of application processing is to decide whether to approve or reject the application. Scan the application to identify whether anything is preventing you from making that decision.
- The Applicants tab includes features that facilitate application processing.
- The Applicants list shows all the applicants involved in the application. Select an applicant from the list to see information about them in the Personal Info and Background Checks sections.
- Background Checks use color to highlight what needs attention, as well as providing a way to view the information that contributed to each background check's outcome.local_library
To learn about background checks, see The application Details screen > Background Checks section.
Some of the background checks are colored red indicating a negative result. We'll resolve this later.
- The badge on the Document Checklisttab indicates the tab contains content that requires attention; in our case, required documents are missing and need to be uploaded. So, the application needs to be sent back to the applicant so they can upload the required documents.
- Having determined a course of action, the application needs to be assigned to you before you can make any updates to it. You can do this by claiming the application which assigns the application's current task to you. (We'll discover another way to assign a task later.)
Claim the application.
local_libraryTo learn how to claim an application, see Claim: Assign an unassigned task to a yourself.
Now that you've claimed the application, you can start updating it.
- Workspaces functionality can be extended using custom actions which are available from the button's dropdown list on the Details screen.local_library
To learn about custom actions, see Workspaces actions > Custom actions.
The following custom actions are available in the default Workspaces configuration on which your Workspaces portal may be based. All the custom actions are covered in this demo.
- Send the application back to the applicant, requesting the required documents be uploaded as well as some additional information not captured in the application form. local_library
To learn about requesting information from an applicant, see Example: Request information from applicant.
Request the following information from the applicant:
- Required documents: Payslip, Proof of address, Driver License, Proof of employment
- Additional information: Details of previous employment, Marital status
- Notes: Advise the applicant that the requested documents and information are required in order to process the application.
In response to this action:
- a JM account is created for the applicant using the applicant's email as the account login name and with the default password
- the application is assigned to the applicant
- an email is sent to the applicant informing them of their application's progress and including details for accessing their application in Journey Applicants
On returning to the List screen, note that the application is no longer available in the All outstanding view. This is because it no longer satisfies the criteria imposed by that view. In fact, it is no longer available in the Review space; instead, it is now available in the Information Requests space.
- Select the Information Requests space.
local_library
To learn about the Information Requests space, see Request information during application review.
You can see the application here. Notice that the application is assigned to the applicant.
In this space, Application Processing users can monitor applications assigned to applicants and communicate with them to handle any inquiries.
- Select the application to view it on the Details Screen again.
Note the task assigned to the applicant in the task switcher.
- Finally, let's create a review checklist. This will allow us to keep track of which aspects of the application have been reviewed and which are outstanding. This is particularly useful when application processing occurs over several days or weeks, or when the application is assigned to different reviewers over the course of processing it.local_library
For an example of how the Review Checklist works, see Example: Review checklist.
Select the custom action Review Checklist. The Review Checklist modal window is displayed.
- From the Personal Details dropdown, select Reviewed.
- From the Attachments dropdown, select Awaiting customer update.
- Leave the other Background Checks dropdown showing To do.
- Save and close the modal window.
A Review Checklist tab appears in the task pane. You can monitor the state of the Review Checklist items here.
-
of Journey Workspaces.
At this stage, the application is with the applicant for action, and bank staff can't do anything to advance the application towards success. Next, we'll see how the applicant and bank staff can communicate with one another to keep the application progressing along its journey.
Applicant interaction
In this section, we discover how applicants can communicate with bank staff, and how an applicant can add more information to their application after the initial submission.
-
: Clear your browser cache, and login to Journey Applicants using the applicant's email from the application user.
Applicant (Applicant's email)
Journey Applicants uses a mobile-first design, but can also be used on the desktop. We'll use it in desktop-mode throughout the remainder of this demo.
- Let's investigate the applicant screen.
The progress stepper shows that the applicant has been asked to provide more information, and a task has been assigned to them for this purpose.
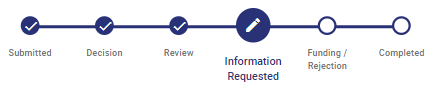
Looking at the task switcher, the only tasks shown are those assigned to the applicant.
In the Information Requested card, we can see the message we sent to the applicant requesting more information.
- To find out what information is required, the applicant resumes the application.
From the actions group, click Resume.The Resume modal window is displayed with sections and fields for just the required information; in our case, upload four documents to the application and provide some additional information.
Let's assume the applicant needs assistance to understand what was requested. Close the modal window, returning to the Details screen
- Use the Notes and Comments features to seek assistance from the financial institution.
Add a note to the application, asking whatever you need to know to be able to complete the assigned task.
local_libraryTo learn about Notes and Comments, see Task notes and comments.
-
of Journey Applicants.
We need to return to Workspaces now to respond to the applicant's inquiry.
The applicant waits for the bank staff to respond to their question.
-
: Clear your browser cache, and login to Journey Workspaces as the Application Processing user.
Application Processing (
[email protected]) - Select the Document Requests space.
Application Processing (
[email protected]) - Select the application to view it on the Details screen. The applicant's question (note) is available in the Notes card.
- Reply to the applicant's inquiry.
Click Comments on the note. This creates a threaded conversation on the note between the applicant and bank staff. The applicant and bank staff can add more notes or comment on existing notes until the applicant is satisfied they have what they need to continue.
- of Journey Workspaces.
Having responded to the applicant's inquiry, it's now back to the applicant to complete the task assigned to them.
-
: Clear your browser cache, and login to Journey Applicants using the applicant's email from the application user.
Applicant (Applicant's email)
- The applicant views the bank staff's response (comment) to their question (note). Assuming the applicant is satisfied with the response, they can now move on to completing their assigned task.
- Resume the application then fill in the required information, upload the required documents, and submit the application (again).
local_library
To learn how to resume an application, see The application Details screen > Progress stepper.
To learn about uploading documents, see The application Details screen > Upload a document. - In the Requested Information card, click the Complete to progress the application, assigning it back to the Application Processing user. Note that the task moves to the Completed Actions card which appears now if it wasn't already displayed.
We can see that the task's status is Completed now, and the progress stepper shows that the application has returned to the Review step.
The applicant has nothing else to do now until the application is approved.
- of Journey Applicants.
The application has been assigned back to the Application Processing user who can continue to review it.
-
: Clear your browser cache, and login to Journey Workspaces as the Application Processing user.
Application Processing (
[email protected])The Document Requests space is selected because it was selected when we last logged out as the Application Processing user.
The application is no longer available in the Document Requests spacebecause the applicant has completed our request for information. We need to look for the application in a different space.
- Select the Review space.
Application Processing (
[email protected])We see that the application is available here. Notice that the application is not assigned to anyone.
Before we finish processing our application, let's take a look at some of the other spaces available in Workspaces.
- of Journey Workspaces.
Helpdesk
Workspaces includes a Helpdesk space designed to support teams who respond to customer inquiries.
To learn about the Helpdesk space, see Workspaces Helpdesk.
-
: Clear your browser cache, and login to Journey Workspaces as the Helpdesk user.
Helpdesk (
[email protected])Generally, responding to a customer inquiry starts with finding an application.
- Search for the application. You can search by various criteria such as application id or applicant name. However, you need to enter the full value of whichever field you're searching on as partial match is not supported. Items matching your exact search criteria are displayed in the item list.local_library
To learn about finding a task or application, see Finding tasks and applications.
The Helpdesk user can use the information in the item list to verify the identity of a caller. Once the caller is verified (as the applicant), the Helpdesk user can confidently share additional application details with the them.
- Select the application to view it on the Details screen.
While assisting the caller, the Helpdesk user can examine the application's details to check what has happened with the application so far. The Progress stepper shows where the application is currently in the application processing workflow, while the Task switcher and Application Timeline show all the steps the application has been through so far, some of which may have been repeated as the application is processed.
When the call ends, the Helpdesk user can return to the Helpdesk List screen to handle another inquiry, or logout.
- of Journey Workspaces.
Next, we'll take a look at task management.
Manage
Workspaces includes a Manage space designed to support task management.
To learn about the Manage space, see Manage tasks and applications.
-
: Clear your browser cache, and login to Journey Workspaces as the Manager user.
Manager (
[email protected])A manager can perform various task and application management activities such as:
- preview all applications in different queues
- monitor applications to ensure they're meeting SLAs
- assign, reassign, or unassign tasks
- Explore the List screen.
- The Queue selector can be used to focus on application's at different steps in the application journey.
- The SLA field helps us to focus on the application's that need to be processed first.
Also, our application's Assigned to field is empty.
- Assign the application to the Application Processing user.local_library
To learn about task assignment, see Assign a task to a user, Reassign a task to another user, and Unassign a task.
- of Journey Workspaces.
Now that the application is assigned to the Application Processing user, we can continue to process it.
Ad hoc requests
In this section, we continue processing the application, sharing the workload by using an ad hoc request to get someone else to verify the documents uploaded by the applicant.
-
: Clear your browser cache, and login to Journey Workspaces as the Application Processing user.
Application Processing (
[email protected])The Review space is selected.
- The All outstanding view is selected by default. The application appears in the item list, and it's assigned to the Application Processing user.
Select the Assigned to me view. All applications assigned to the logged in user are available from this view. Other views allow you to focus on tasks in different states.
- Select the application to view it on the Details screen. Review the application.
- Notes: The Notes card shows all the communication that has happened between the applicant and processing staff.
- Documents: The documents uploaded by the applicant are available in the Documents card. You can either view a document in a modal window () or download it (), for example, to verify applicant details.local_library
To learn about viewing and downloading documents, see Documents.
- Documents Checklist: The Documents Checklist tab shows that all required documents are now available. However, none of the documents have been verified which is why the attention badge remains on this tab.
- Additional Information: The Additional Information tab contains questions and answers for the additional information requested of the applicant.
- The documents need to be verified. Create an ad hoc task for someone else to verify them.local_library
For an example of how to create an ad hoc task, see Example: Create an ad hoc task.
- of Journey Workspaces.
For this demo, the Document Verification ad hoc task is assigned to the super user ([email protected]).
-
: Clear your browser cache, and login to Journey Workspaces as the super user. Select the Ad hoc Requests space.
Application Processing (
[email protected])Only tasks that are assigned to the logged in user appear in the item list.
- Locate the ad hoc task in the item list.
Notice the SLA indicator displays the
 (SLA Warning) icon.
 - Select the task to display its details. Explore the Details screen.
- In the application card, notice the Task Type is Document Verification.
- Notice the attention badge on the Documents Checklist tab.
- Select the Documents Checklist tab. Notice the Verification column.
- Verify the documents.local_library
To learn about completing an ad hoc task for document verification, see Example: Complete an ad hoc task.
After verifying the documents, the List screen is displayed and the task no longer appears in the item list.
- of Journey Workspaces.
With the application documents verified, the reviewer can complete application processing.
Finish application processing
In this section, we finish processing the application by making a decision about it's outcome. Along the way, we update the background checks and re-visit the Review Checklist.
-
: Clear your browser cache, and login to Journey Workspaces as the Application Processing user.
Application Processing (
[email protected])The Review space is selected.
- Locate the application in the item list. Notice that it's not assigned to anyone. This is because the last task, the document verification task, has been completed.
Claim the application again, from the List screen this time, then select it to display its details.
- Review the application again.
- Queue: Notice that the Queue is Manual Review.
- Documents Checklist: Select the Documents Checklist tab. Notice that the attention badge no longer appears on this tab, and all required documents are available and verified.
- Background Checks: Select the Applicants tab. Failed background checks still appear on the Background Checks section. These checks need to be run again to see if they still fail.
- Run the background checks again, to see if the failing checks pass now.
local_library
For an example of how to re-run background checks, see Example: Re-run background checks.
All the background checks pass now, except for one that we'll ignore.
- Update the Review Checklist.local_library
For an example of how to use the Review Checklist, see Example: Review checklist.
On the Review Checklist modal window
- From the Attachments dropdown list, select Reviewed.
- From the Background Checks dropdown list, select Reviewed.
- Save and close the modal window.
Having reviewed the application's details, we're now ready to make a decision about the application's outcome. We're going to approve it.
- Approve the application.local_library
For an example of how to approve an application, see Reviewing applications > Approve an Application.
The Details screen closes, returning to the List screen.
The application is transferred back to the applicant, and an email is sent to them advising how to complete the final step: funding the application.
- The application no longer appears in the Assigned to me view but it is still available under the Completed tasks view if it needs to be viewed again.
Alternatively, you can find the application in the Received Applications space. Here, you can see all of the tasks associated with an application.
- of Journey Workspaces.
Fund the application
Finally, the application has been approved and the applicant needs to fund their new account.
-
: Clear your browser cache, and login to Journey Applicants using the applicant's email from the application user.
Applicant (Applicant's email)
A funding task is assigned to the applicant.
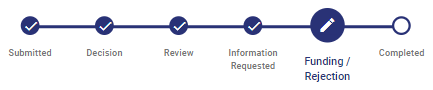
- Resume the application, complete the funding stage on the form, and submit the application one last time. The application is completed.

All of the tasks assigned to the applicant (in the task switcher) now appear as completed.
- of Journey Applicants.
With the application funded, this application journey ends here.
You can learn more about Workspaces features in the Workspaces user guide, and information for solution builders is available in the Workspaces technical guide.