Finding tasks and applications
WorkspacesThis topic relates to Journey Workspaces | Workspaces UserIncludes bank staff, helpdesk, relationship managers, and managers | This feature was introduced in the 18.11 releaseThis feature was updated in the 23.04 release
Some of the text and images below may not match what you see in your Journey Workspaces app. This is because the features described are based on a default Journey Workspaces configuration, and your Workspaces app may be configured differently; for example, with your company's branding, with fields for other information, or with a custom layout. Nevertheless, the features described work the same way in every Workspaces app.
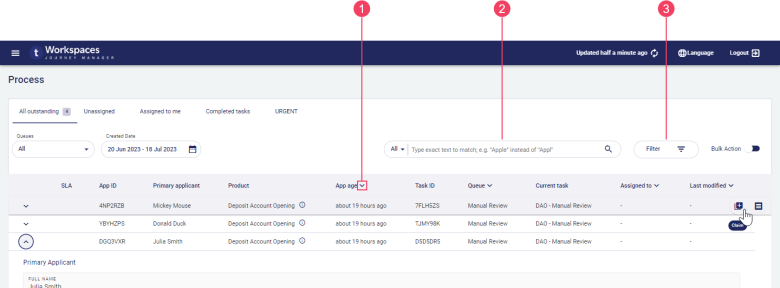
The Workspaces item list shows tasks from the active task queue (Review and Manage spaces) or applications for a selected form / product type (Helpdesk or Assisted Channel spaces) that also satisfy the criteria defined for the current view. This may still result in a large number of tasks which you might want to refine further. Searching, filtering and sorting can help you to focus on the tasks or applications that are important to you right now.
Information in a List screen expansion row cannot by found by searching or filtering.
Searching and filtering are similar in that both reduce the number of items in the item list by matching desired field (column) values. However, searching differs from filtering in a number of ways:
- Searching can target one field or all fields, whereas each filter is targeted at a single specific field.
- When searching on one field, the user can choose which field to target, whereas each filter is targeted at a fixed predetermined field.
- When searching on all fields, the same search text is compared against all searchable fields. In contrast, filtering allows you to match a different value against each filter field.
- Searching is supported for text fields only, whereas filtering is supported for different data types including text and dates.
Search for a Task or Application
If you know which task or application you're looking for and you can't see it in the item list, you can try to search for it. Searching allows you to refine the list of items displayed to show just those relevant to what you are looking for.
To search for a task or application:
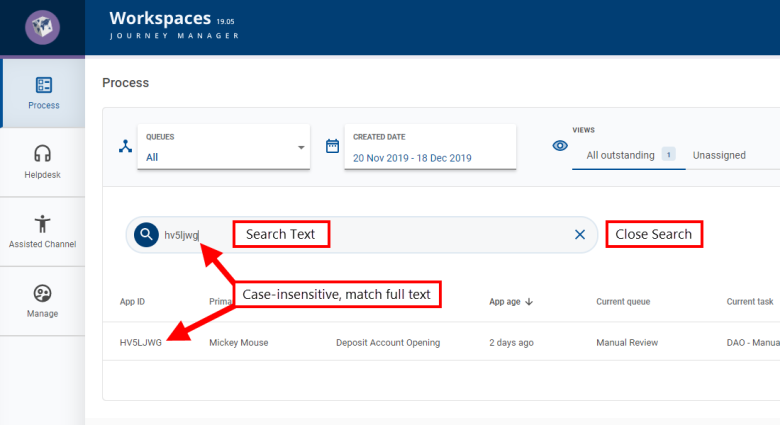
- Workspaces 20.05 and later: Select a search scope, type your search text, and press Enter or click . Workspaces compares the search text against the field or fields in the search scope, and displays matching items in the item list. If the search scope is All, the search text is compared against all searchable fields.
- Workspaces 19.11: Type your search text in the field, and press Enter. Workspaces compares the search text against all the searchable fields in the item list, and restricts the items displayed to only those that have one or more fields matching the search text.
- Workspaces 19.05 and earlier: Click in the field and start typing. As you type, Workspaces compares the text you enter against all the searchable fields in the item list, and restricts the items displayed to only those that have one or more fields matching the text entered. If you pause while typing the search text, Workspaces will attempt to find items that match the text you have entered. Keep typing until you have entered the full text that you want to search for.
Searching is case-insensitive, treating uppercase and lowercase characters as the same, and only finds items that match the search text exactly (ignoring letter case). Partial match is not currently supported.
When a search is active, the items displayed in the item list satisfy the current view and filter selections as well as the search criteria. A search remains active until you clear it. Note that simply deleting all of the search text in the box does not clear an active search. To clear a search, follow the instructions for your Workspaces version:
- Workspaces 22.04 and later: Click the button.
- Workspaces 20.05 and 21.11: Delete the search text, and click or press Enter.
- Workspaces 19.11 and earlier: Click , or select any space which re-loads the List screen.
If you select an item in the item list while a search is active, when you subsequently return from the Details screen to the List screen, the search will still be active. You can tell that the search is still active by the text and the icon in the Search field.
Filter the Item List
If you're looking for something specific and there are too many items to scroll through, filters might help you to find what you're after. A filter restricts what appears in the item list so that items more relevant to what you are looking for right now are shown. Filters are applied to the item list using the Filters selector, however, a View can also include filters.
A filter is a requirement that must be satisfied for an item to appear in the item list. A filter requirement specifies one or more values to compare against a column in the item list, and all matching items satisfy the filter requirement. Multiple filters can be defined at the same time. Only items that satisfy all the active filters will appear in the item list.
If you select an item in the item list while a filter is active, when you subsequently return from the Details screen to the List screen, the filter is still active. This is indicated on the Filter button by a number in parentheses identifying how many filters are active.
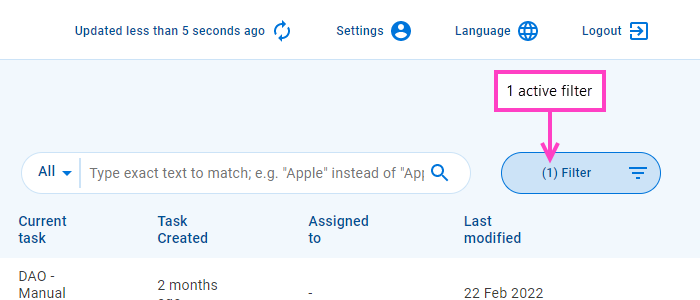
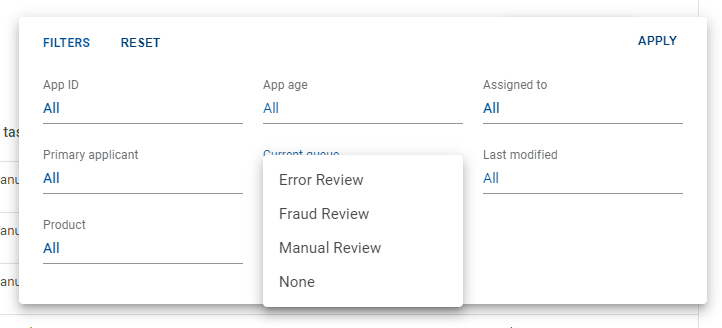
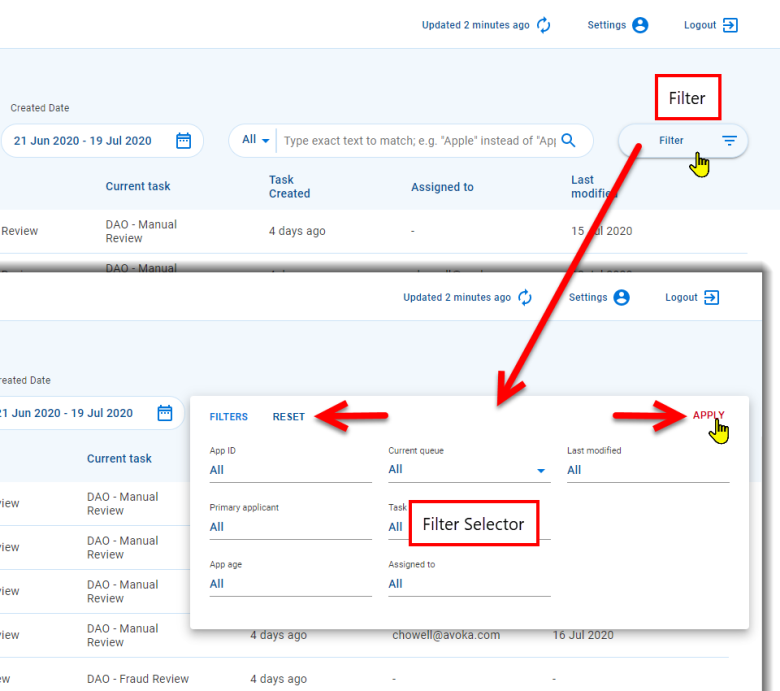
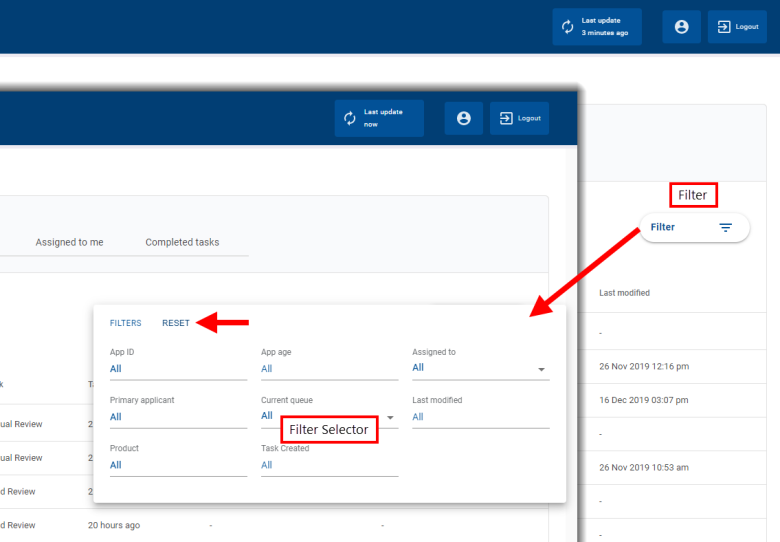
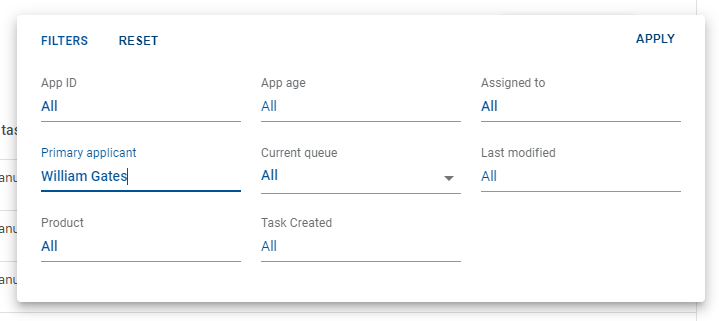
To view the current filters, click the button. The Filters selector is displayed showing all the filters that are currently applied to the item list. Each filter allows you to select a value or set of values to compare against the column.
Workspaces supports several types of filter.
- Single-select: A single value selected from a predefined list of values.
- Multi-select: Multiple values selected from a predefined list of values.
- Date: A single date or a date range.
- Text: Similar to searching but applied to a single column.
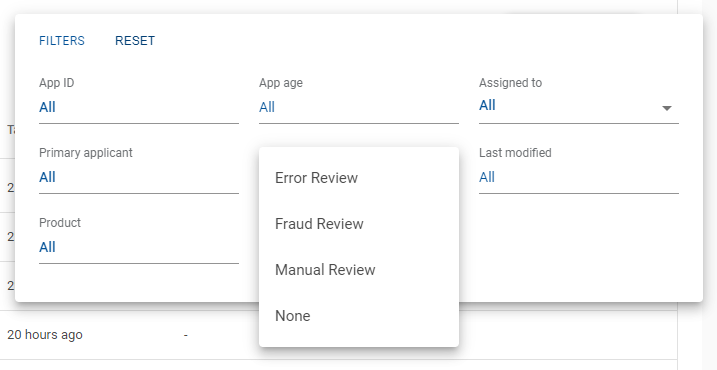
When you click a single-select or multi-select filter field, a drop-down list appears populated with a predefined list of values. For a single-select filter, select a value from the dropdown list to filter on. For a multi-select filter, you can select one or more values from the dropdown list.
To apply a filter to the item list, click (1) to display the Filters selector then select the filter values you want to apply from the various filter items (2,3) and click Apply (4). Click outside the Filters selector to close it. The number of active filter items is displayed on the Filter button (5).
Prior to Workspaces 19.11, filters are applied to the item list immediately after values are selected.
Date Filters
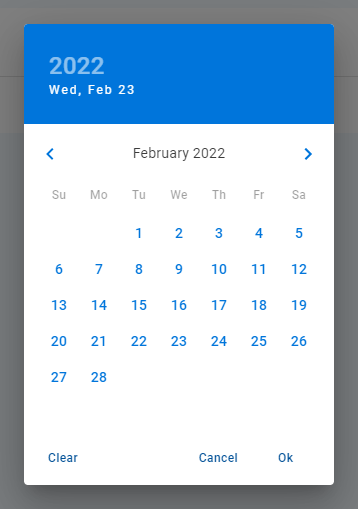
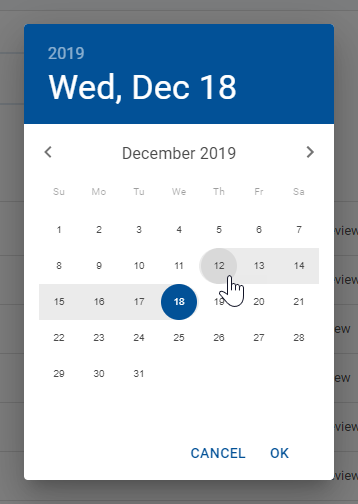
Date fields in Workspaces can be configured to accept either a single date or a date range. So, when you click a date filter field, either a date picker or a date range picker is displayed depending upon how the field has been configured.
You can filter on a single date regardless of configuration. To filter on a single date:
- Date picker: Simply click the date you want to filter on.
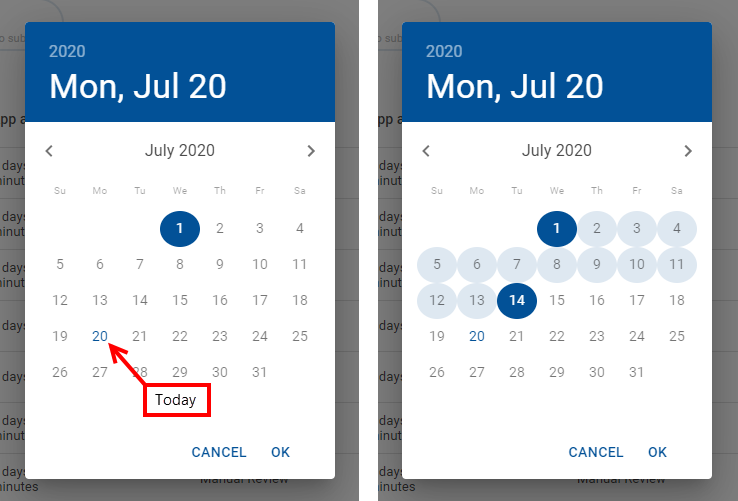
- Date range picker: Click the same date twice to select a one-day date range.
To filter on a date range, click the first date (4) then click a second date (5) to define the desired date range. You can click the dates in any order; you don't have to click the earlier date first.
When selecting a date, use or to browse to and select dates in other months. Once you've selected the date or dates for the filter, click OK (6) to apply the date filter.
Text Filters
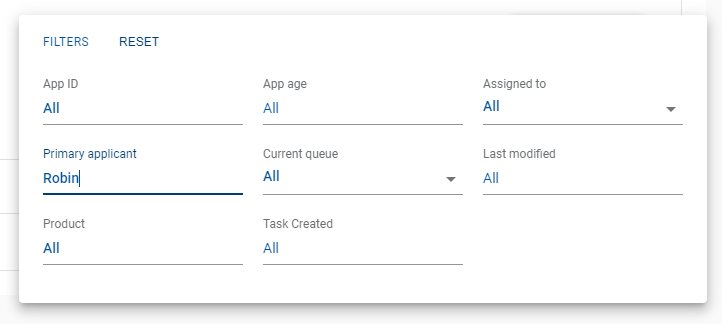
To filter on a text field, click the field in the Filters selector and enter the filter value. In Workspaces 19.11 and later releases, click Apply to make the filter active.
Like searching, text filters find only those items that exactly match the filter criteria; partial match is not currently supported. And like searching, text filters are case-insensitive; that is, they treat uppercase and lowercase characters as the same.
Clearing Filters
To clear a filter on a filter field:
- Single-select, Multi-select: Select All from the filter field’s dropdown list.
- Date: In Workspaces 21.11, click Clear on the date picker or date range picker. In earlier Workspaces releases, delete the date filter text.
- Text: Delete the filter text.
In Workspaces 19.11 and later releases, you need to click Apply after clearing any filter field values.
To clear all filters that you have applied, click Reset.
When you clear all filters, the current view remains selected and any filters defined for that view are still applied or re-applied if you had changed them.
Sort the Item List
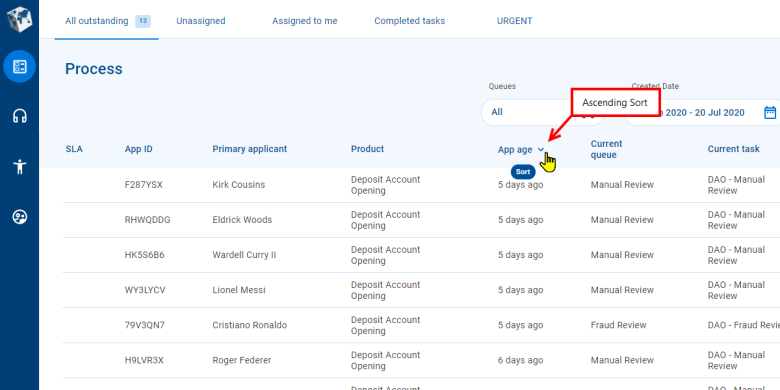
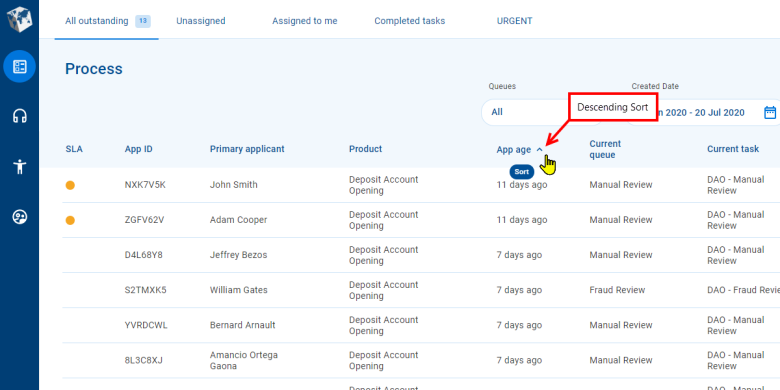
Items in the item list are displayed in an order determined by the current sort selection. This is indicated by an icon on the right-hand side of a column name. The icon indicates the item list is sorted by the column values in ascending order, while indicates items are sorted by the column values in descending order.
You can determine whether a column is available to use for sorting by pointing your cursor at a column heading. If your cursor changes to the hand pointer and a "Sort" tooltip is displayed, you can sort by the column. To change the sort order, click the column name. If you click the column name for the current sort selection, sorting will alternate between ascending and descending order.
