Claim: Assign an unassigned task to a yourself
WorkspacesThis topic relates to Journey Workspaces | Workspaces UserIncludes bank staff, helpdesk, relationship managers, and managers | This feature was introduced in the 18.11 releaseThis feature was updated in the 24.04 release
As an application progresses through its life cycle, Journey Manager creates tasks that users can interact with. A task must be assigned to a user before they can work on it. Workspaces provides the Claim action as a convenient way to assign a task to yourself.
The Claim action can only be used to assign a task to yourself, not to someone else. If you have access to the Manage space, you can assign or reassign a task to another user. Claim, Assign, and Reassign are mutually exclusive actions, so only one of them is available at any time. To learn more, see Assign from a List screen and Reassign from a List screen.
In the default Workspaces configuration, Assign, Reassign, and Unassign are only available in the Manage space.
You can't claim a task that is already assigned to someone. If you want to claim an assigned task, the task assignment must be removed first. If you have access to the Manage space, you can remove a task assignment using the Unassign action. To learn more, see Unassign from a List screen.
You can claim a task in the Review or Helpdesk space from either a List screen or a Details screen.
Claim from a List screen
To claim a task from the List screen :
- Click the to open the , and select the Review or Helpdesk space. The List screen is displayed.
- In the item list, locate a task that you want to claim and point your cursor at it. The available actions appear at the right-hand side.
- Click . The task is assigned to you, and your Workspaces id is displayed in the Assigned column.
You can use the Bulk Action feature to claim multiple tasks at once. Bulk actions are available on the Journey Workspaces List screen only. Neither Journey Brokers nor Journey Applicants support bulk actions, nor can they be performed from any Details screen.
Claim from a Details screen
To claim a task from the Details screen :
- Click the to open the , and select the Review or Helpdesk space. The List screen is displayed.
- In the item list, locate a task that you want to claim and select it. The Details screen for the selected task is displayed.
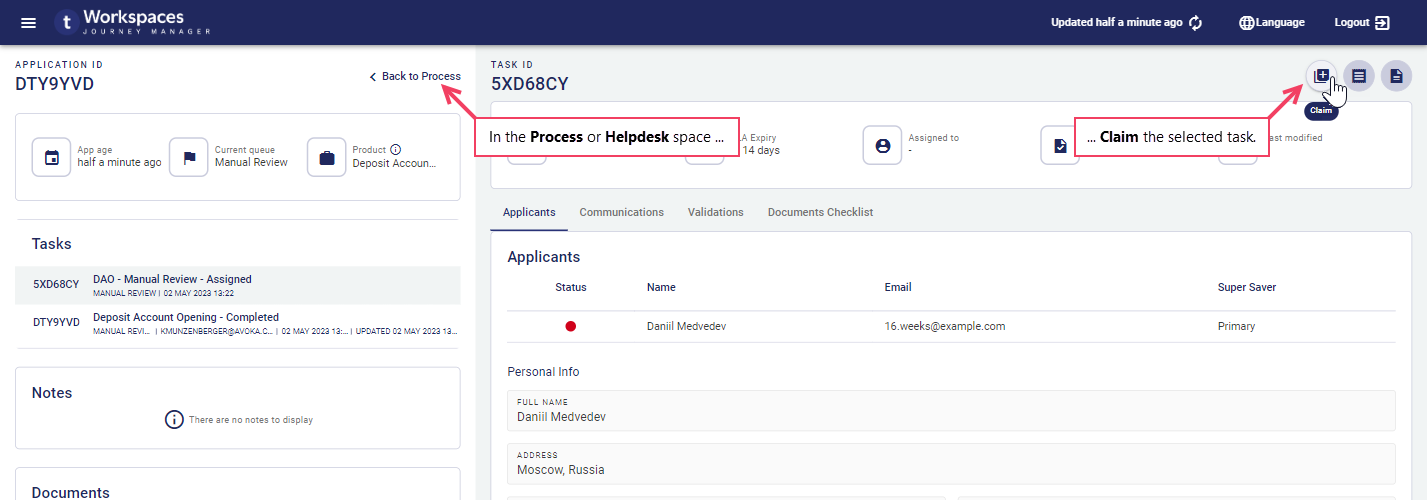
- On the Details screen, click .
The task is assigned to you, and your Workspaces id is displayed in the Assigned to field in the .
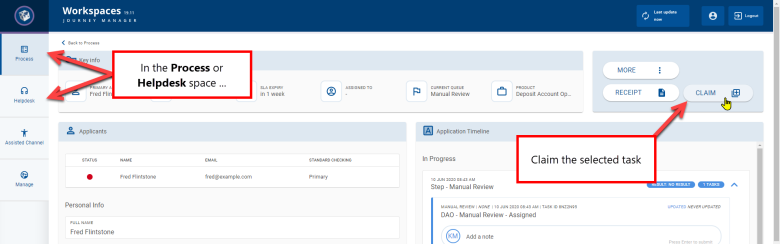
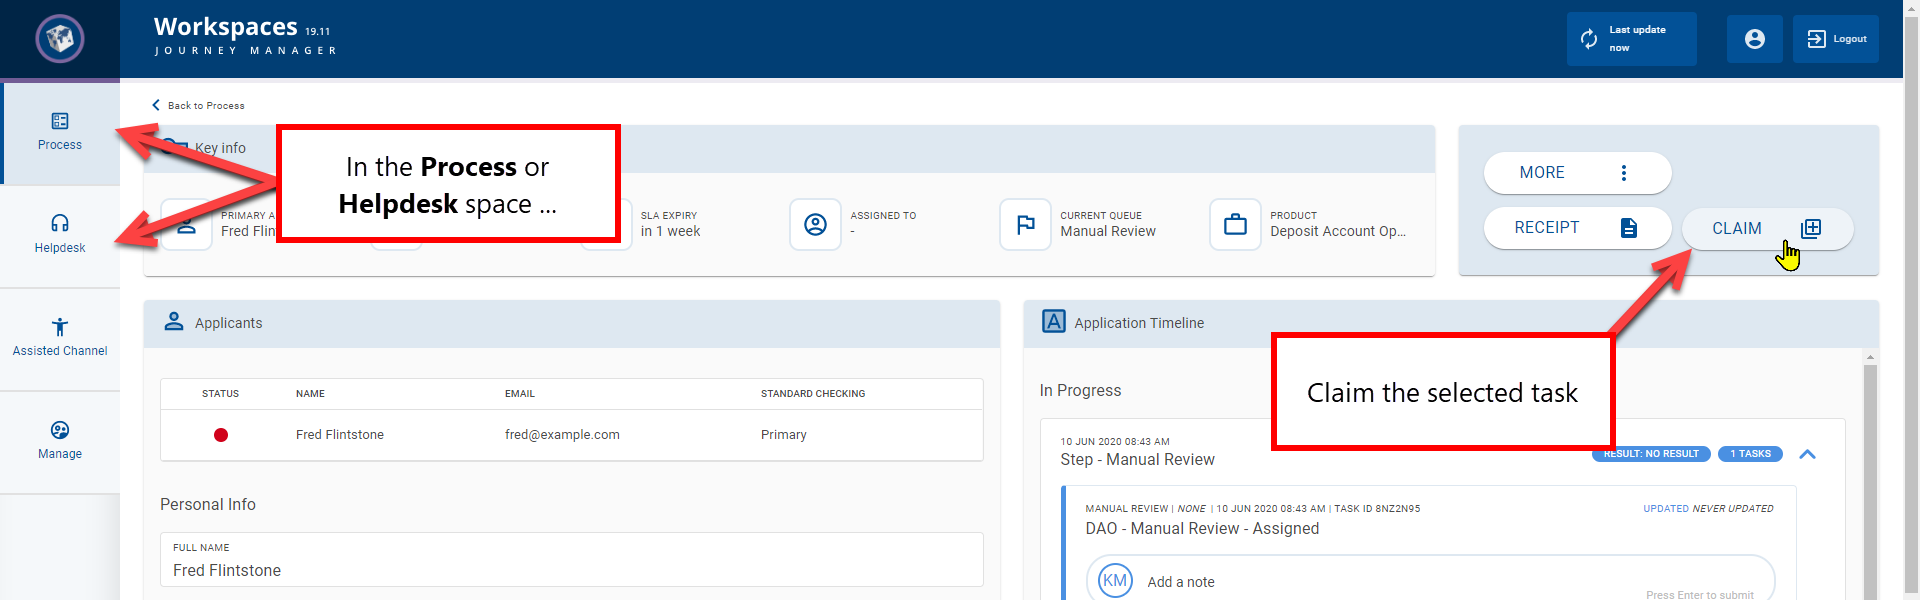
is located in the Actions group.

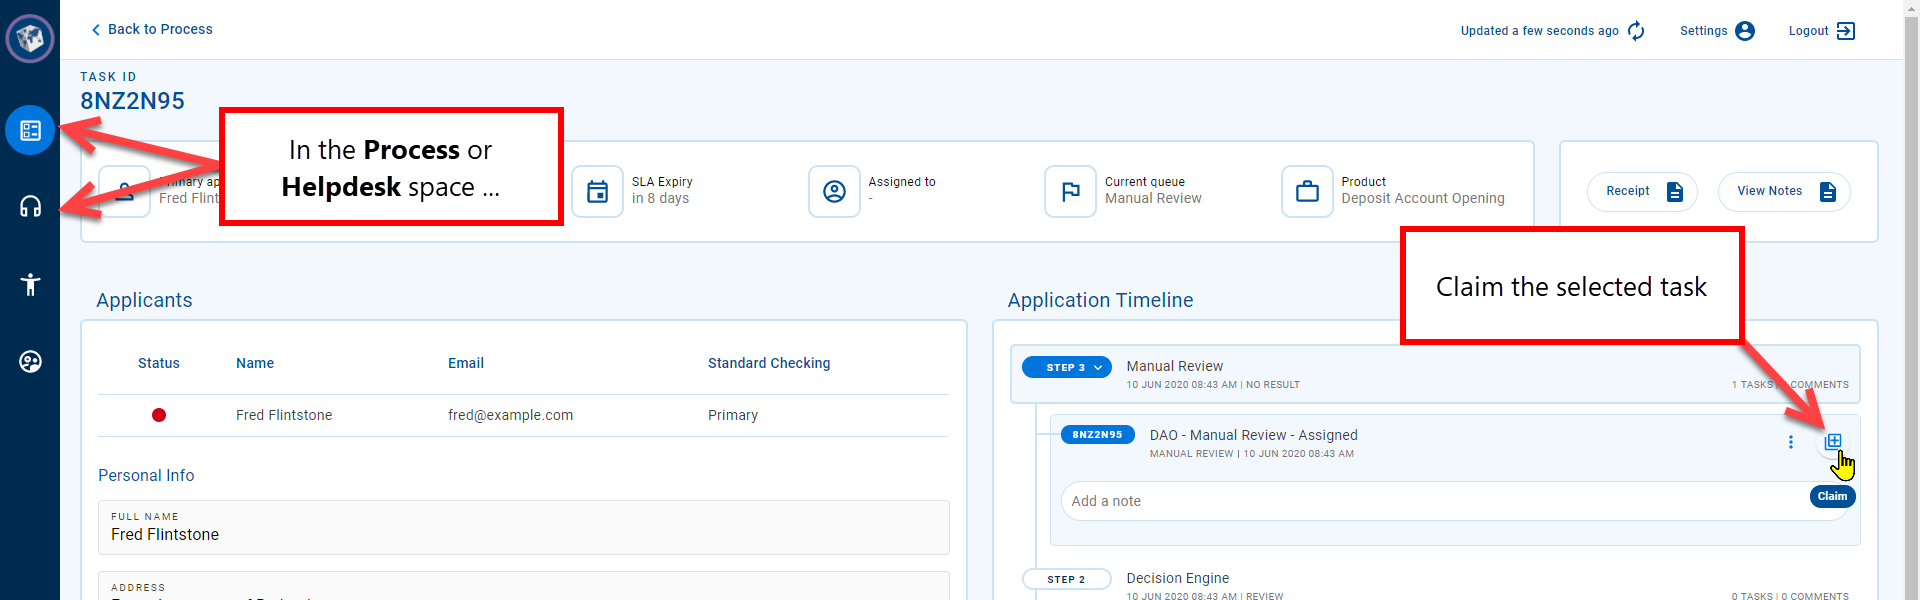
is located within the selected task in the application timeline.

The Claim button is located in the Action panel.
When you claim a task from any screen, a message is displayed briefly in the bottom left corner of the page identifying whether or not the action was successful.