Configure Form Details
Journey Manager (JM) The transaction engine for the platform. | Platform Developer | 23.10This feature was updated in 23.10
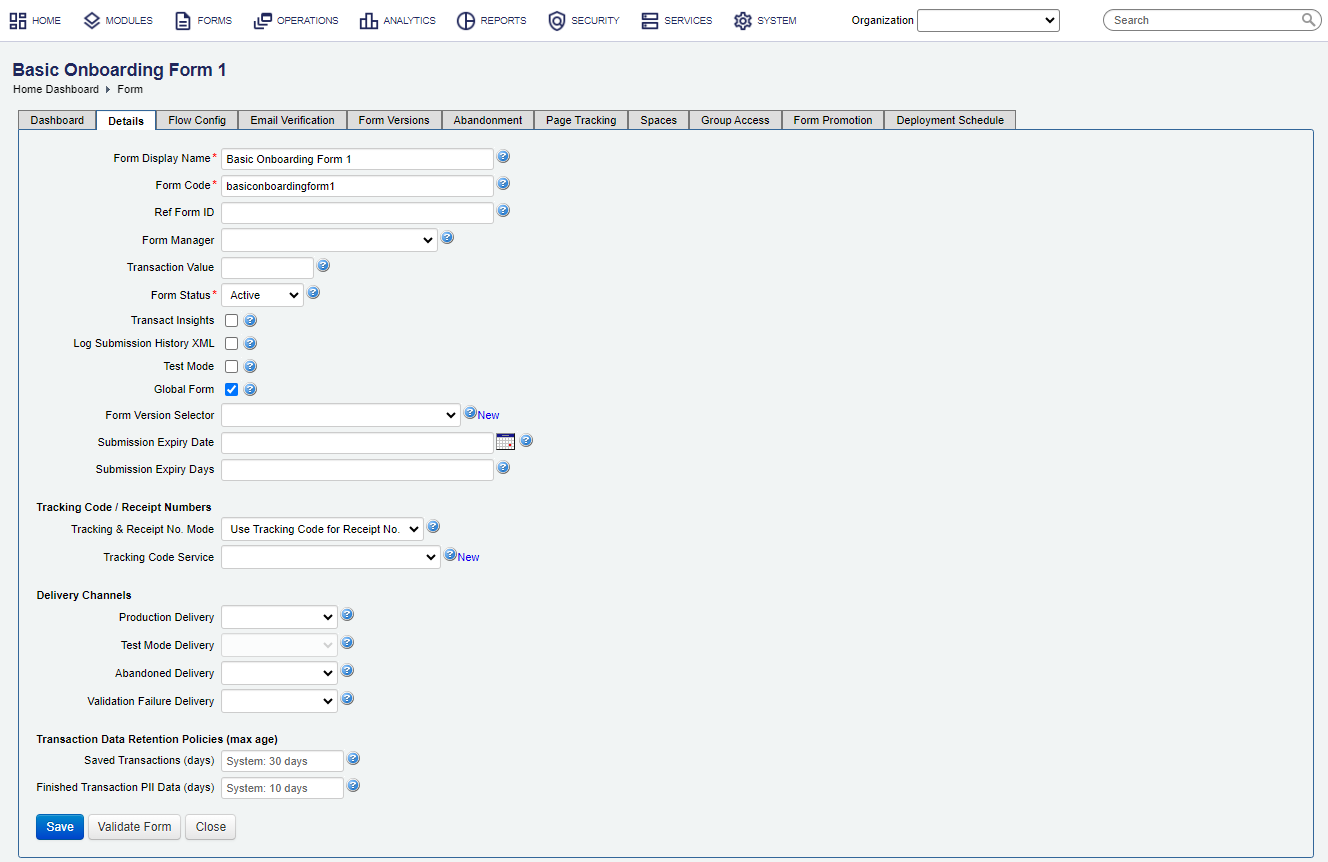
Manager allows you to fine-tune a form by configure the following details:
- General form information
- Tracking codes or receipt numbers
- Delivery channels
- Transaction data retention policies
To configure form details:
- Select Forms > Forms.
- Locate a form and click the Details tab to edit the form configuration.
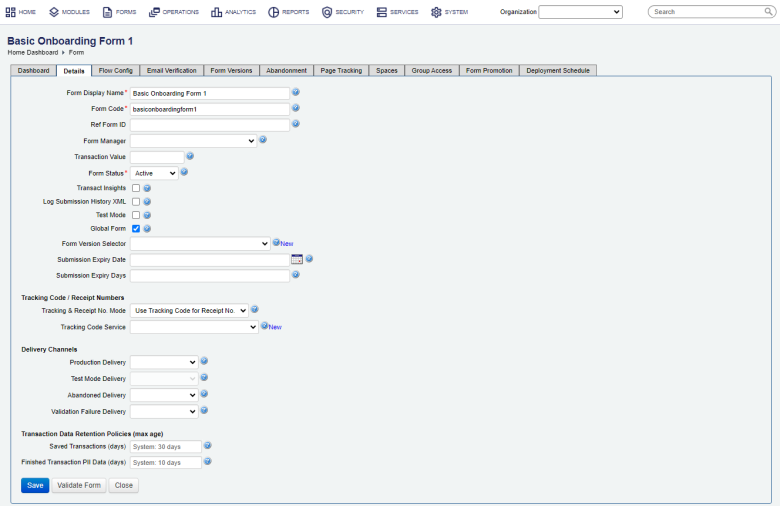
- Edit the name of the form that is displayed to the user in the Form Display Name field. The name uniquely identifies the form within a specific Organization. It will also be used in the long form URL (Form Friendly URL).
- Edit a form code in the Form Code field. This is a short alphanumeric string, which uniquely identifies the form across all organizations. It is generally not displayed to users.
- Edit a ref form ID in the Ref Form ID field. This is the identifier used internally by the organization and will be passed through during various web service calls such as prefill and receipt generation. It is optional, only used if there is an identifier that is used internally by the organization that the form version is associated with.
- Select a form manager from the Form Manager dropdown, who will be notified via email whenever the form’s status changes or a form version is promoted. The Form Manager user is associated with a form's organization.
- Provide the form's transaction value to the business in dollars in the Transaction Value field. This value is used for reporting purposes.
- Select a status from the Form Status dropdown list, which can be one of the following: | 21.11
This feature was introduced in 21.11.
- Active: it is in use and readily available to all users. All functionality is allowed.
- Offline: it can't be used at all. No functionality is available, including DDS, Delivery and so on.
- Inactive: similar to Offline.
- NoRender: it doesn't allow for new or saved and resumed forms, but ongoing open sessions can be completed. DDS, submits, saves, and delivery are allowed.
Note Select the Inactive checkbox to retire a form without deleting it.
- Select the Transact Insights checkbox to enable this form with Journey Analytics. For more information, see how to enable applications to collect analytics
- Select the Log Submission History XML checkbox to log all form XML changes so you can view transaction history and transaction XML difference. This is handy for transaction troubleshooting. If a form uses Transact functions, this option creates a new submission history record for the
formUpdateoperation.Note Excessive logging can degrade performance of Manager applications with high throughput, so ensure that the form doesn't have the Log Submission History XML selected. Otherwise, every time the form does a
formUpdateor background save operation, Manager stores a full copy of the submission XML which can result in large growth of the submission history XML data table on high throughput systems with modern form applications . - Select the Test Mode checkbox to mark the form to be in test mode, which is useful when you develop and test the form. Forms in Test Mode use the Test Mode Delivery method and are not available in TransactField App, Web Portal search pages, as well as no transaction analytics and reports are created.
By default, the form is in production mode (the Test Mode checkbox unselected), so the Production Delivery method will be used to deliver submissions and they will be marked as live submissions. For more information, see Configure Form Test Mode.
- Select the Global Form checkbox to make the form global.
Warning The experimental Global Forms feature has been temporarily disabled while we continue improving it. This feature will be disabled in releases starting from 24.10 and going back to 23.10.
- Select a service responsible for selecting the version of the form to be rendered at request time from the Form Version Selector dropdown list. If there is no appropriate service, click New to create one. If left blank, the system default Form Version Selector service, such as Current Form Version, is used. You may want to use this option for form A/B testing.
- Select a date from Submission Expiry Date that is used to ensure a form can't be submitted on or after this date. If the form is submitted after this date, it'll be rejected by a user defined as the Form Manager. The Submission Expiry Date is populated to a form's XML element
//SystemProfile/SubmissionExpiryDatefor reference purposes. The Transaction Processor abandons these submissions if the expiry date is passed and the form is not submitted, that is, it has either the Open or Saved status.Note You can also set this value using the
submission.timeTxnExpiryAPI - Specify a number of days in the Submission Expiry Days field that are used to ensure a form can only be submitted a specified number of days after the form is requested. If a form is submitted after this time, it'll be rejected by SmartForm Manager. The form submission expiry time is calculated as
time the form is requested + submission expiry days. This value is populated to a form's XML element//SystemProfile/SubmissionExpiryDatefor reference purposes. - Select how to generate tracking and receipt codes from the Tracking & Receipt No. Mode dropdown list. You have the following options:
- Use Tracking Code for Receipt No
- Use Receipt Number for Tracking Code
Note We recommend using Tracking Code to improve performance and scalability. For more information, see configure receipt numbers and tracking codes.
- Select a service to generate form tracking codes from the Tracking Code Service dropdown list. You have the following options:
- Blank - the default Tracking Code service is used
- Fluent Tracking Number
- Random Tracking Number
- Select a delivery channel from the Production Delivery dropdown list to send successful submissions through. This is enabled by default.
Note This dropdown is disabled if the form is in Test Mode, that is the Test Mode checkbox is selected.
- Select a delivery channel from the Test Mode Delivery dropdown to send successful test submissions through.
Note This dropdown is enabled if the form is in Test Mode, that is the Test Mode checkbox is selected.
- Select a delivery channel from the Abandoned Delivery dropdown list to send abandoned submissions through.
- Select a delivery channel from the Validation Failure Delivery dropdown list to send submissions with data validation errors through.
- Select the maximum age of user saved transactions, after which they will be automatically abandoned, from the Saved Transactions (days) dropdown list.
- Select the amount of time to keep PII transaction data for after the transaction has finished from the Finished Transaction PII Data (days) dropdown list.
Note For more information on data retention configuration, see how to configure form data retention.
- Click Validate Form to check whether the form is active, has no invalid versions or expired dates and a few other parameters using values defined in the Test Import Tag metadata tag.
- Click Save to update the changes.
Next, you may want to configure form flow.