Notifications and Status Changes
Journey Manager (JM) The transaction engine for the platform. | System Manager / DevOps | 22.04 This feature was updated in 22.04.
Manager allows you to create notification messages and status change events that will be automatically applied to various entities, such as form spaces, organizations, forms, or form versions, for specified period of time. This functionality is handy for system housekeeping and performing various automated tasks.
You can create the following types of events:
Notification events, which are a well established product feature, let you post text messages to form spaces, so users can be easily informed when accessing forms hosted on these form spaces or via the dashboard. For example, you can let users know about forms being offline, in a maintenance mode and so on. You can also create announcements to inform Manager users.
Status change events are the new feature designed to simplify, schedule and automate a status change of form spaces, organizations, forms, or form versions. | 22.04 This feature was introduced in 22.04.
This new functionality greatly compliments the manual form space status change. Now, you can choose not only a form spaces, but an organization, a form or a version of the form where the status needs to be updated. Then, you specify the date and time so the scheduler runs the Status Management service, which picks up this event and executes it. The results of the status change are recorded in the event log.
This scheduling is especially handy when you know about a maintenance task and you want to change a form space status to offline, so application for users won't access it.
View Notifications and Status Changes
You must have the Notification View permission set to your user account to view notifications and status change events.
To view notifications and status changes, select System > Notifications and Status.
Events are shown page by page, with the maximum number of records per page configured in the users preferences.
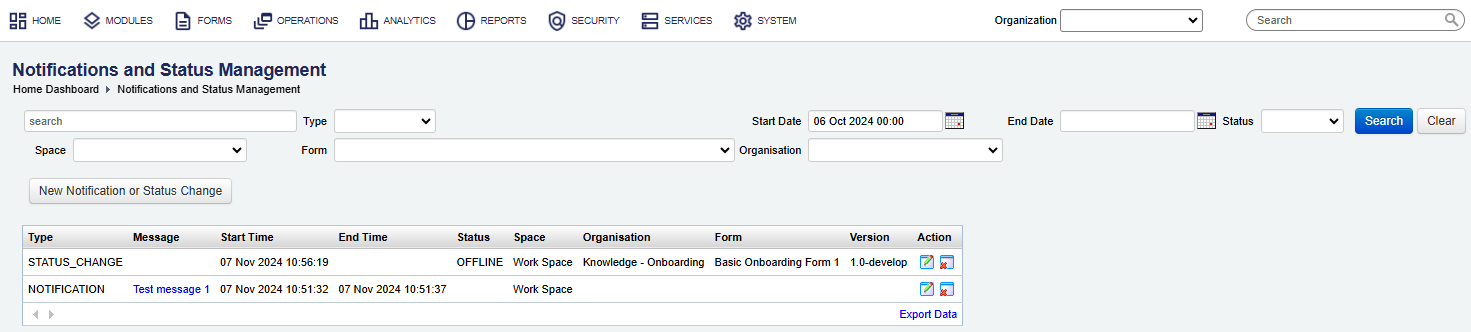
The list displays the following details:
- Type: a notification type, which can be Notification or Status Change.
- Message: a message to be displayed.
- Start Time: a start time when the notification or the new status will apply from.
- End Time: an end time when the notification or the new status will apply until.
- Status: a new status of a form.
- Space: a form space where the notification or the new status will apply to.
- Organization: an organization where the notification or the new status will apply to.
- Form: a form where the new status will apply to.
- Version: a version of a form the new status will apply to.
To filter or search events by one or more criteria, specify the following settings and click Search:
- A part of a notification message or a status change.
- Type of an event, which can be Notification, Status Change, or blank for both.
- Form space.
- Form name - select this for Status Change events only.
- Organization - select this for Status Change events only.
- Start Date and End Date a notification or a status change is scheduled for or within a time interval.
Click Clear to reset the search criteria.
To view additional information, click Details.
Click Export Data to export the displayed data as a Microsoft Excel (XLS) file.
Create a Notification Message
You must have the Notification Edit permission set to your user account to create a notification.
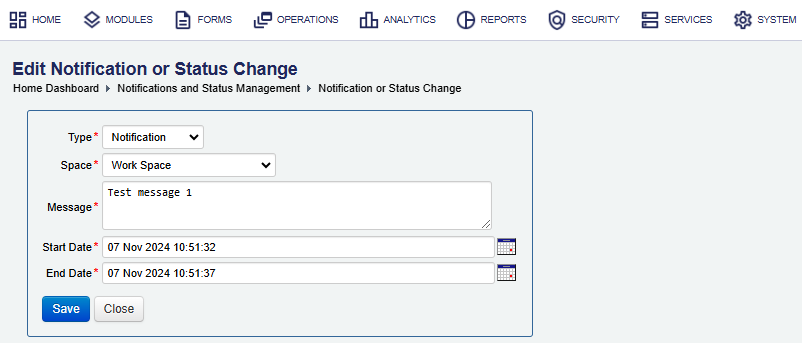
To create a notification message for a form space:
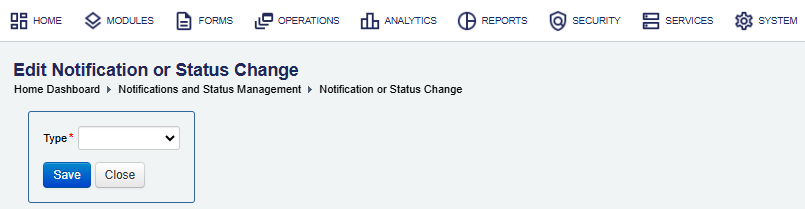
- Select System > Notification Messages and click New Notification or Status Change.

- Select the Notification type from the Type dropdown list and click Save.
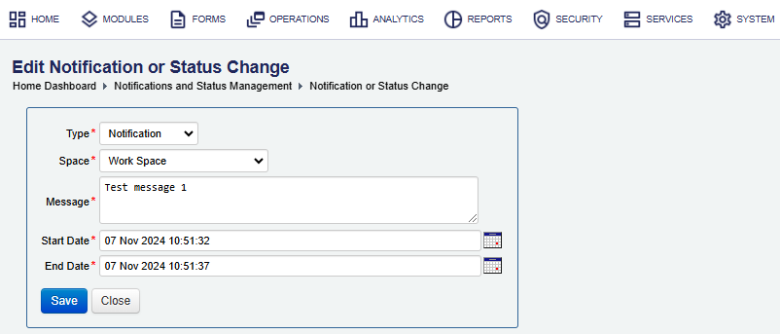
- Select a form space, where a notification message will be displayed in, from the Space dropdown list.
- Enter a detailed message, which will be shown to form space users, in the Message field.
- Select a start date and time to start displaying the notification using the Start Date picker.
- Select an end date and time to stop displaying the notification using the End Date picker.
- Click Save to update the changes.. The new notification message will appear in the list of the notification messages and status changes.
Create a Status Change
Manager allows you to schedule events that will automatically change a status of a form space, an organization, a form or a form version.
You must have the Notification Edit permission set to your user account to create a status change event.
To create a status change event:
- Select System > Notification Messages and click New Notification or Status Change.
- Select the Status Change type from the Type dropdown list and click Save.
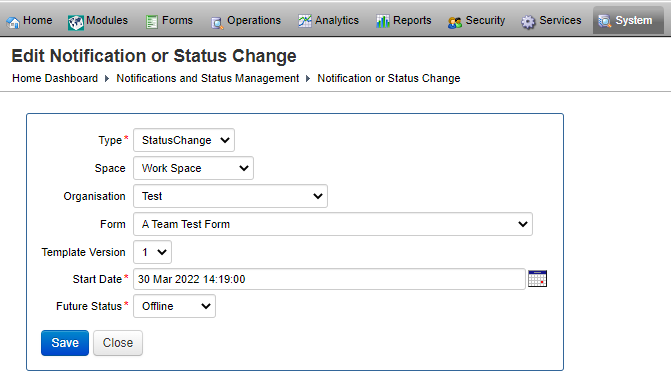
- Select a form space, which status should be changed, from the Space dropdown list.
- Select an organization from the Organization dropdown list.
- Select a form, which status should be changed, from the Form dropdown list.
- Select a form version, which status should be changed, from the Template Version dropdown list.
Note The Template Version is only shown if the selected form has a form version or multiple form versions created.
- Select a start date and time, when the status should be applied, using the Start Date picker.
- Select a new status, which should be applied to the form space, form or a form version, from the Future Status dropdown list. The status can be one of the following:
- Active: it is in use and readily available to all users. All functionality is allowed.
- Offline: it can't be used at all. No functionality is available, including DDS, Delivery and so on.
- Inactive: similar to Offline.
- NoRender: it doesn't allow for new or saved and resumed forms, but ongoing open sessions can be completed. DDS, submits, saves, and delivery are allowed.
- Click Save to update the changes. The new status change event will appear in the list of the notification messages and status changes.
Note You must select at least one of the entities, otherwise you can't schedule the status change.
Note If you select all entities, the new status will be applied to all of them.

Remove a Notification Message or Status Change Event
You must have the Notification Remove permission set to your user account to delete notifications and status change.
To remove a notification message or a status change:
- Select System > Notifications and Status and locate a notifications or a status change.
- Click Remove Notification.
Next, learn about server nodes.