Configure Modules
Journey Manager (JM) The transaction engine for the platform. | System Manager / DevOps | 24.10This feature was updated in 24.10
A variety of modules can be installed in Journey Manager according to your requirements and license agreements. These modules are selected during Journey Manager installation. Subsequently, Manager allows you to view, configure, and remove the installed modules. For more information, see Installation guide > Modules and Form Spaces.
If you can't see a module you are after, it is possible that it has not been installed, so check with your system administrator or the Cloud Services team.
View Modules
To view the modules, select System > Modules Config.
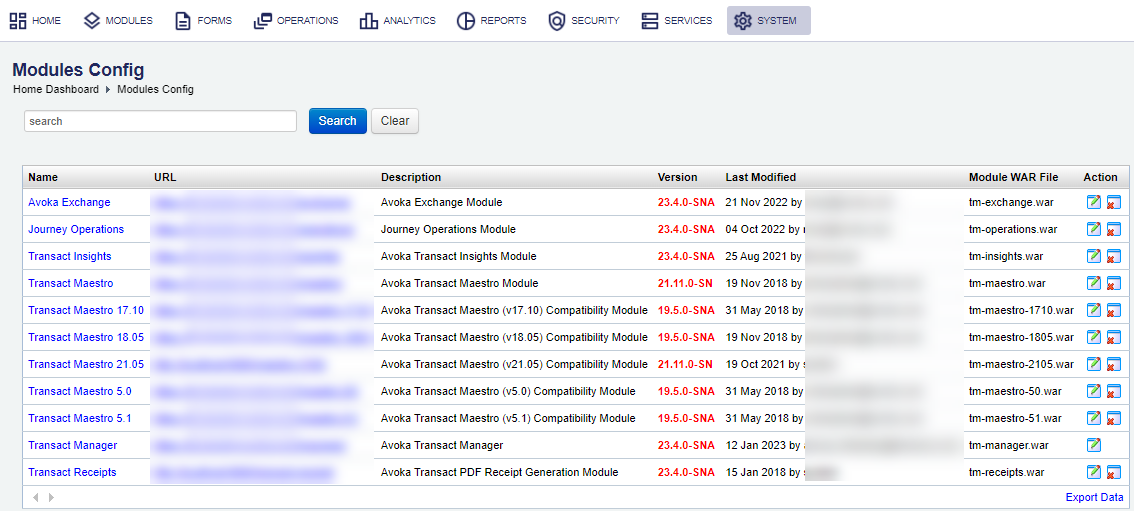
The list displays the following details:
- Name: a name of a module.
- URL: a context path of a module, which is used by services, application forms, and REST APIs.
- Description: a meaningful description of a module.
- Version: a version of a deployed module.
- Last Modified: a day when a module was modified and a user who modified it.
- Module WAR File: a file name of a deployed WAR file containing a module.
To search for a module, type its name and click Search.
Click Clear to reset the search criteria.
Click Export Data to export the displayed data as a Microsoft Excel (XLS) file.
Configure a Module
To configure a module:
- Select System > Modules Config.
- Locate a module and click Edit.
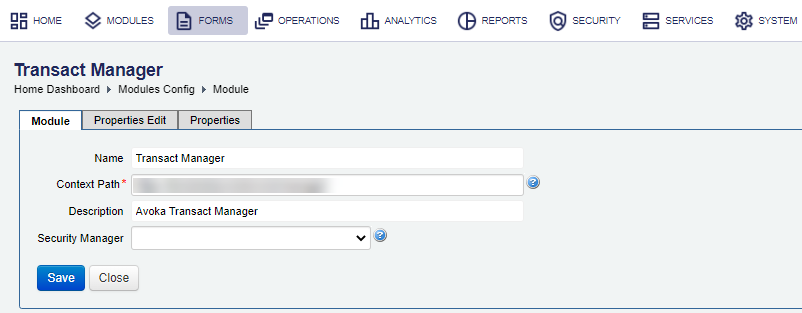
- Select the Module tab to update the module's hosting configuration.

- Update the portal application fully qualified domain name in the Context Path field, for example,
https://my-domain.com/manager/. - Select a security manager from the Security Manager dropdown list, which will be used authenticate and authorize users trying to access this module via the Context Path URL.
- Click Save to update the changes.
- Select the Properties Edit tab to update the module's specific configuration. Each module has different properties which are described below.
- Select the Properties tab to see all the properties in a table format.
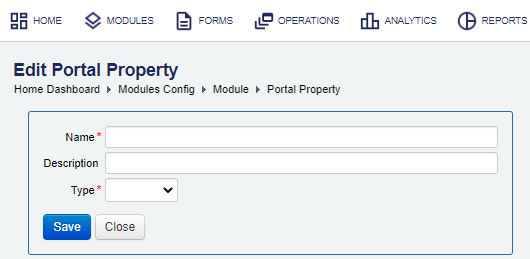
- Click New to add a new property.
- Enter the property name in the Name field.
- Provide a meaningful property description in the Description field.
- Select a property type from the Type dropdown list, which can be one of the following:
- Boolean
- CSV
- HTML
- Image
- JSON
- List
- Long Text
- Number
- String
- Click Save to update the changes.
Each module has some specific configuration, so let's look at each of the modules in more detail.
Configure the Transact Exchange Module
To configure the Transact Exchange module's properties:
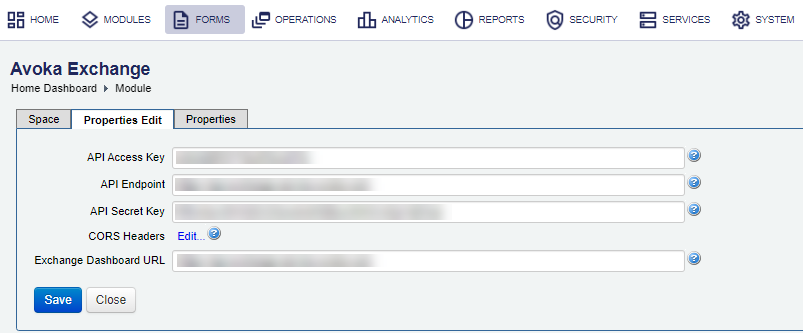
- Select the Properties Edit tab.

- Update authentication credentials used to generate auth header for API calls the API Access Key field.
- Edit the Base URI to the API Gateway hosting the remote Exchange APIs in the API Endpoint field, for example,
https://api.my-domain.com. - Edit authentication credentials used to generate authentication header for API calls in the API Secret Key field.
- Click the CORS Headers link to update the Cross-Origin-Resource-SharingCross-Origin Resource Sharing (CORS) is a mechanism that uses additional HTTP headers to tell a browser to let a web application running at one origin (domain) have permission to access selected resources from a server at a different origin. A web application executes a cross-origin HTTP request when it requests a resource that has a different origin (domain, protocol, and port) than its own origin. (CORS) security HTTP header values.
- Update the Exchange Dashboard URL in the Exchange Dashboard URL field, for example,
https://dashboard.my-domain.com. - Click Save to update the changes.
A form space can have the CORS Headers property configured as well.
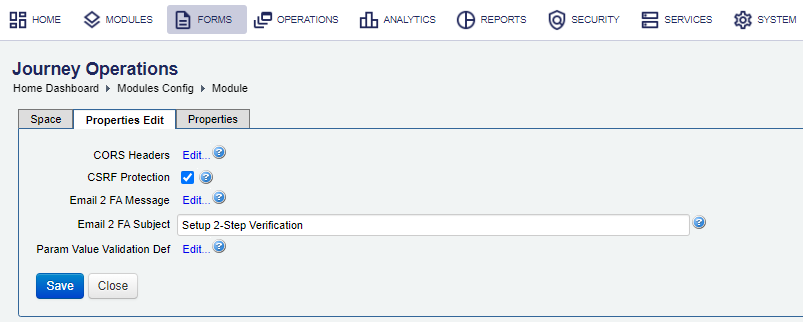
Configure the Journey Operations Module
To configure the Journey Operations module's properties: | 22.10 This feature was introduced in 22.10.
- Select the Properties Edit tab.

- Click the CORS Headers link to update the Cross-Origin-Resource-Sharing (CORS) security HTTP header values.
- Select the CSRF Protection
to enable Cross Site Request ForgeryCross-site request forgery (CSRF), also known as one-click attack or session riding, is a type of malicious exploit of a website where unauthorized commands are transmitted from a user that the web application trusts. protection.
Note You must restart the form space for the change to take effect.
- Click the Email 2 FA Message link to edit the email message for 2FA user account enrollment.
- Edit the Email 2 FA Subject.
- Click the Param Value Validation Def link to edit API update param value validation definition.
- Click Save to update the changes.
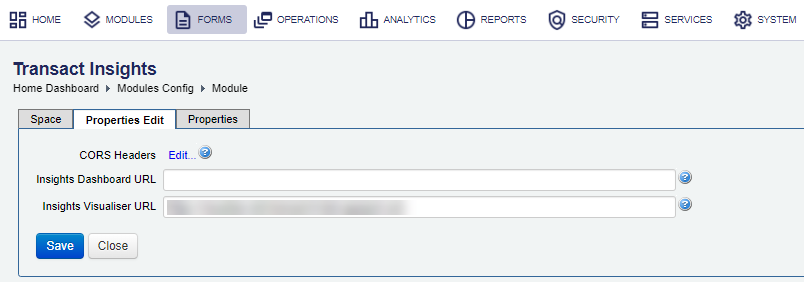
Configure the Transact Insights Module
To configure the Transact Insights module's properties:
- Select the Properties Edit tab.

- Click the CORS Headers link to update the Cross-Origin-Resource-Sharing (CORS) security HTTP header values.
- Edit a dashboard URL in the Insights Dashboard URL field, for example,
https://dashboard.my-domain.com. - Edit an URL of a visualizer in the Insights Visualiser URL field, for example,
https://visualizer.my-domain.com. - Click Save to update the changes.
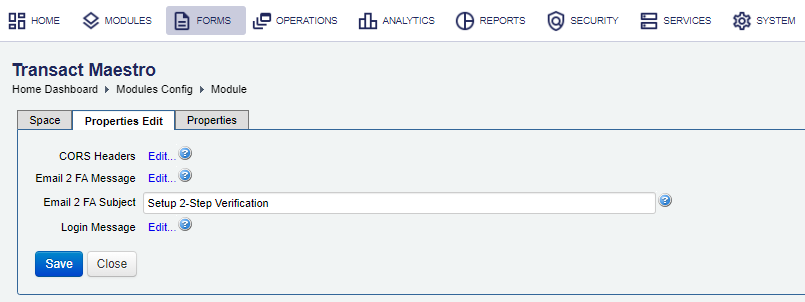
Configure the Transact Maestro Module
To configure the Transact Maestro module's properties:
- Select the Properties Edit tab.

- Click the CORS Headers link to update the Cross-Origin-Resource-Sharing (CORS) security HTTP header values.
- Click the Email 2 FA Message link to edit the email message for 2FA user account enrollment.
- Edit the Email 2 FA Subject.
- Create or update a message shown on the Maestro login page in the Login Message field.
- Click Save to update the changes.
Configure the Transact Manager Module
One of the most important module's configuration is a context path, which can be used by various services. The Configuration Service requires the correct context path set up before it can be run to update and create system configurations. You can configure the content path any time after Manager is installed. However, the installer allows you to do it during the system installation. For more information, see Installation > Context Path. | 24.04 This feature was introduced in 24.04
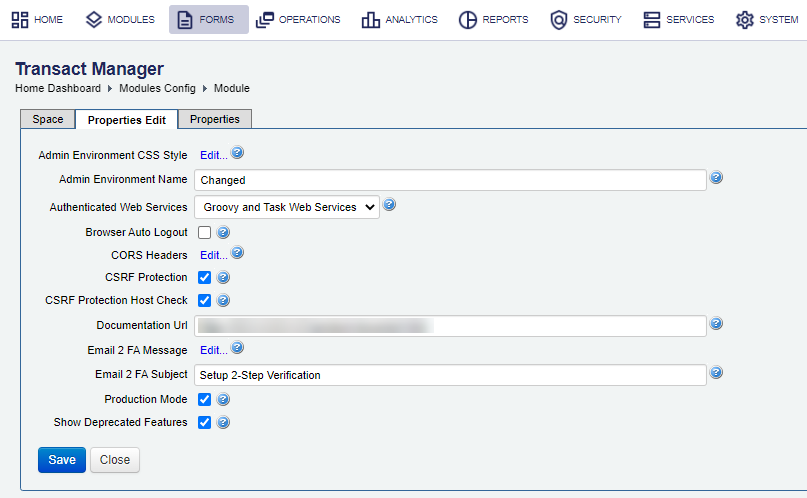
To configure the Transact Manager module's properties:
- Select the Properties Edit tab.

- Click the Admin Environment CSS Style link to update a CSS style of the Admin Environment Name. For example,
#environmentCssStyle { position: absolute; top: 10px; text-align: center; width: 100%; } #environmentCssStyle span { color: #000000; background-color: #fcfcfc; font-weight: bold; padding: 3px 6px; border: 1px solid #a0a0a0; } - Edit a name of the server environment in the Admin Environment Name field to distinguish between various environments. This name is displayed in the Screen Header of the Management Dashboard.
- Edit a comma-separated list of allowed hostnamesHostname is a label that is assigned to a device connected to a computer network and that is used to identify the device. in the Allowed Host Names field. The default is to allow any hostname.
Note You must restart the form space for the change to take effect.
- Select Web Services requiring authenticated and authorized access control from the Authenticated Web Services dropdown list, which can be one of the following:
- Groovy and Task Web Services:
- All Web Services:
- No Web Services:
- Blank:
- Select the Browser Auto Logout to automatically logout any open browser windows when the Security Manager Session Timeout has been reached. This is done by running a JavaScript.
- Click the CORS Headers link to update the Cross-Origin-Resource-Sharing (CORS) security HTTP header values. For more information, see standard form space properties.
- Select the CSRF Protection
to enable Cross Site Request ForgeryCross-site request forgery (CSRF), also known as one-click attack or session riding, is a type of malicious exploit of a website where unauthorized commands are transmitted from a user that the web application trusts. protection. This setting is only relevant for the
/managerand/workspacecontexts.Note You can turn off some of the CSRF security hardening settings in non-production environments to make it easier to work with multiple browser tabs open at the same time.
- Select the CSRF Protection Host Check to enable Cross Site Request Forgery protection host check. This setting is only relevant for the
/managerand/workspacecontexts. - Edit a URL to a documentation site in the Documentation Url field. The default is
/Content/product-document.html.This URL is used to point to several specific sections of the documentation, such as Journey SDK, Services Guide and Fluent API. For more information, see Journey Manager Developers Documentation. - Click the Email 2 FA Message link to edit the email message for 2FA user account enrollment.
- Edit the Email 2 FA Subject, which is an email subject for 2FA user account enrollment.
- Edit the time in seconds to explicitly expire the user session in the Explicit Session Expiry In Seconds field. Setting 0 will disable this feature. The default value is 0.
- Select the Production Mode checkbox to enable the module to be run in the production environment. This is selected by default. | 23.04
This feature was introduced in 23.04
To help you avoid enabling the Groovy Debug Logging option for Groovy services and functions by mistake in a production environment, Manager checks if the Production Mode option is selected and then sets the Groovy Debug Logging option to false for them.
When you import a Groovy service or a function, Manager performs the same check and set the Groovy Debug Logging option to false even if it was set to true in an archive file. This is recorded in the Audit Log
- Select the Show Deprecated Features to enable access to deprecated features.
- Click Save to update the changes.
Configure the Manager API Module
The Manager API module provides the Journey Manager API (Fluent, REST, SOAP) endpoints that can be authenticated by using a security manager that is different to one configured in the Transact Manager module. | 24.10 This feature was introduced in 24.10
To call the Journey Manager API, you need to use the URL defined in the Context Path of the Manager API module, for example, https://my-domain.com/manager-api/.
You can also call the API using the Transact Manager module, for example, https://my-domain.com/manager/.
To configure the Manager API module's properties:
- Select the Properties Edit tab.

- Configure properties as described in Configure the Transact Manager Module.

Configure the Transact Receipts Module
No extra configuration is required for the Transact Receipts module.
Remove a Module
Manager allows you to remove a module if you wish to do so.
To remove a module:
- Select System > Modules Config.
- Locate a module and click Remove Portal to delete it.
Next, learn about server nodes.