WorkspacesThis topic relates to Journey Workspaces | Workspaces UserIncludes bank staff, helpdesk, relationship managers, and managers | 19.05This topic was introduced with the 19.05 release | 23.04This topic was updated for the 23.04 release
Note
Some of the text and images below may not match what you see in your Workspacesportal. This is because the features described are based on a default Workspacesportal configuration, and your Workspacesportal may be configured differently; for example, with your company's branding or with other fields. Nevertheless, the features described work the same way in every Workspacesportal.
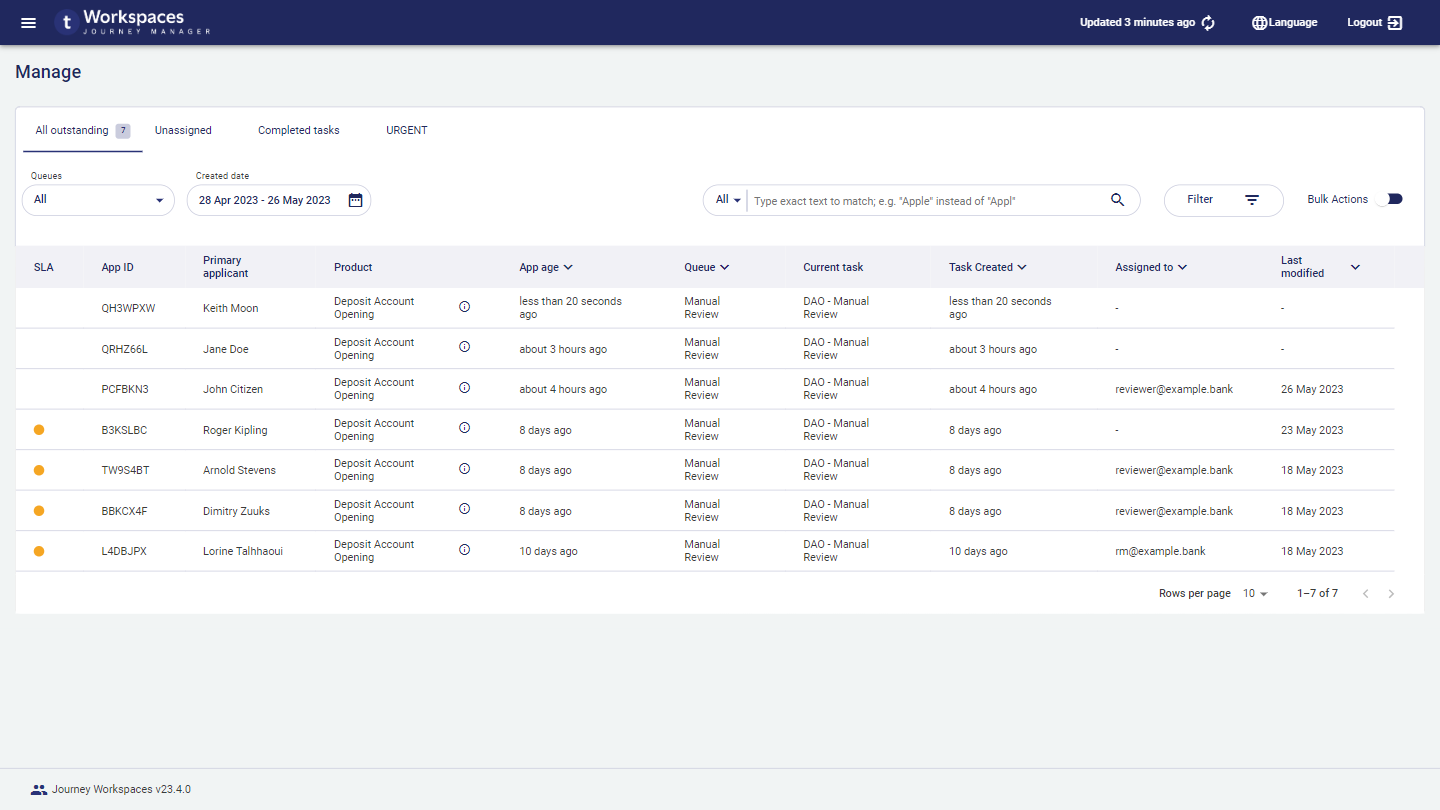
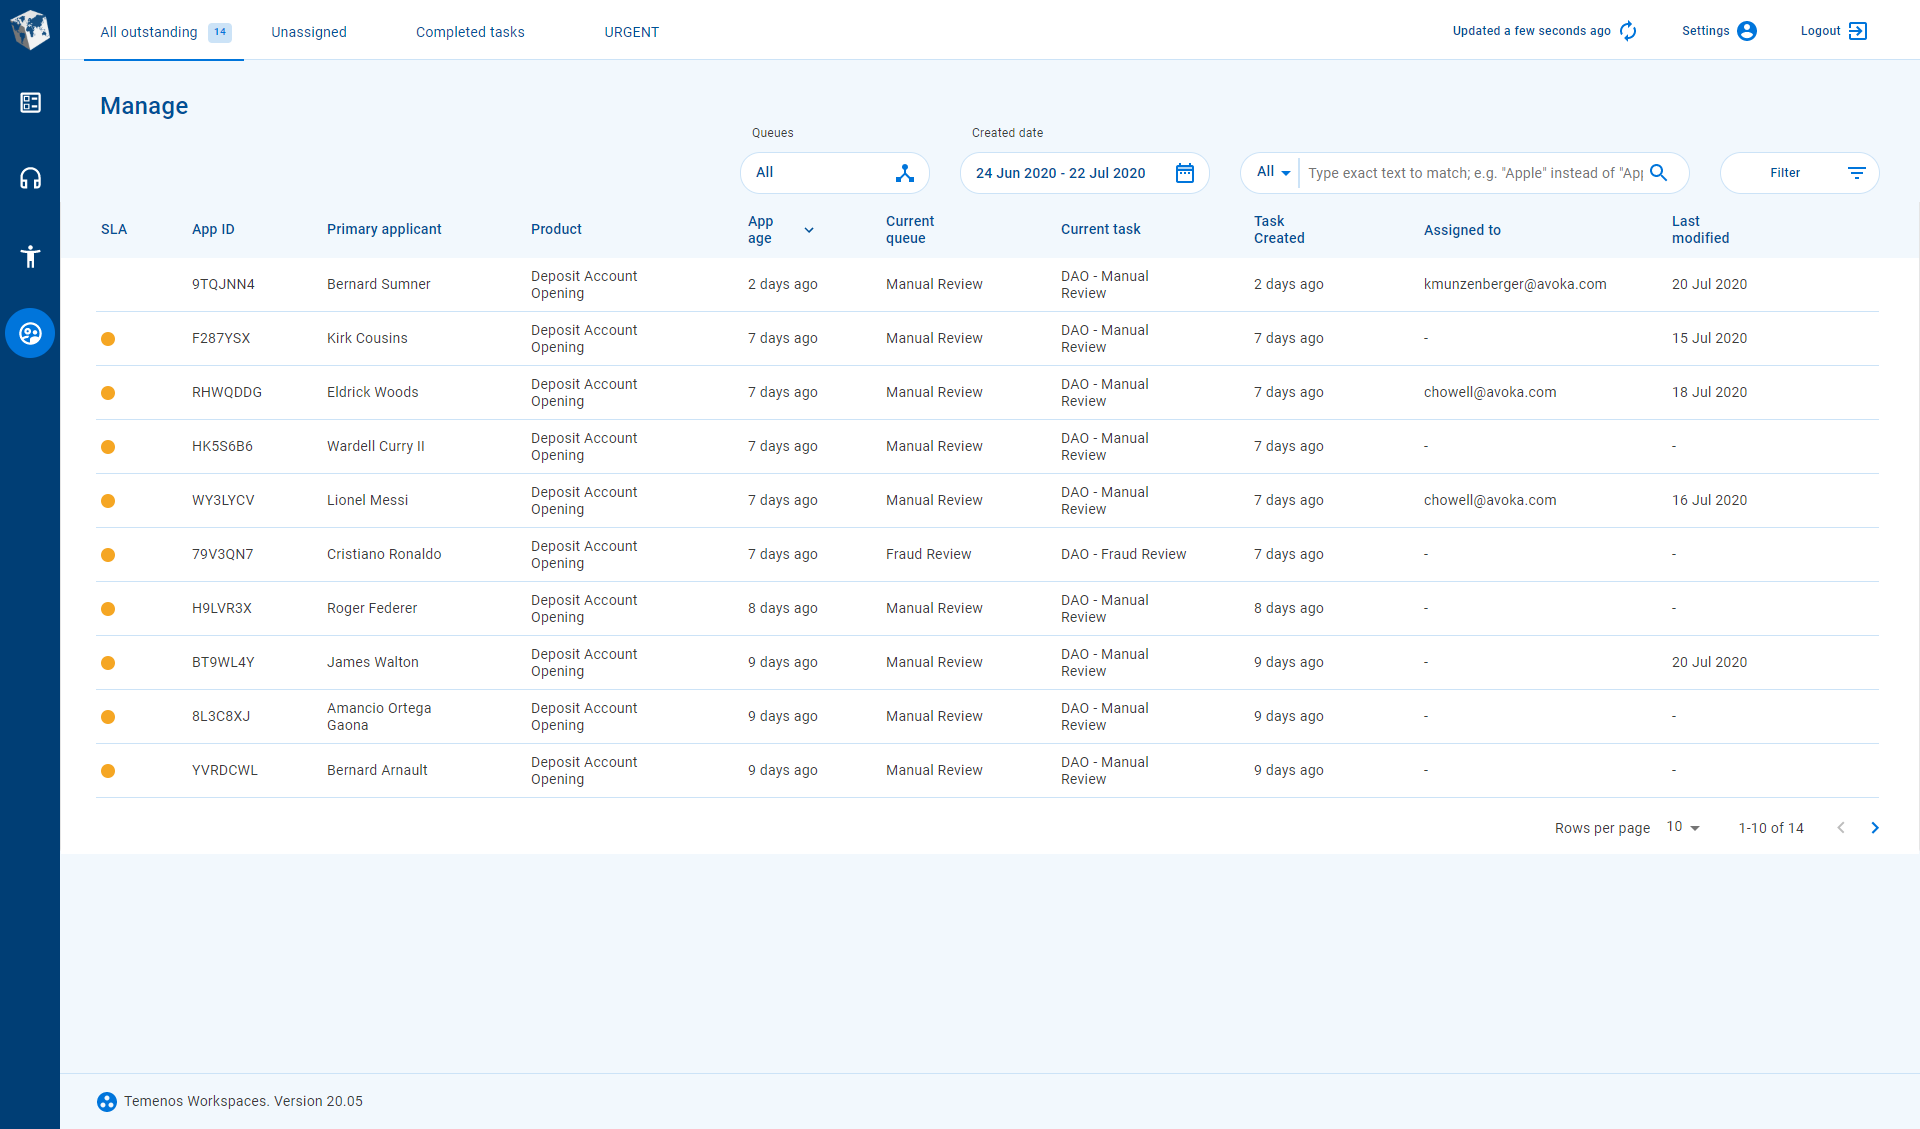
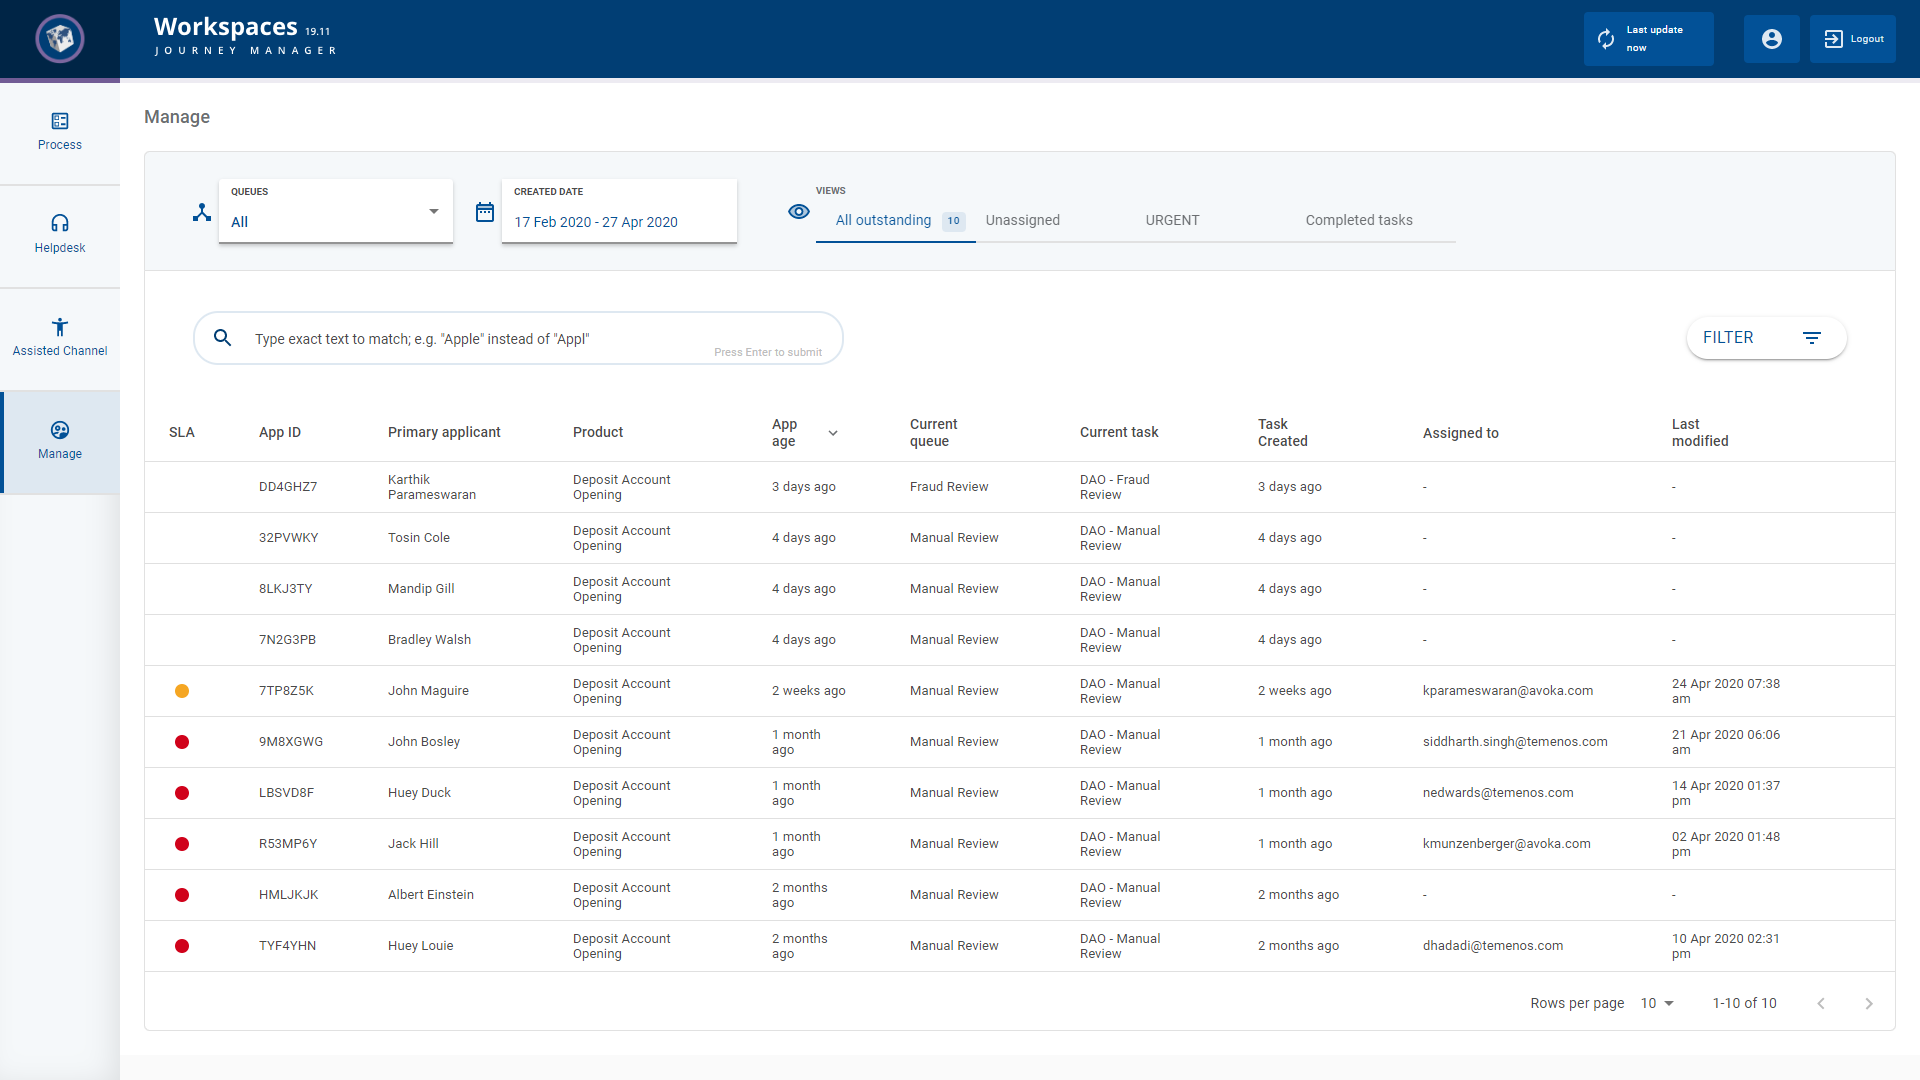
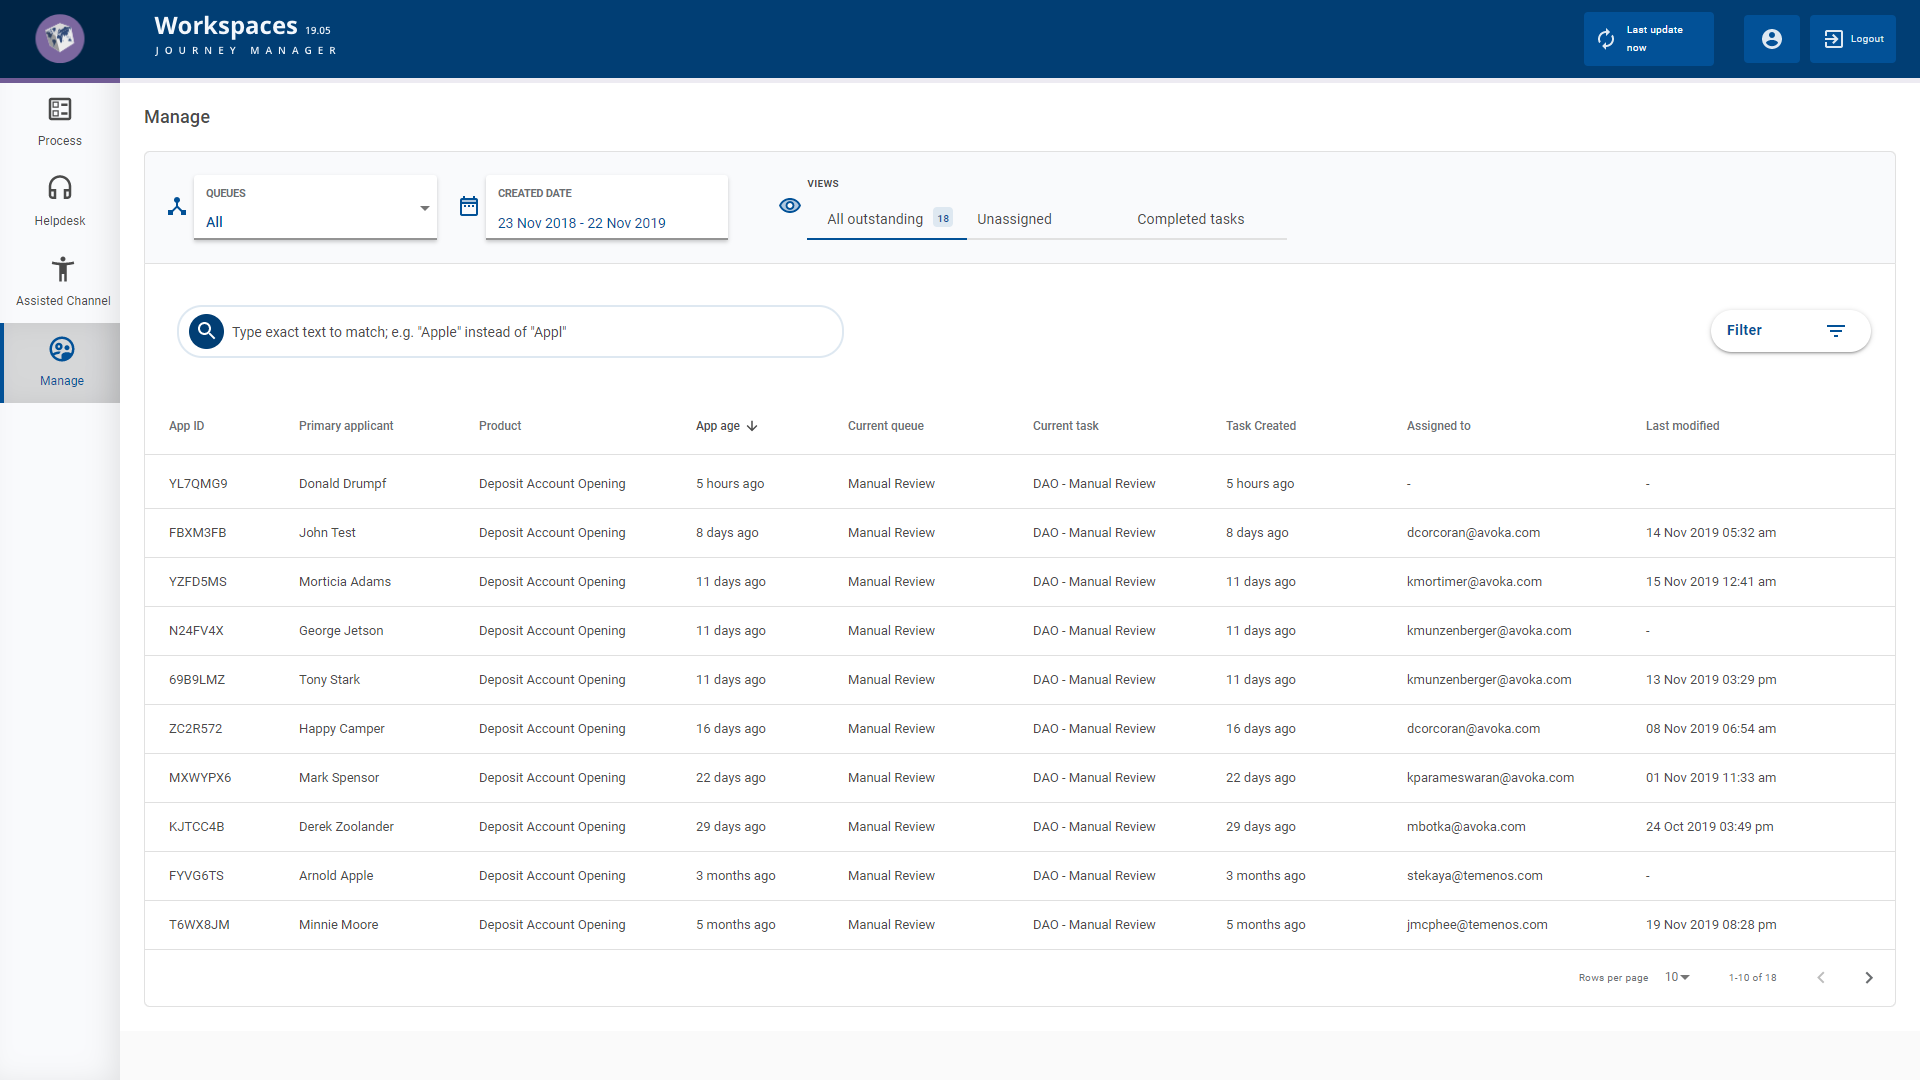
The Manage space's List screen displays a list of tasksfrom the selected queue, and taking into consideration the current view and any active search, filter and sort options. Each row in the item list corresponds to a single task, showing a set of pre-configured data items in columns including an SLA indicator that identifies how application processing is progressing against the SLA conditions. The name of the active queue is displayed in the Queue selector, and the name of the current view is highlighted in the View selector. The list of tasks displayed can be further refined using the filter and sort options. Filtering restricts which tasks are displayed in the list, and sorting determines the order that tasks appear in the list. To learn more about these options, see Filter the Item List and Sort the Item List.
Once you've found the task you're interested in, you can select it in the item list to perform an action on it. To learn about the available actions, see Manage Actions below.
Details Screen
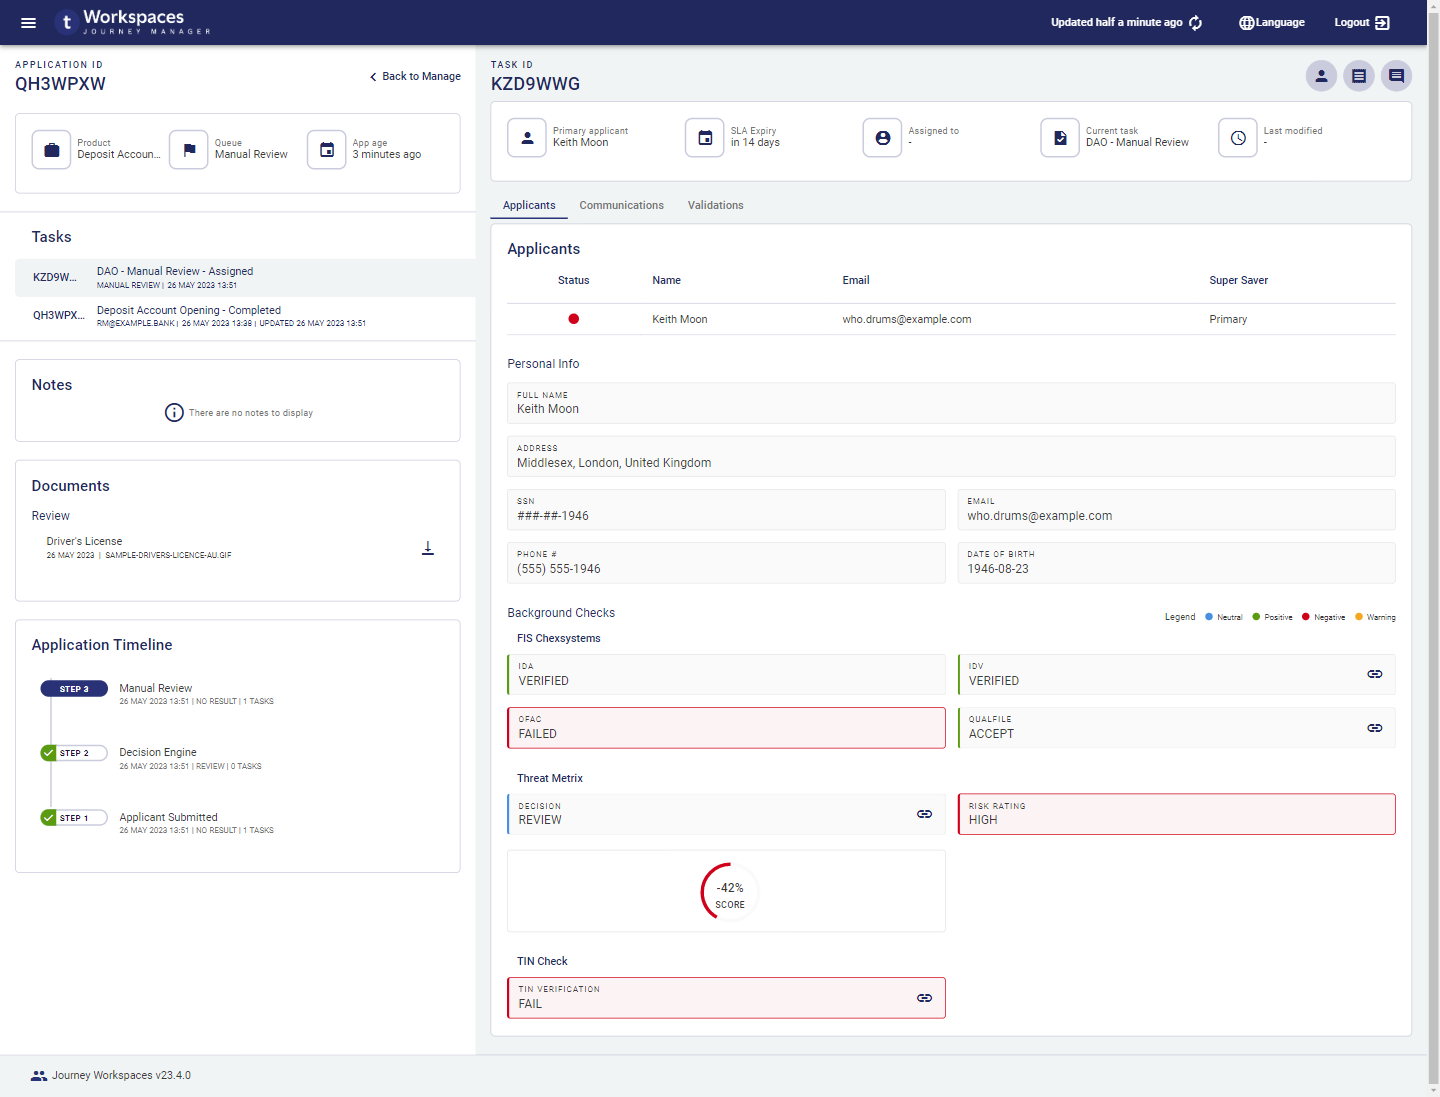
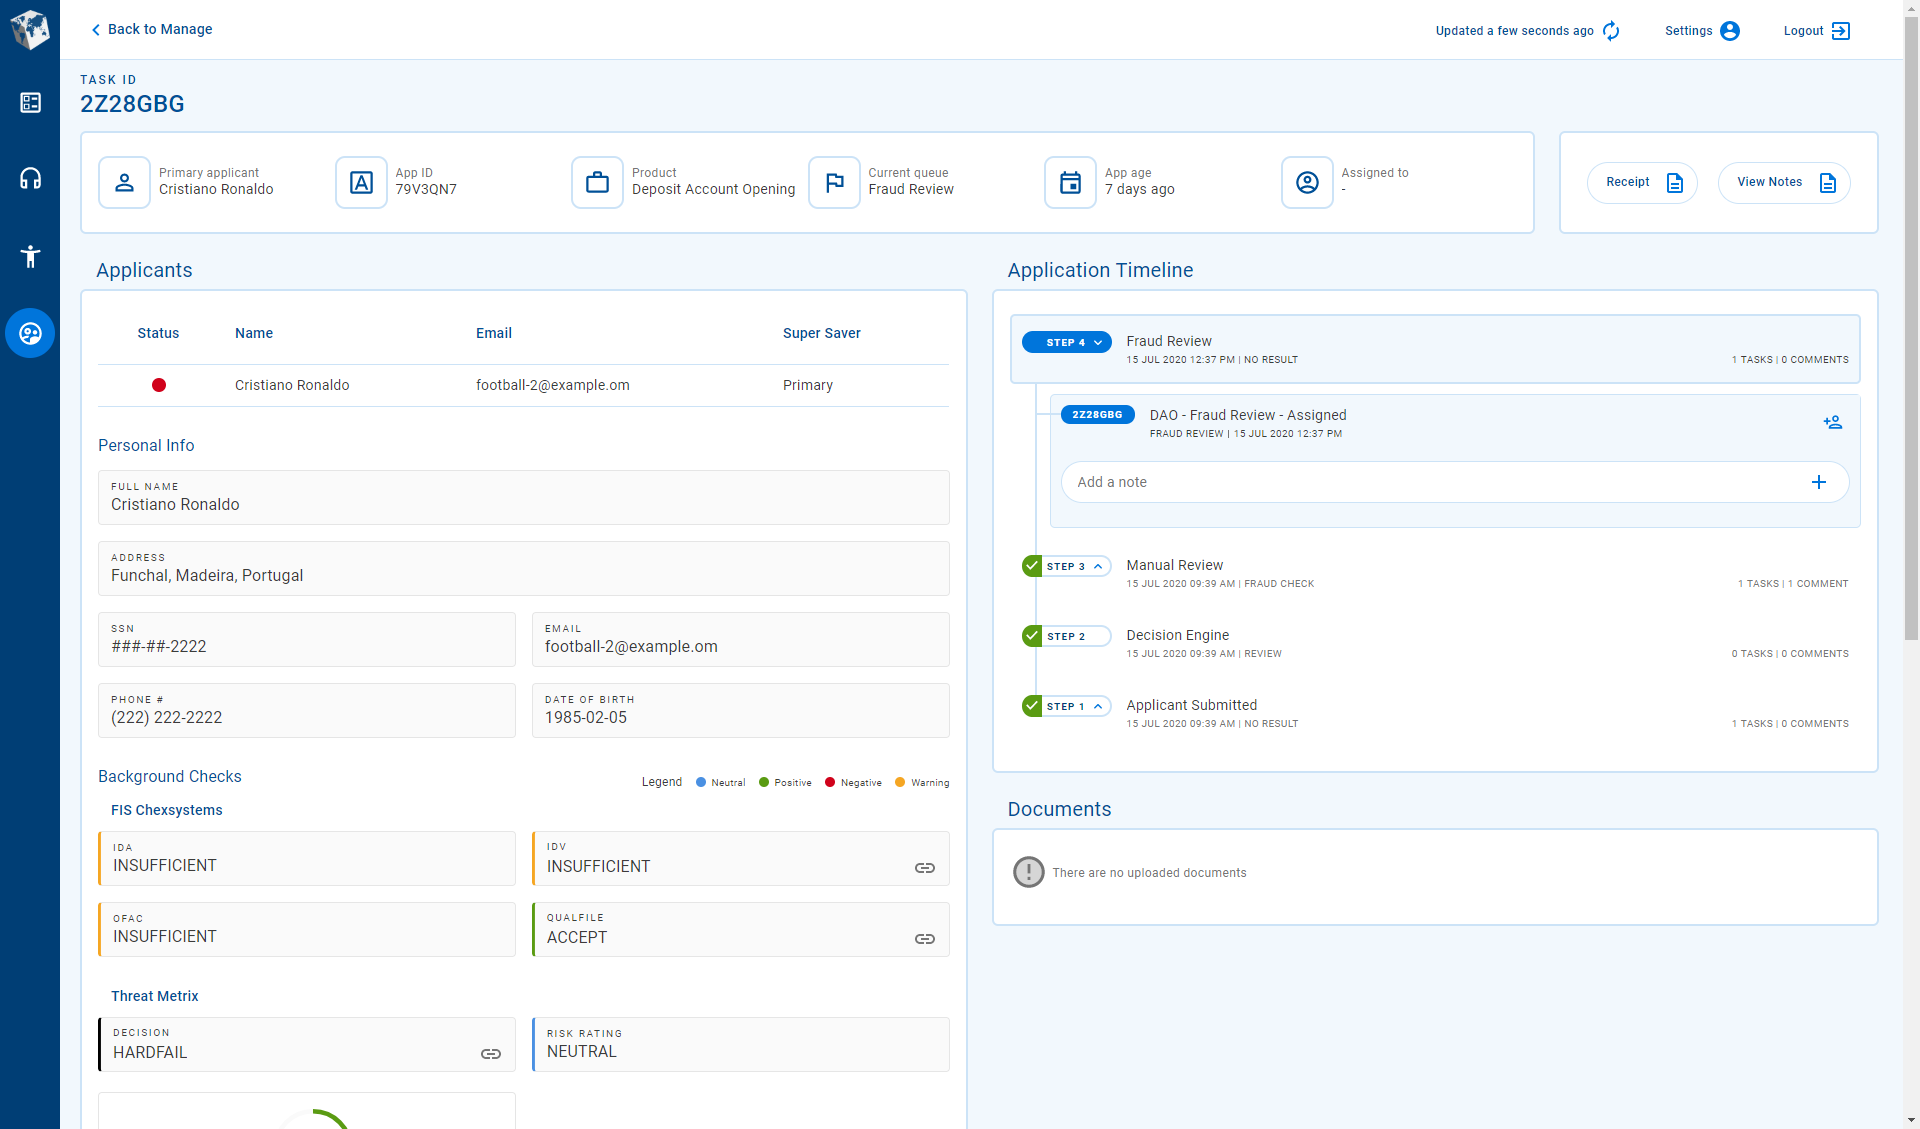
The Details screen in the Manage space supports all of the standard features of a WorkspacesDetails screen. It displays comprehensive information about an application and a selected task, and provides access to actions for managing applications. This includes the following features, each of which is contained in a separate card or section.
Separate panes for application and task content. 23.04This feature was introduced in the 23.04 release
Separate key information cards for the application and the selected task. 23.04This feature was introduced in the 23.04 release
A task switcher showing all the application's tasks, from which you can select one to display in the Task pane. 23.04This feature was introduced in the 23.04 release
A Notescard, bringing all notes and comments for a selected application together in a single component. Each note and its comments form a threaded conversation between the applicant and bank staff. 23.04This feature was introduced in the 23.04 release
A collection of documentsrelating to the application.
An application timeline showing the steps (tasks) that the application has progressed through. 23.04This feature was updated in the 23.04 release
A dynamic set of actions that are applicable to the application or selected task and which are currently available for you to perform in the Manage space at the current stage of the application's life cycle.
An Applicantstab, providing access to applicant data including:
An applicant list showing how each applicant relates to each product in the application. Select an applicant to view more details about them.
Personal information for the selected applicant, including identity and contact details.
The outcomes of preconfigured background checks which provide an assessment of a selected applicant's suitability.
A Communicationstab listing emails sent to the applicant with options to view and resend.
Options to view the details of background checks in various formats including JSON, XML, HTML, or PDF.
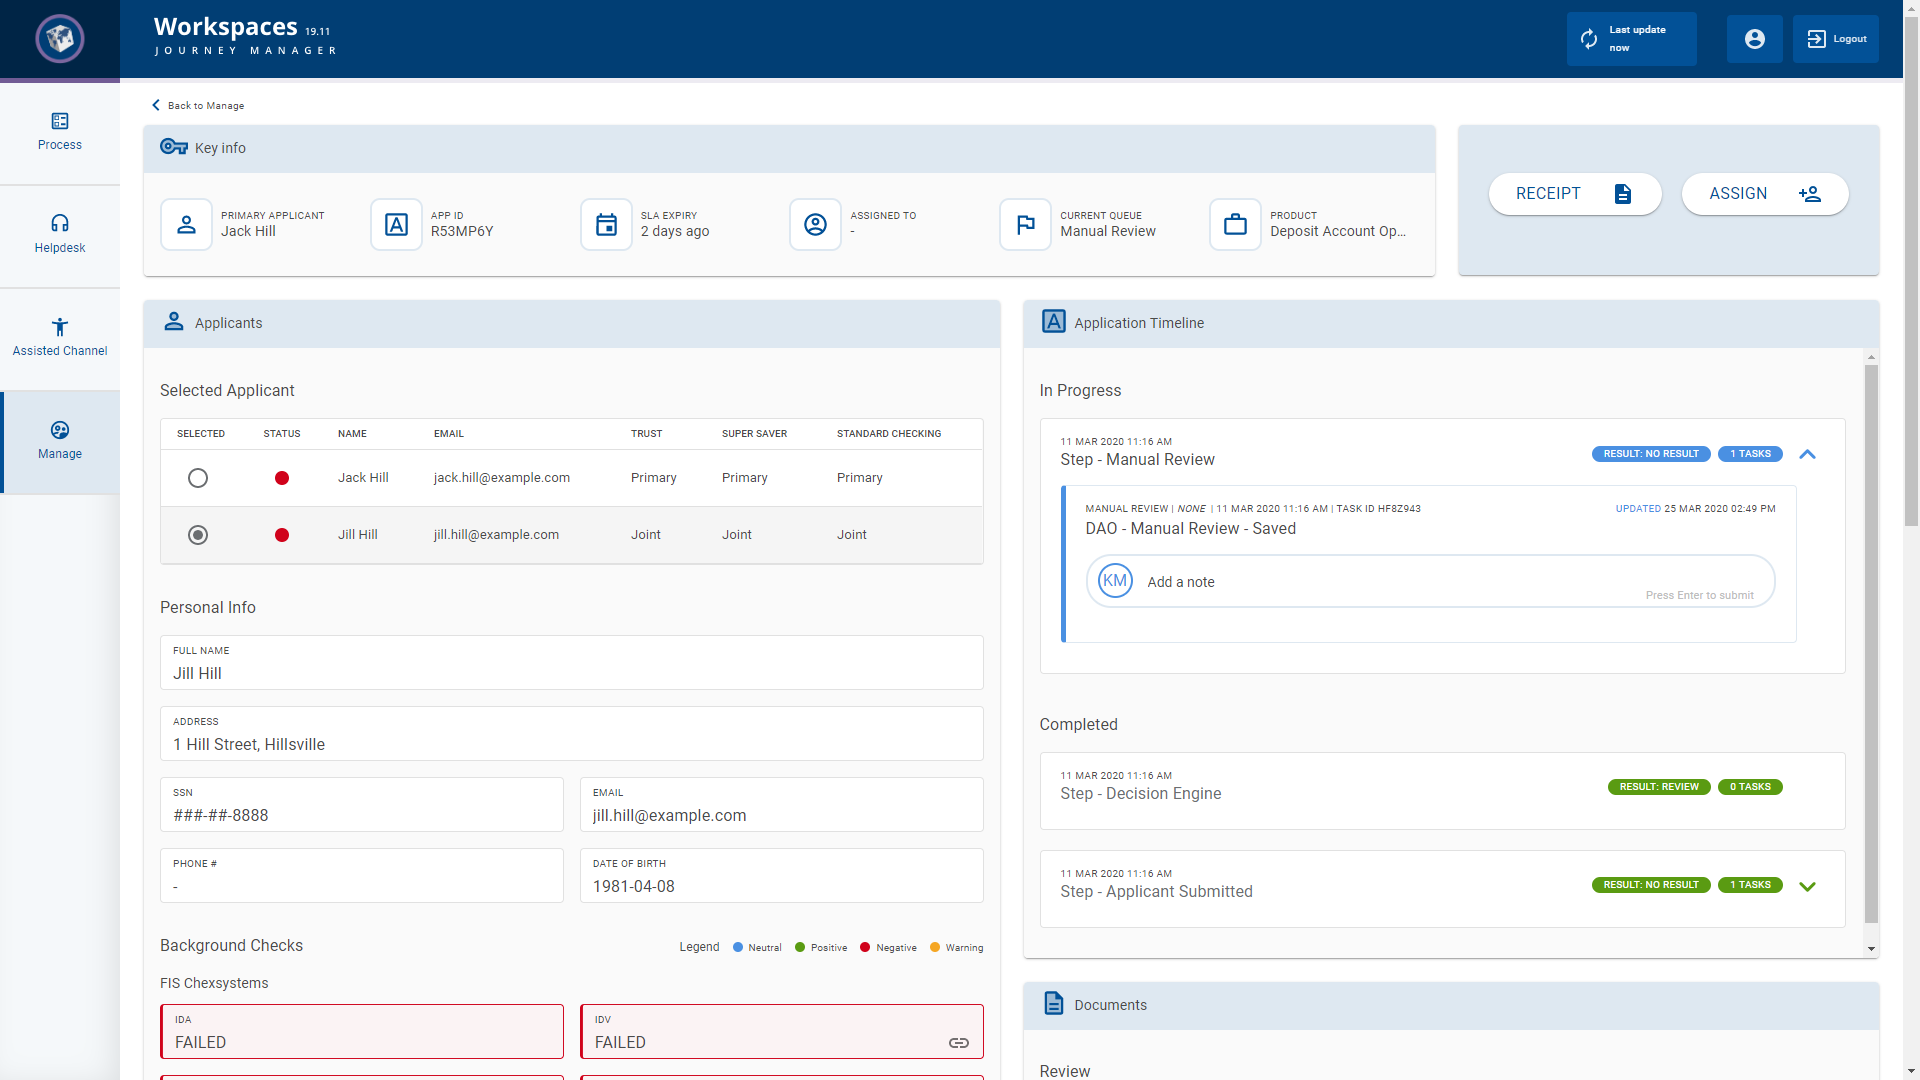
Prior to the 23.04 release, the application timeline is an interactive component where the user can select a task, add or view notes, and perform task actions. In the 23.04 release, these interactive features have been removed from the application timeline and, instead, are available in separate components. For details, see Task switcher, Notes, and Actions.
View Notes: View all notes recorded against all of an application's tasks. 20.05This feature was introduced in the 20.05 release23.04This feature was removed in the 23.04 release
The
Assign, Reassign, and
Unassign actions are described below in the context of the
Manage space, including examples of how to use them.
When you assign or reassign a
task to a
Workspaces user, only that user can work on it. Once a
task is assigned to someone, other actions may become available for the assigned user to perform on the
task.
If you need to remove a
task assignment, you can unassign the
task from the current user. For example, if a staff member goes on leave without completing an assigned
task and you need to assign it to someone else, you can unassign the
task from the current user and assign it to the other user. In this way, you can manage the assignment of
tasks to ensure they are completed in a timely fashion.
Reassign is a handy shortcut action that removes the need to explicitly unassign a task before assigning it to someone else. Looking at the example in the previous paragraph, instead of unassigning the task from the staff member that goes on leave and then assigning it to someone else, you can simply reassign the task to change who the task is assigned to.
Action Examples
Let's go step by step through some examples for activities that you may need to perform when managing
tasks.
There are examples for the following actions below.
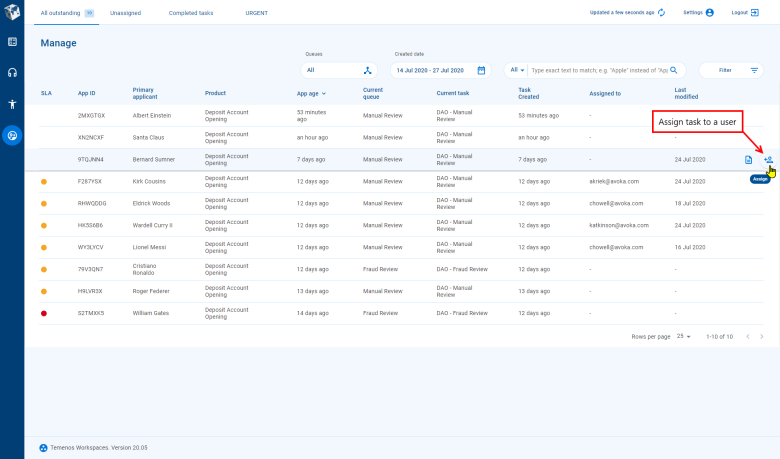
This example shows you how to use
global filters to narrow down the
item list to just
those tasks for recently created applications, then assign a
task to a
Workspaces user.
Login to
Workspaces and select the Manage space.
Click Created Date and select a range of dates that covers recently submitted applications, narrowing down the list of tasks and making it easier to see the
task you want to assign.
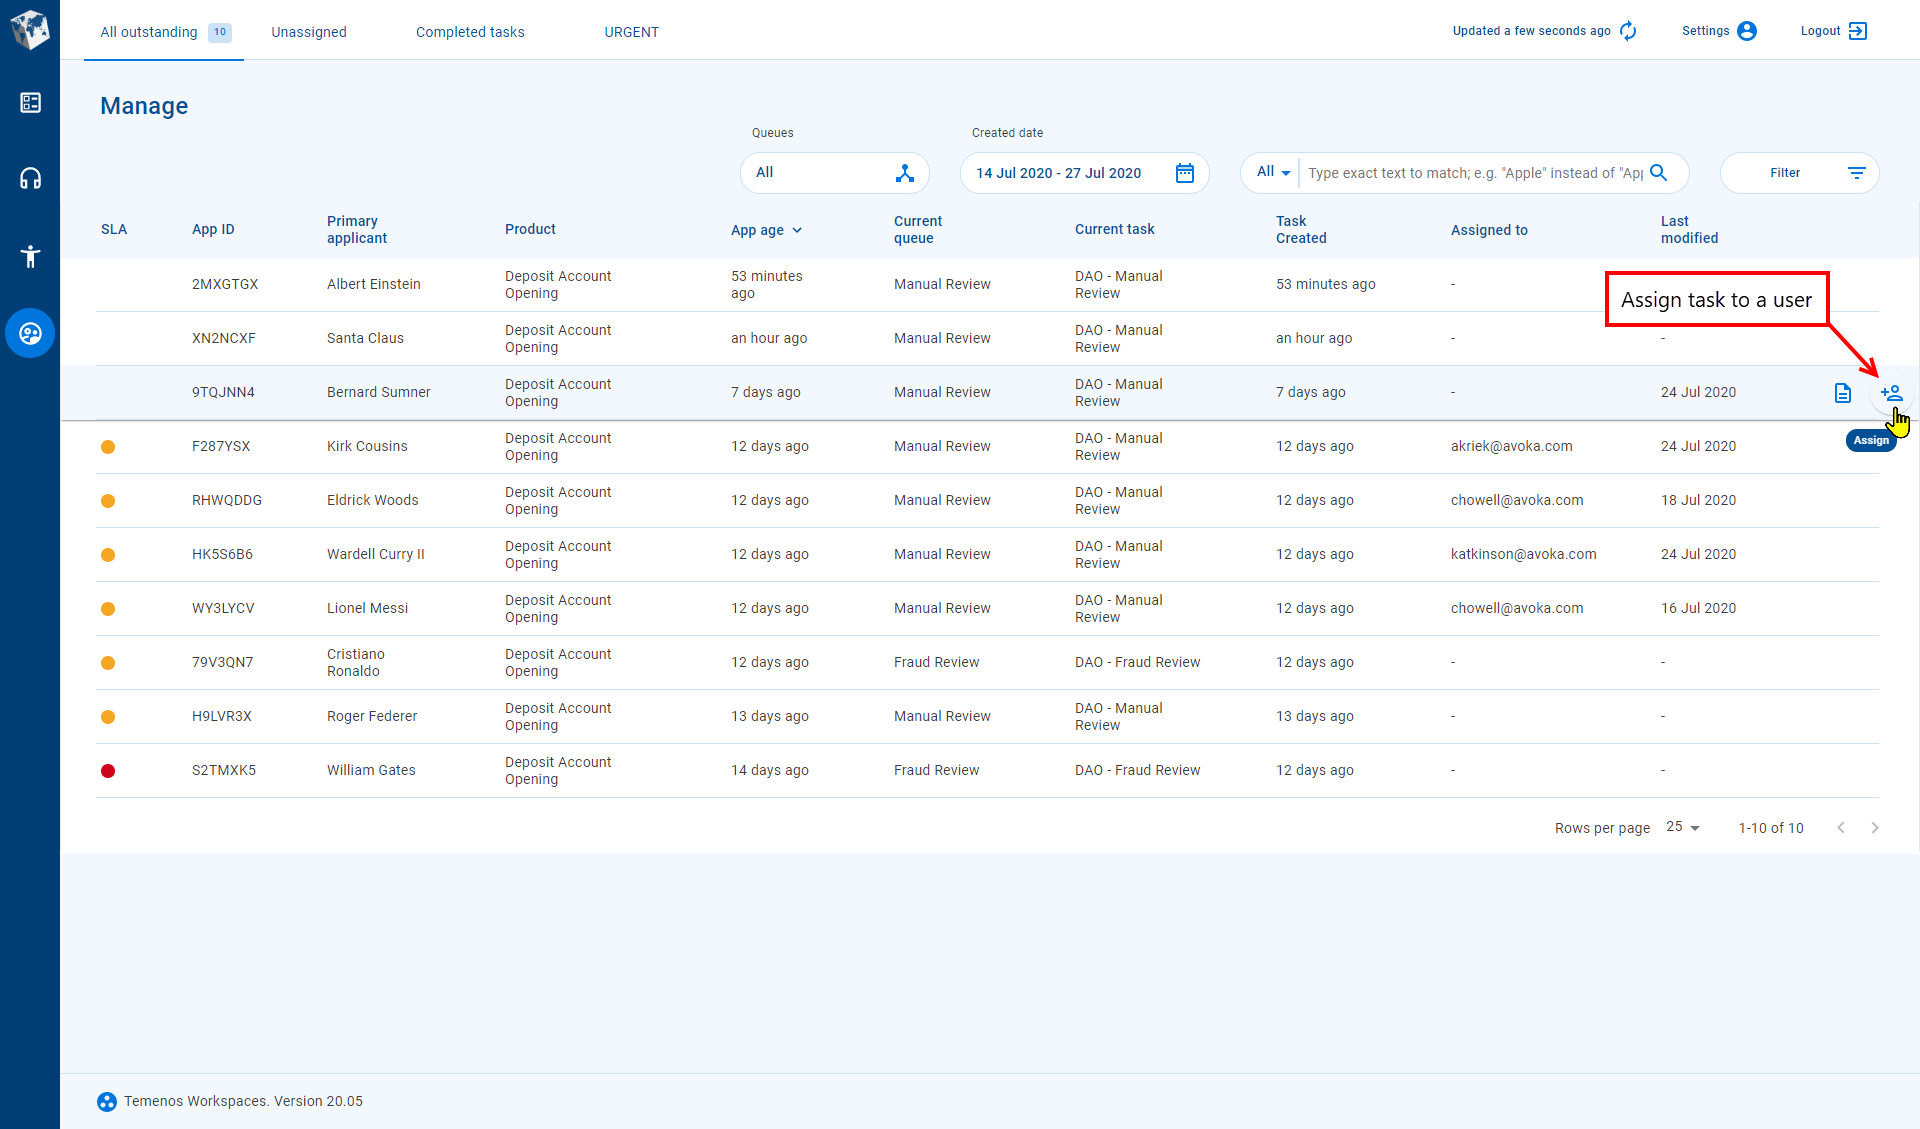
Point your cursor at the
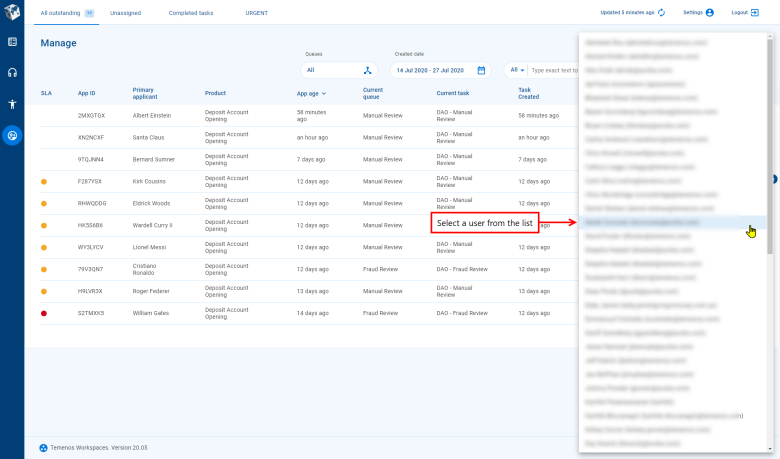
task that you want to assign. The available actions appear at the right-hand side. Click person_addAssign to display the list of
Workspaces users.
Select the user that you want to assign the
task to from the list.
Info | 20.05
This feature was introduced in 20.05.A list of Workspaces users is displayed, showingThe user list displays both the Workspaces user id and the full name for each user.
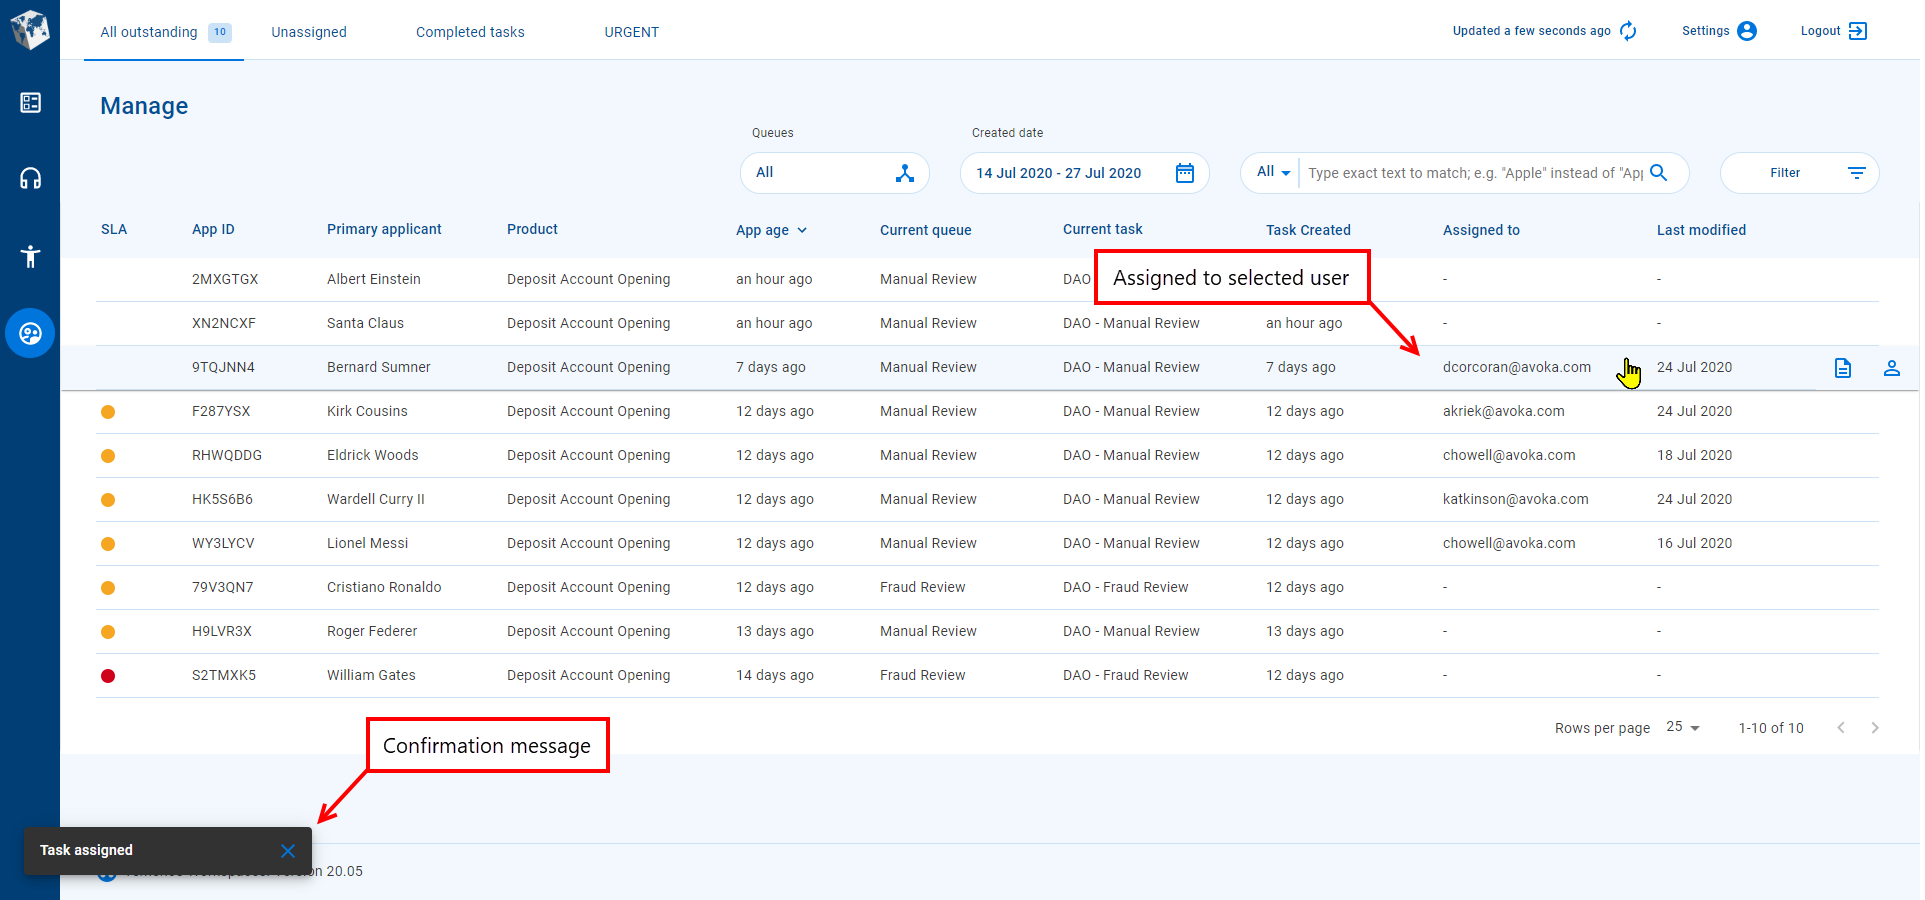
The selected user's
Workspaces id is displayed in the Assigned column, and a message confirming you have assigned the
task is displayed briefly in the bottom left corner.
Alternatively, you can click the
task to display its application details, then click Assign on the
Details screen and select the user to assign the
task to.
Reassign a
Task
This example shows you how to use view filters to narrow down the
item list to just
those tasks assigned to a specific user, then reassign a
task to another Workspaces user.
Login to
Workspaces and select the Manage space.
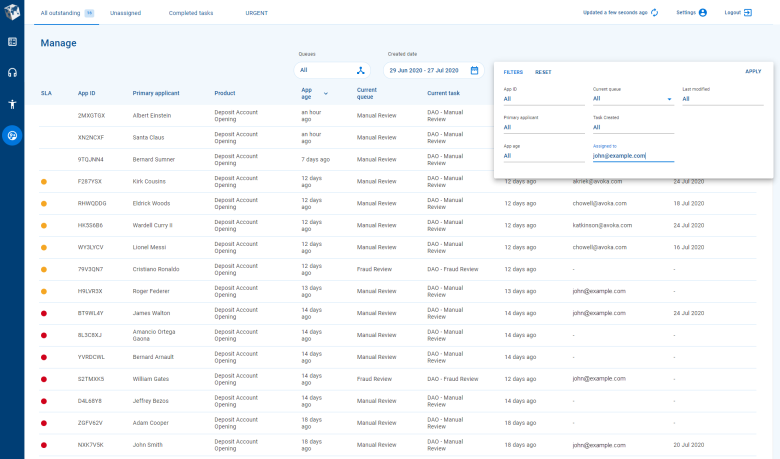
Click Filter to open the Filters selector then enter a Workspace user id in the Assigned to field and click Apply, narrowing down the list of tasks and making it easier to see the
task you want to reassign.
Point your cursor at the
task that you want to reassign. The available actions appear at the right-hand side. Click group_addReassign to display the list of
Workspaces users.
Select the new user that you want to reassign the
task to from the list.
Info | 20.05
This feature was introduced in 20.05.A list of Workspaces users is displayed, showingThe user list displays both the Workspaces user id and the full name for each user.
The new user's
Workspaces id is displayed in the Assigned column, and a message confirming you have reassigned the
task is displayed briefly in the bottom left corner.
Alternatively, you can click the
task to display its application details, then click Reassign on the
Details screen and select the user to reassign the
task to.
Remove a
Task Assignment
This example shows you how to use a filter to narrow the
item list down to just those
tasks assigned to a specific
Workspaces user, then unassign one of these
task.
Login to
Workspaces and select the Manage space.
Click Filter to display the
Filters selector, then click the Assigned to field to display the user list.
Select a user from the list then click outside the
Filters selector twice to close it. This reduces the number of items in the
item list, making it easier to see the
task you want to unassign.
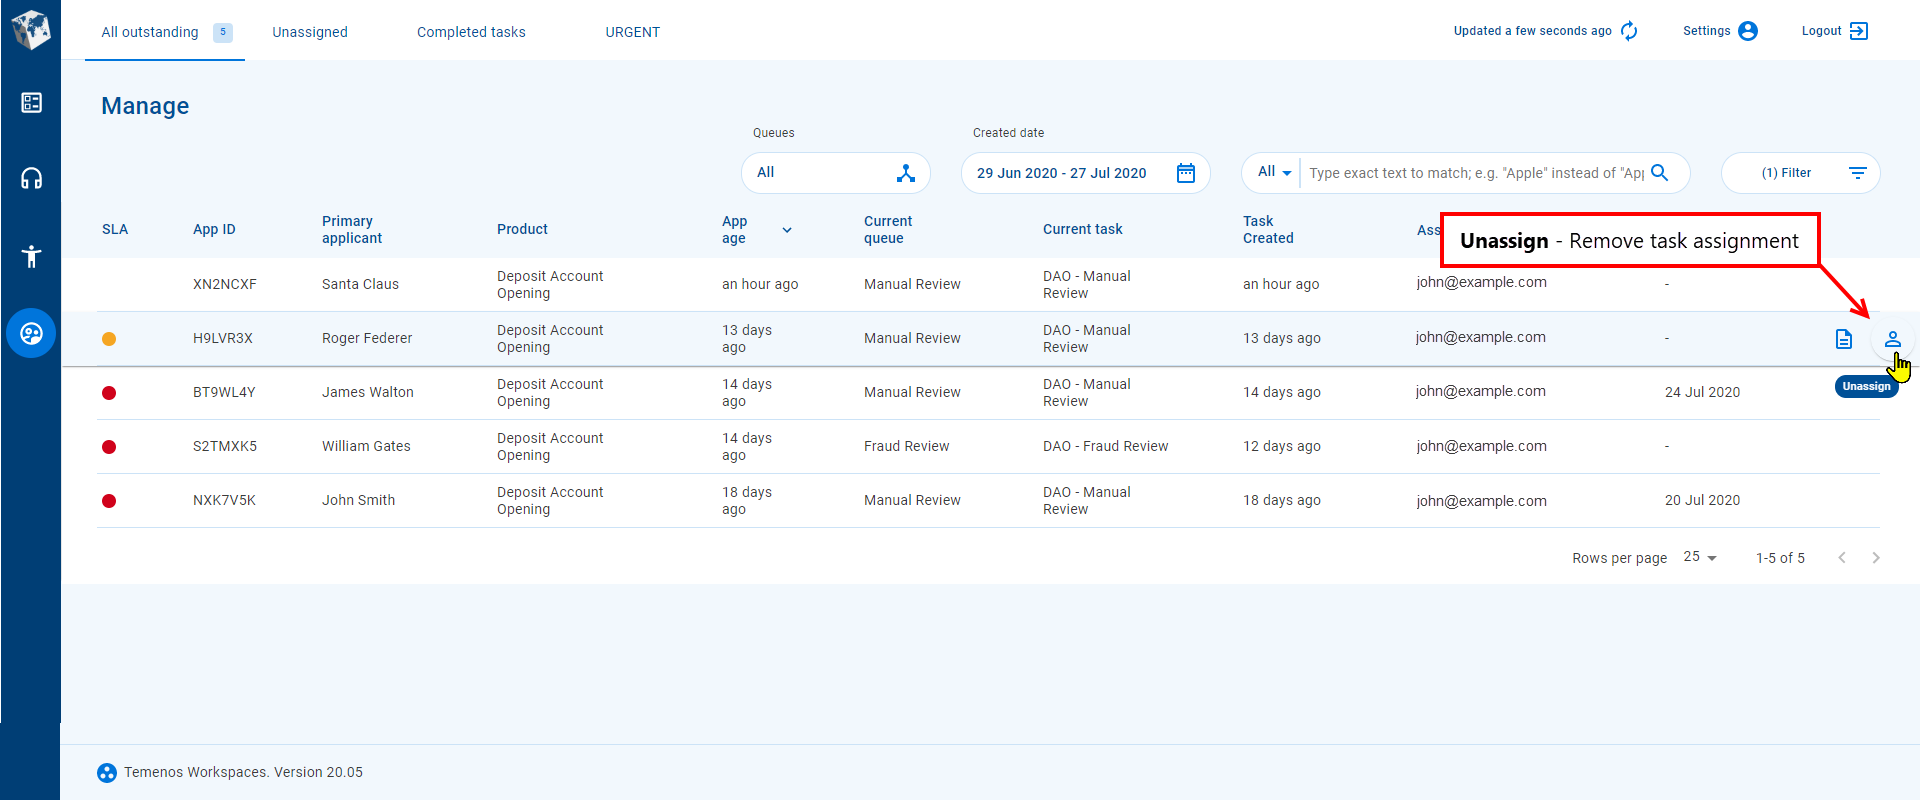
Now, you can unassign the
task. Point your cursor at the
task that you want to unassign – the available actions appear at the right-hand side. Click personUnassign to remove the
task assignment.
Alternatively, you can click the
task to display its application details, then click Unassign on the
Details screen.
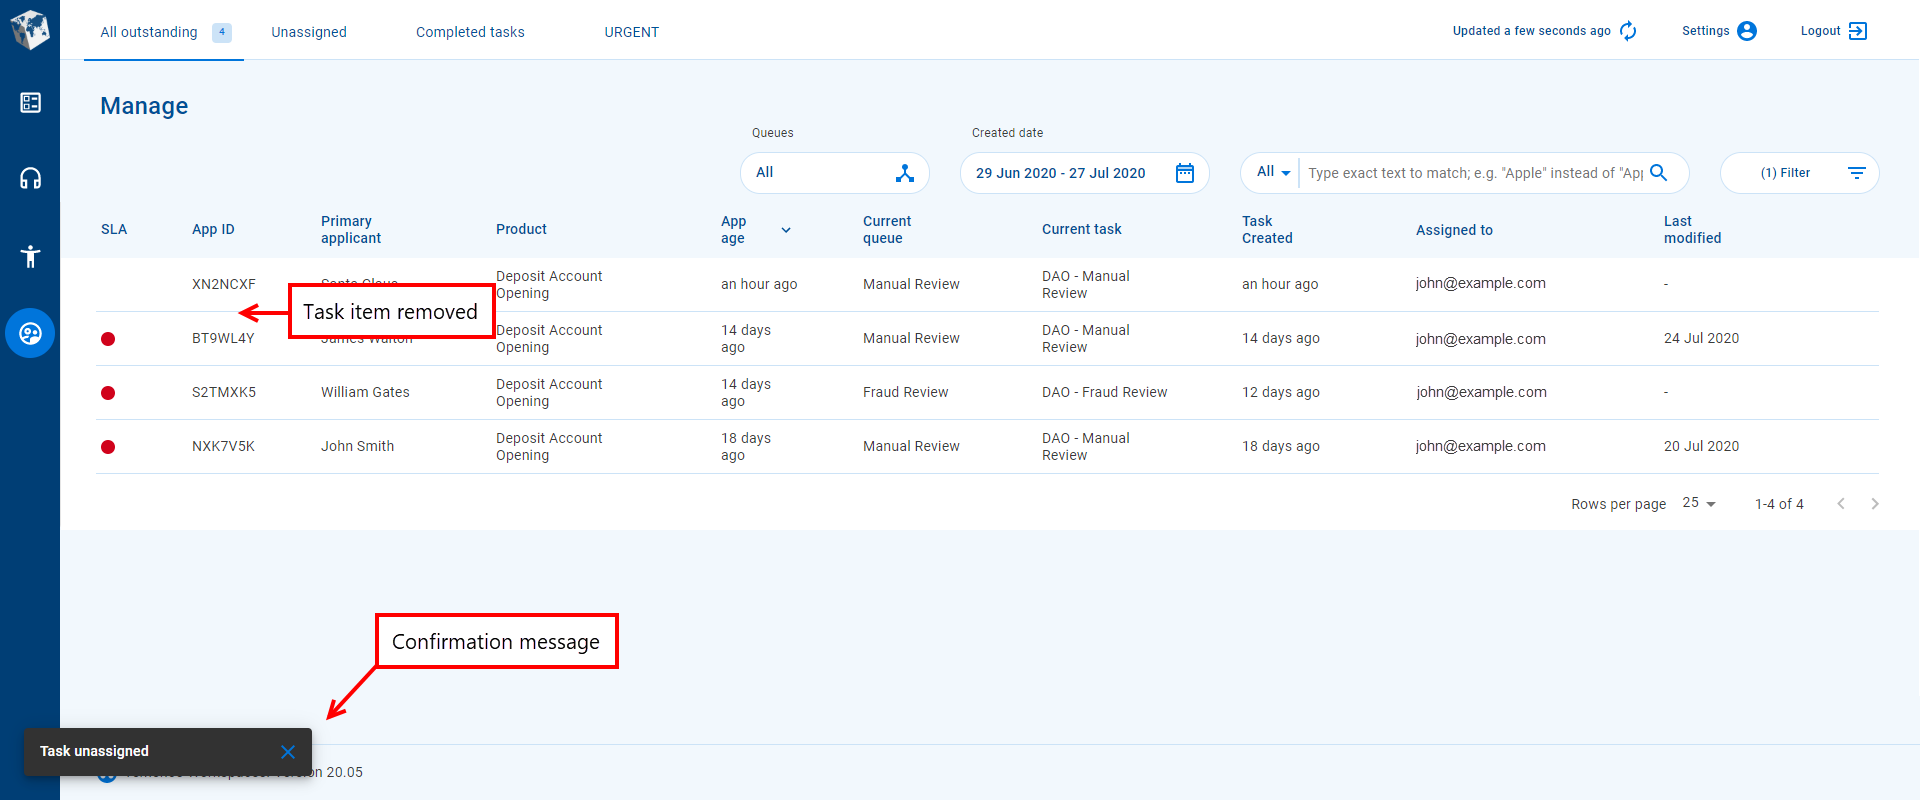
The value in the Assigned to column is cleared causing the
task item to be removed from the
item list as it no longer satisfies the filter criteria. A message confirming that you have unassigned the
task is displayed briefly in the bottom left corner.