Workspaces Assisted Channel
WorkspacesThis topic relates to Journey Workspaces | Workspaces UserIncludes bank staff, helpdesk, relationship managers, and managers | 19.05This topic was introduced with the 19.05 release | 23.04This topic was updated for the 23.04 release
Some of the text and images below may not match what you see in your Workspaces portal. This is because the features described are based on a default Workspaces portal configuration, and your Workspaces portal may be configured differently; for example, with your company's branding or with other fields. Nevertheless, the features described work the same way in every Workspaces portal.
Customer service needs, such as for relationship management, are supported in Workspaces via the inclusion of an Assisted Channel space. In its default configuration, the Assisted Channel space includes a List screen and a Details screen that are configured with features designed to make relationship management activities fast and efficient, so that you can focus on providing a great customer experience.
List Screen
The List screen in the Assisted Channel space includes all of the standard features of a Workspaces List screen.
- An item list containing a list of applications, and which may be empty initially depending upon how it is populated.
- A global view selector, used to apply a pre-defined set of fields, filters and sort options to the item list.
- A global filter that restricts the applications in the item list to just those for a selected form / product type.
- A second global filter, Created Date, that restricts the applications in the item list based on the date they were created.
- Flexible search, filter and sort options that you can use to refine the set of applications in the item list.
- A Bulk Action mode switch to change between acting on a single task or multiple tasks. This feature was introduced in the 22.10 release
- Paging tools that allow you to browse all of the items matching your selected criteria over multiple item list pages.
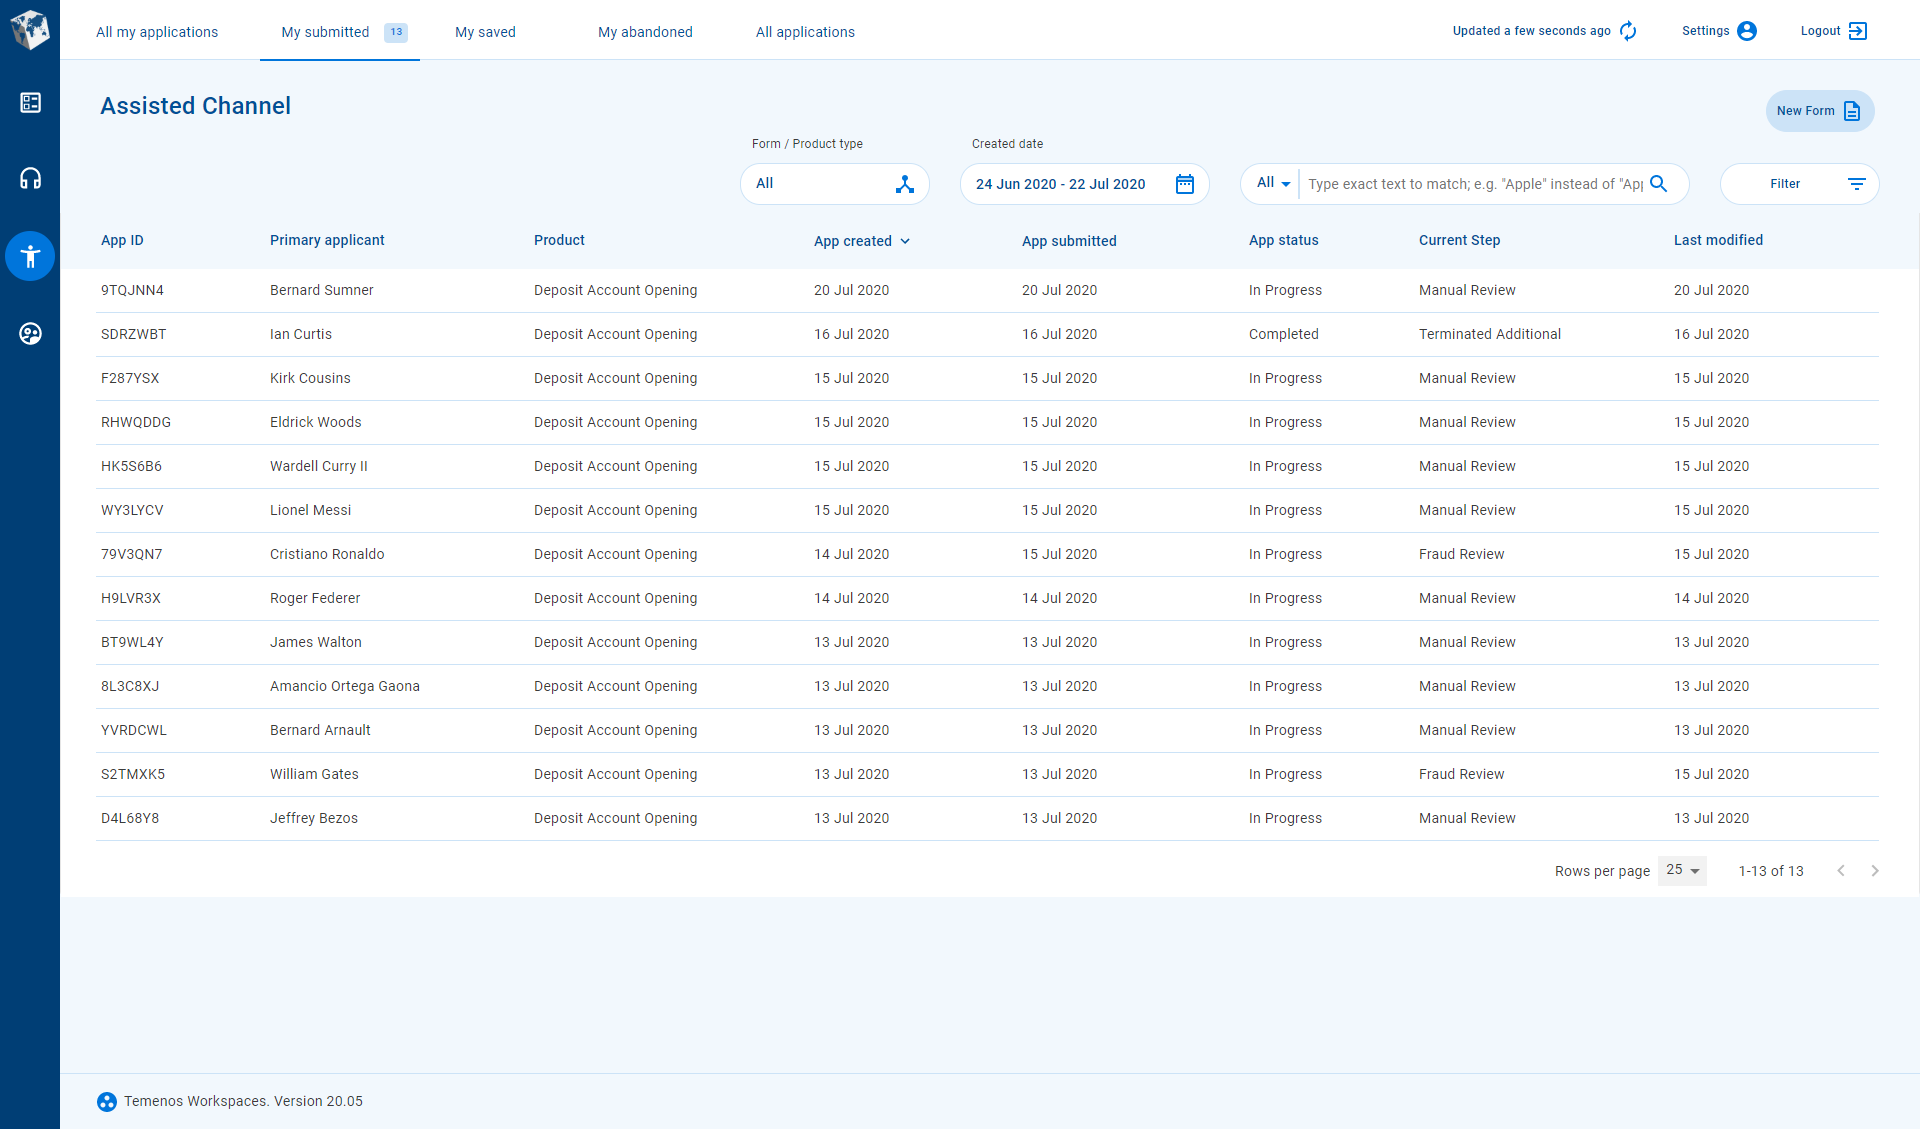
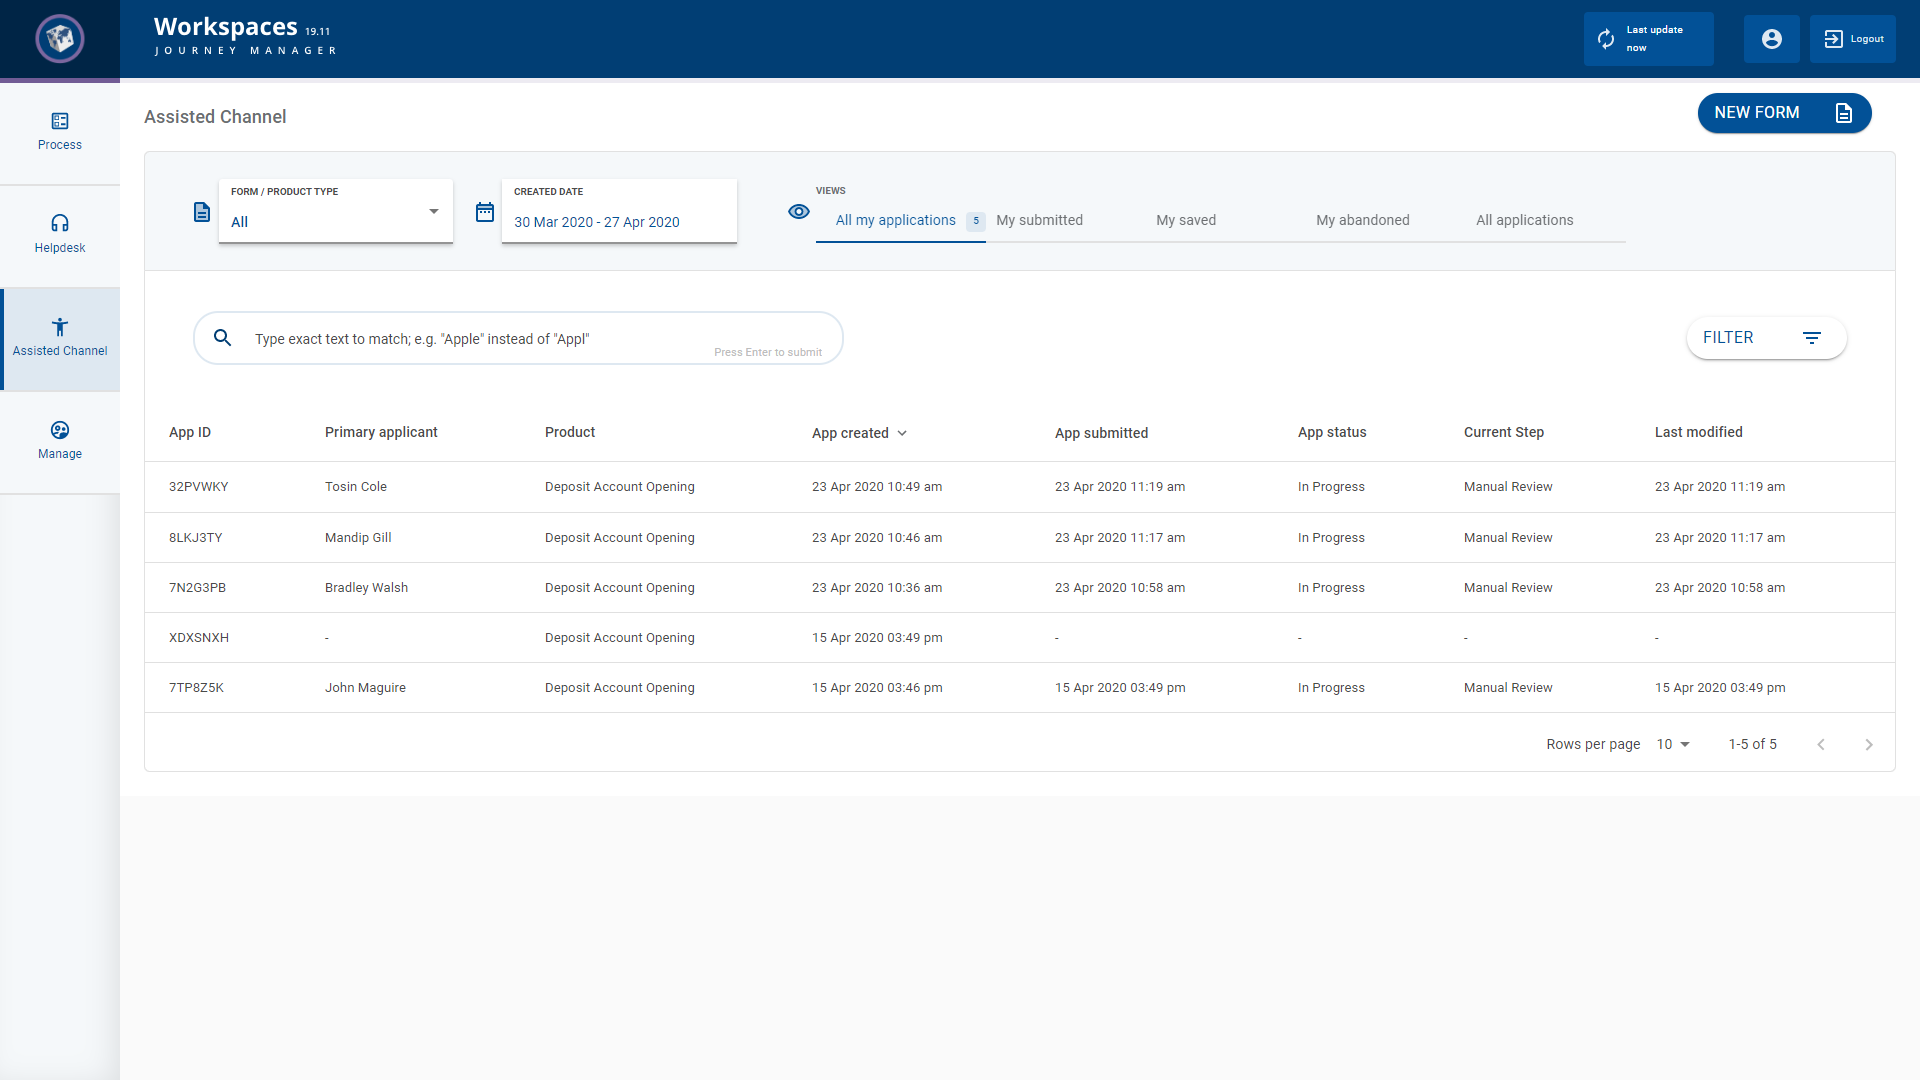
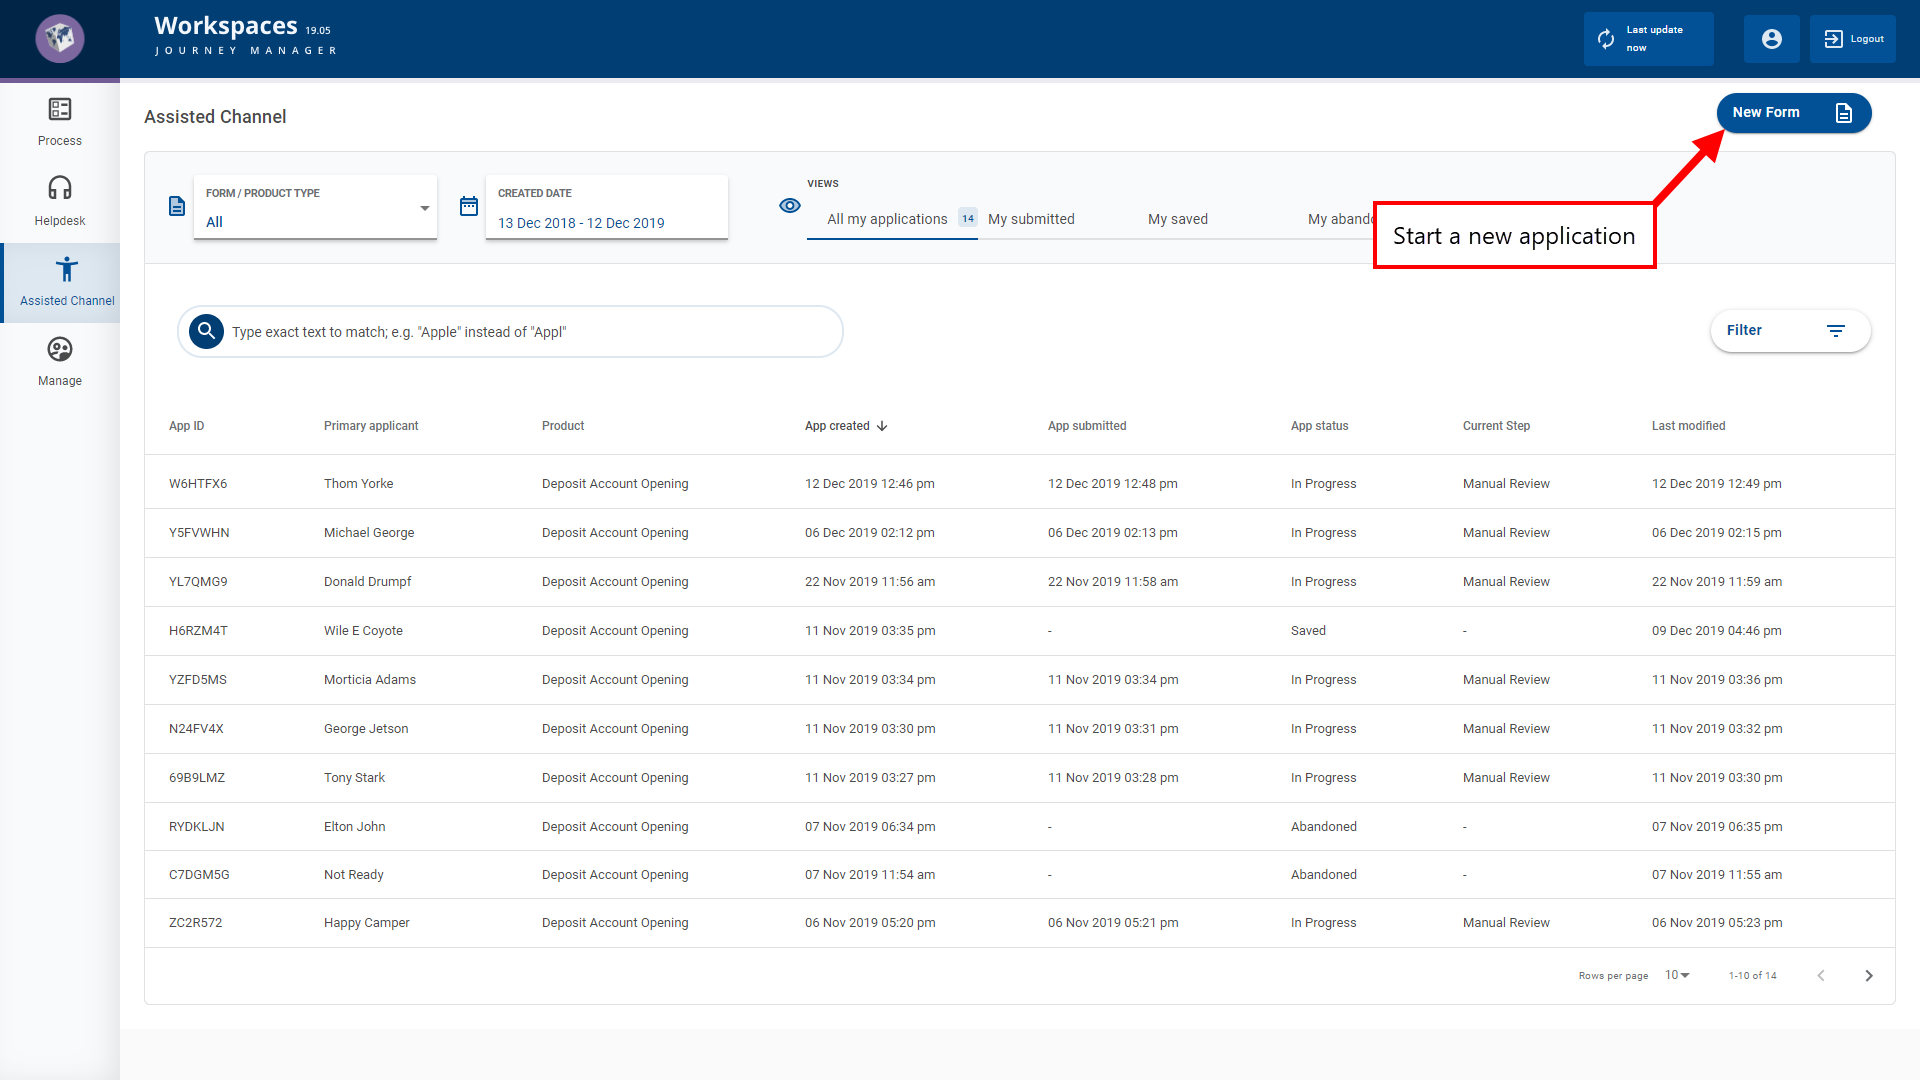
The Assisted Channel space's List screen displays a list of applications that you created or that have tasks assigned to you, taking into consideration the global filters, the current view and any active search, filter and sort options. The Form / Product Type selector shows which form / product types the applications in the list relate to, and the name of the current view is highlighted in the Views selector. The list of applications displayed can be further refined using the filter and sort options. Filtering restricts which applications are displayed in the list, and sorting determines the order that items appear in the list. To learn more about these options, see Filter the Item List and Sort the Item List.
Once you've found the application you're interested in, you can select it in the item list to perform an action on it. In addition to these actions, you can also start a new application on behalf of a customer. To learn about the available actions, see Assisted Channel Actions below.
Details Screen
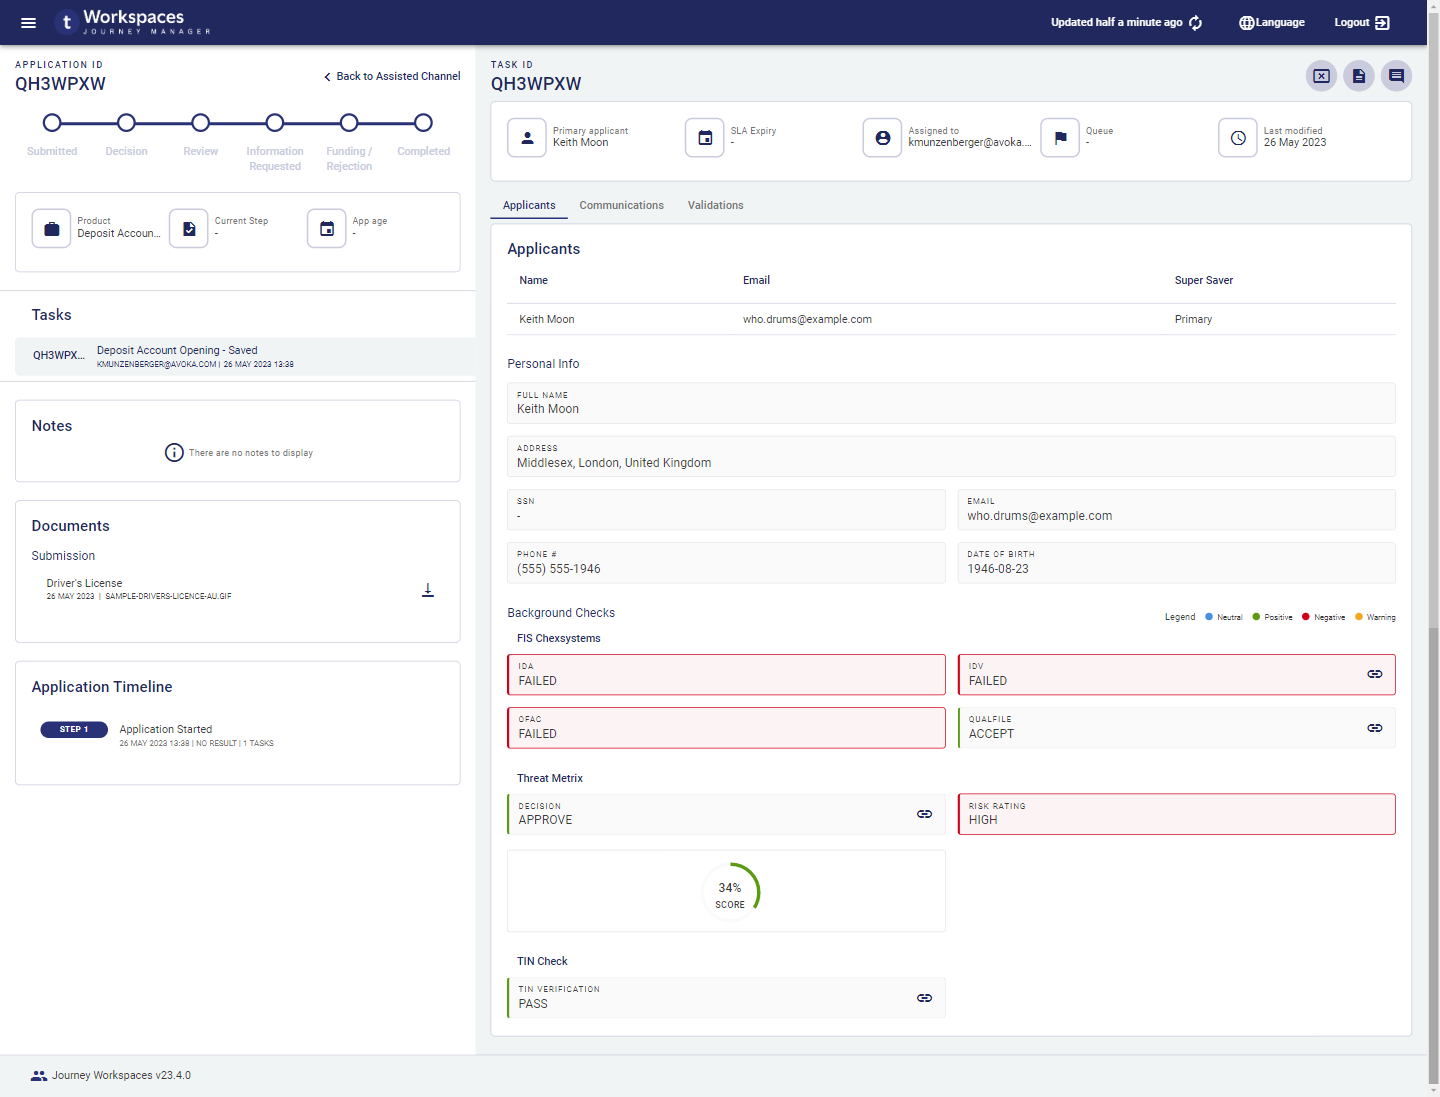
The Details screen in the Assisted Channel space supports all of the standard features of a Workspaces Details screen. It displays comprehensive information about an application and a selected task, and provides access to the Assisted Channel actions. This includes the following features, each of which is contained in a separate card or section.
- Separate panes for application and task content. This feature was introduced in the 23.04 release
- Separate for the application and the selected task. This feature was introduced in the 23.04 release
- The ability to track application progress against an SLA.
- A progress stepper showing a high-level indication of the application's progress. This feature was updated in the 23.04 release
- A task switcher showing all the application's tasks, from which you can select one to display in the Task pane. This feature was introduced in the 23.04 release
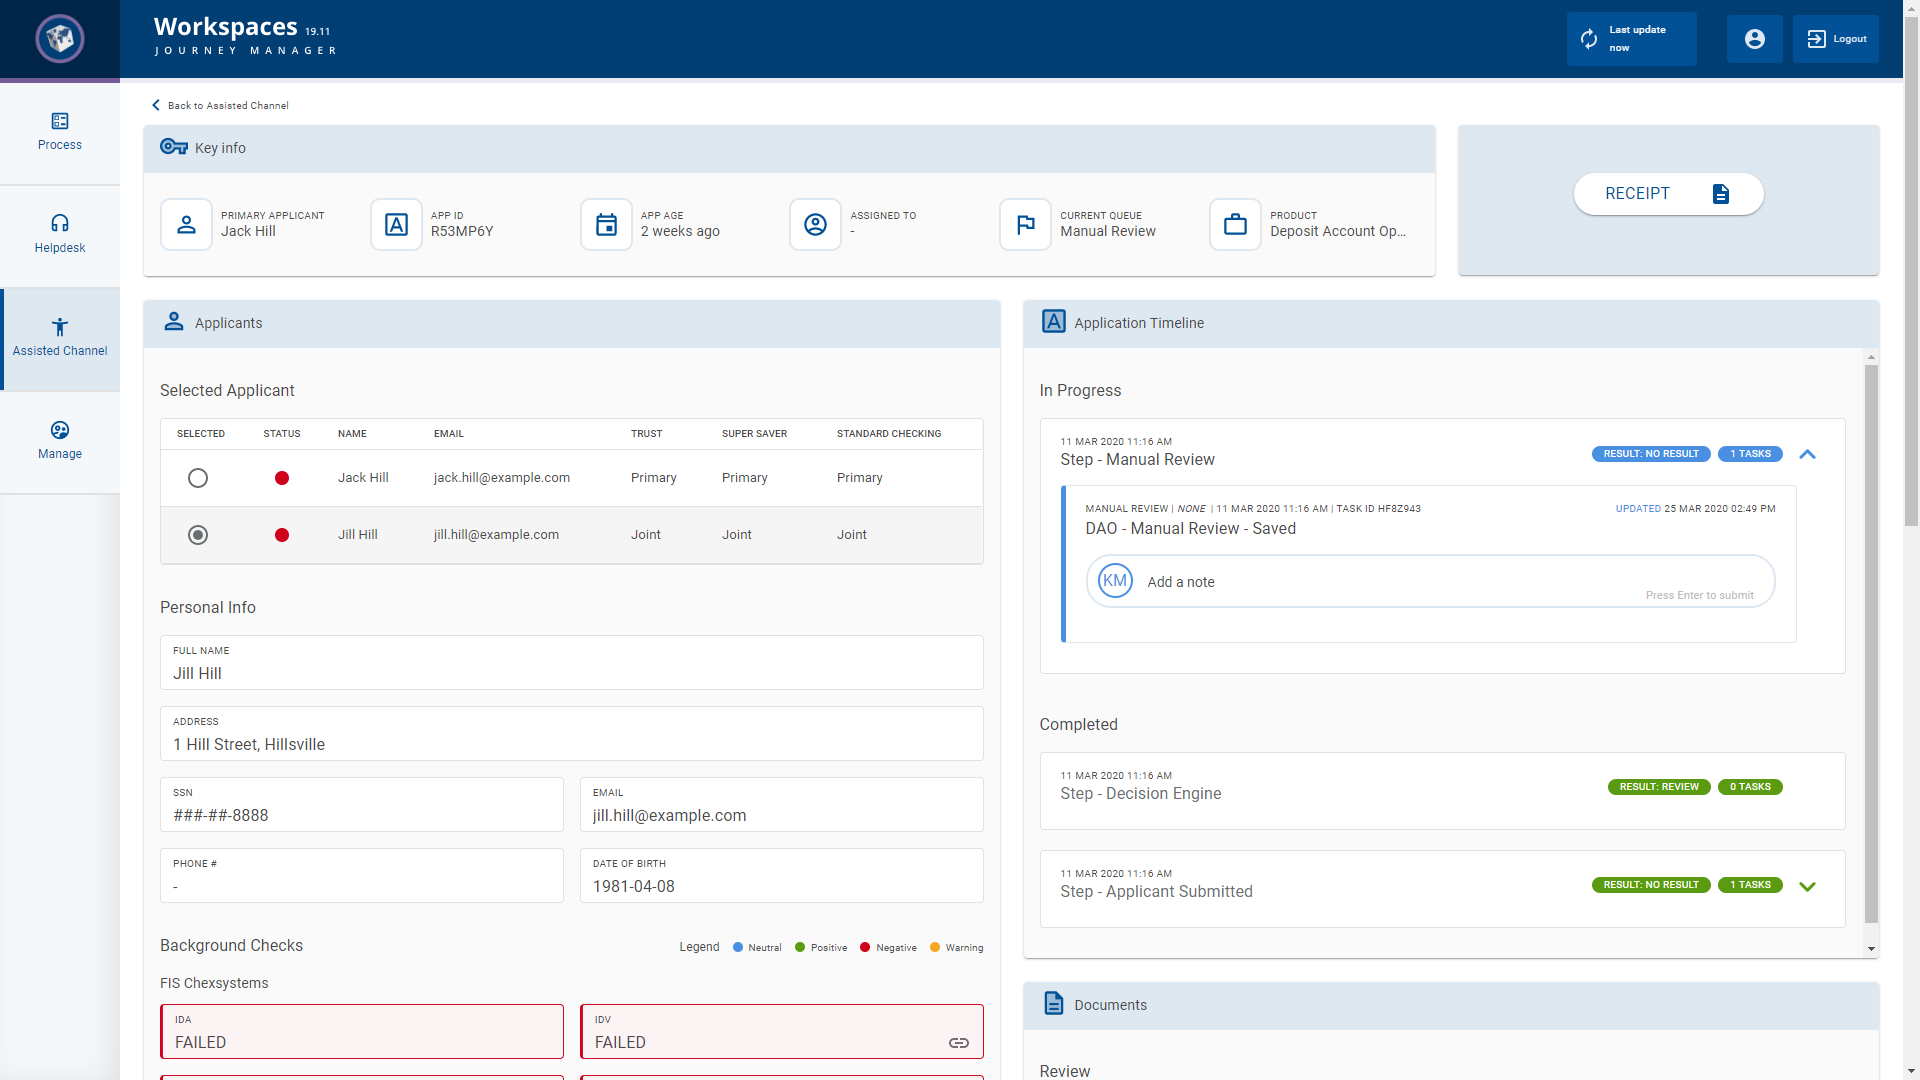
- A Notes card, bringing all notes and comments for a selected application together in a single component. Each note and its comments form a threaded conversation between the applicant and bank staff. This feature was introduced in the 23.04 release
- A collection of documents relating to the application.
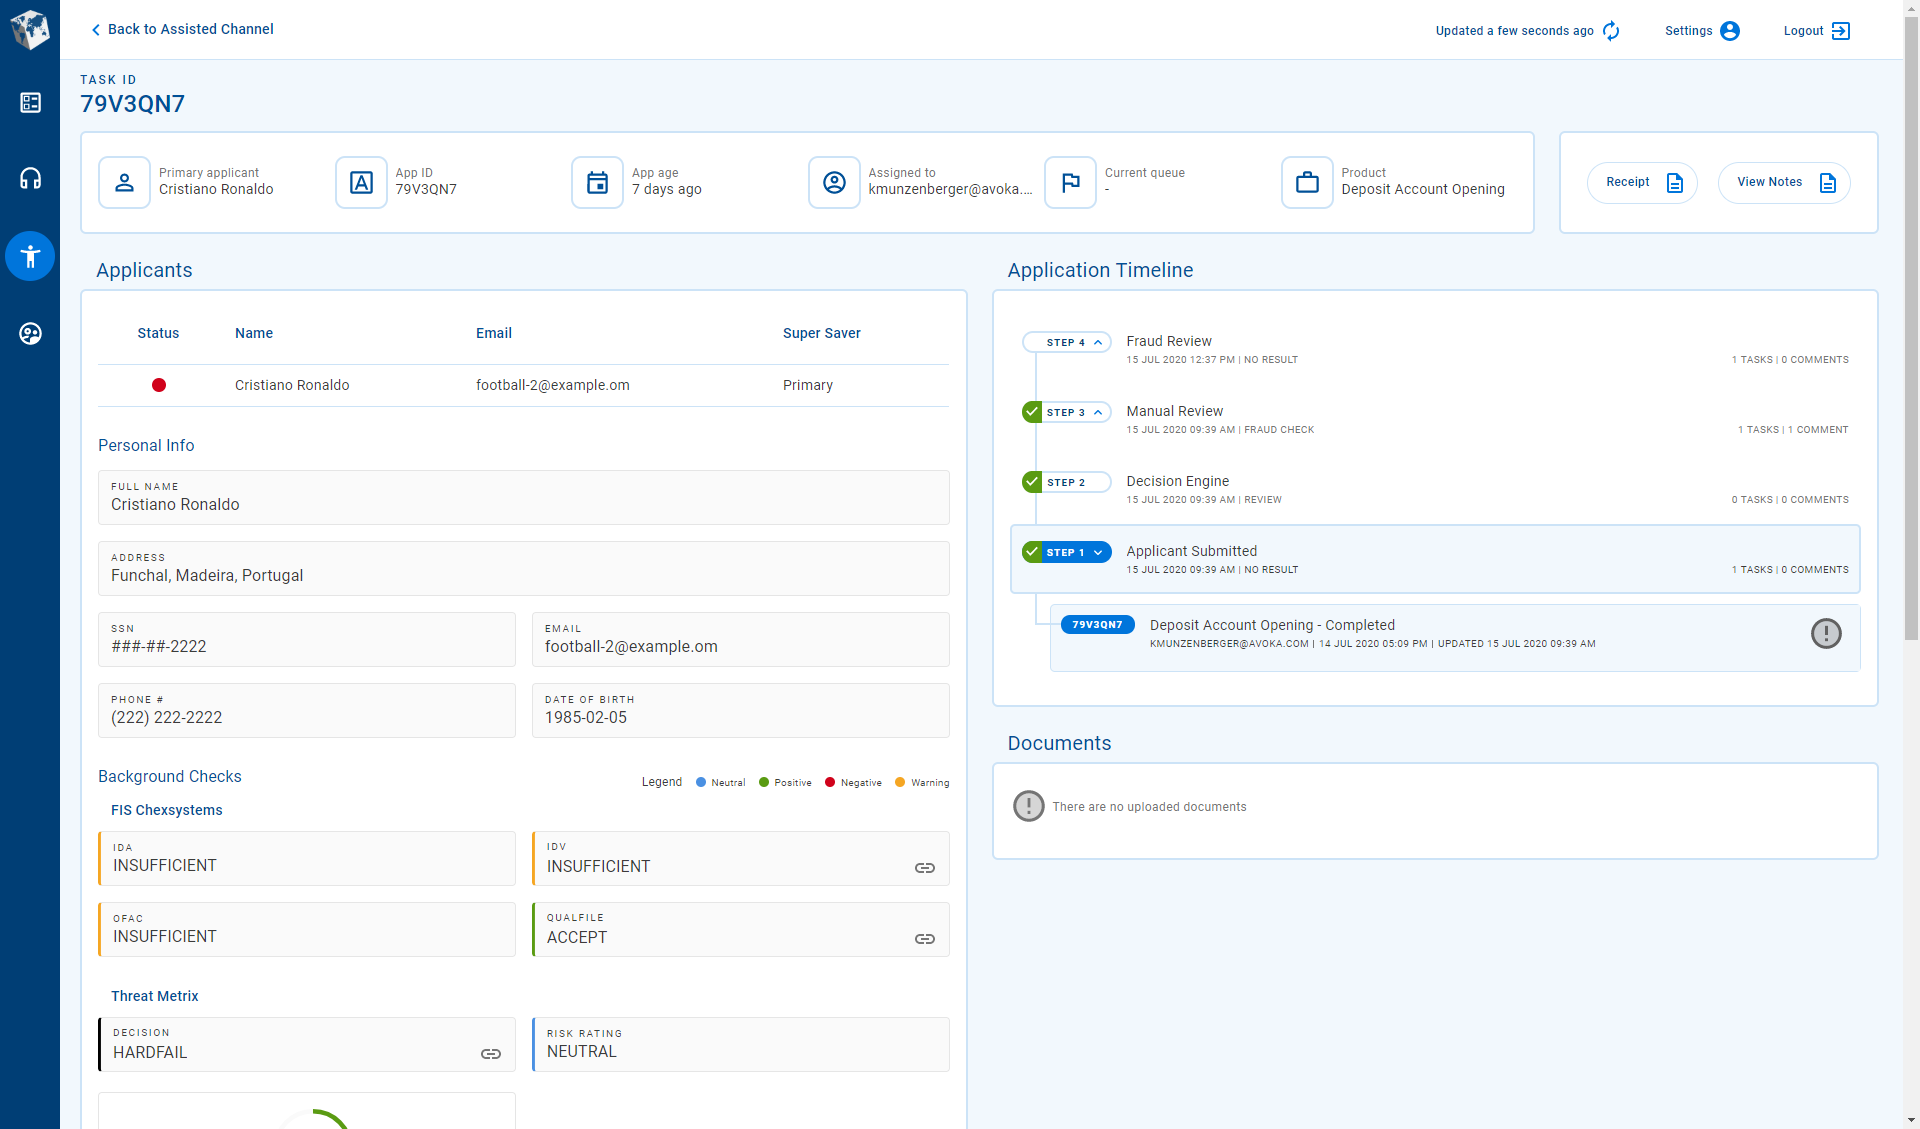
- An application timeline showing the steps (tasks) that the application has progressed through. This feature was updated in the 23.04 release
- A dynamic set of actions that are applicable to the application or selected task and which are currently available for you to perform in the Assisted Channel space at the current stage of the application's life cycle.
- An Applicants tab, providing access to applicant data including:
- An applicant list showing how each applicant relates to each product in the application. Select an applicant to view more details about them.
- Personal information for the selected applicant, including identity and contact details.
- The outcomes of preconfigured background checks which provide an assessment of a selected applicant's suitability.
- A Communications tab listing emails sent to the applicant with options to view and resend.
- Options to view the details of background checks in various formats including JSON, XML, HTML, or PDF.
- A checklist of documents that need to be uploaded, as well as an upload status for each document.
To learn about any of these features, click the links above or see The Application Details Screen if you're using Workspaces 23.04 or later and The Application Details Screen (22.10 and earlier) if you're using an earlier Workspaces release.
Prior to the 23.04 release, the application timeline is an interactive component where the user can select a task, add or view notes, and perform task actions. In the 23.04 release, these interactive features have been removed from the application timeline and, instead, are available in separate components. For details, see Task switcher, Notes, and Actions.
Actions
The assisted channel actions are:
- Add Notes: Add notes (and comments) against an application's tasks. This feature was introduced in the 23.04 release
- New Form: Start a new application on behalf of someone else.
- Receipt: See a read-only view of a submitted application.
- Recover: Recover an abandoned or withdrawn application so that the applicant can continue with it. This feature was introduced in the 19.11 release
- View Form: Open an application that has been saved but not yet submitted in the original form.
- View Notes: View all notes recorded against all of an application's tasks. This feature was introduced in the 20.05 release This feature was removed in the 23.04 release
- Withdraw: Cancel an application that has been saved but not yet submitted. This feature was introduced in the 19.11 release
The New Form action is described below in the context of the Assisted Channel space. Descriptions of the other actions are available in the context of the Helpdesk space.
Examples showing how to use all of these actions are available or linked below.
Start an Application (New Form)
In a customer-focused role such as a relationship manager, it helps to be able to provide services to your busy customers that make their lives easier. Workspaces includes several features aimed at reducing friction in the application process. One of these is the New Form action which allows you to kick-start applications on behalf of your customers.
The New Form action allows you to start a new application for a customer and fill in all of the application details that you know, accelerating the application process. You can work with your customer to enter all the necessary details, and then submit the application when it's ready.
An application started using the New Form action can only be accessed by an authenticated user; that is, a user who is logged in to Journey Workspaces or a Temenos Journey Manager system. However, many applicants are anonymous or unauthenticated users, starting an application from an external website such as an online banking website, and so will not be able to access an application started with New Form.
Handover of applications between authenticated and anonymous users is possible but may not be offered in an out of the box Temenos Journey Manager solution. If application handover is important to you, contact your Temenos Journey Manager representative to discuss how your solution can be customized to allow application handover where you need it in your application workflow.
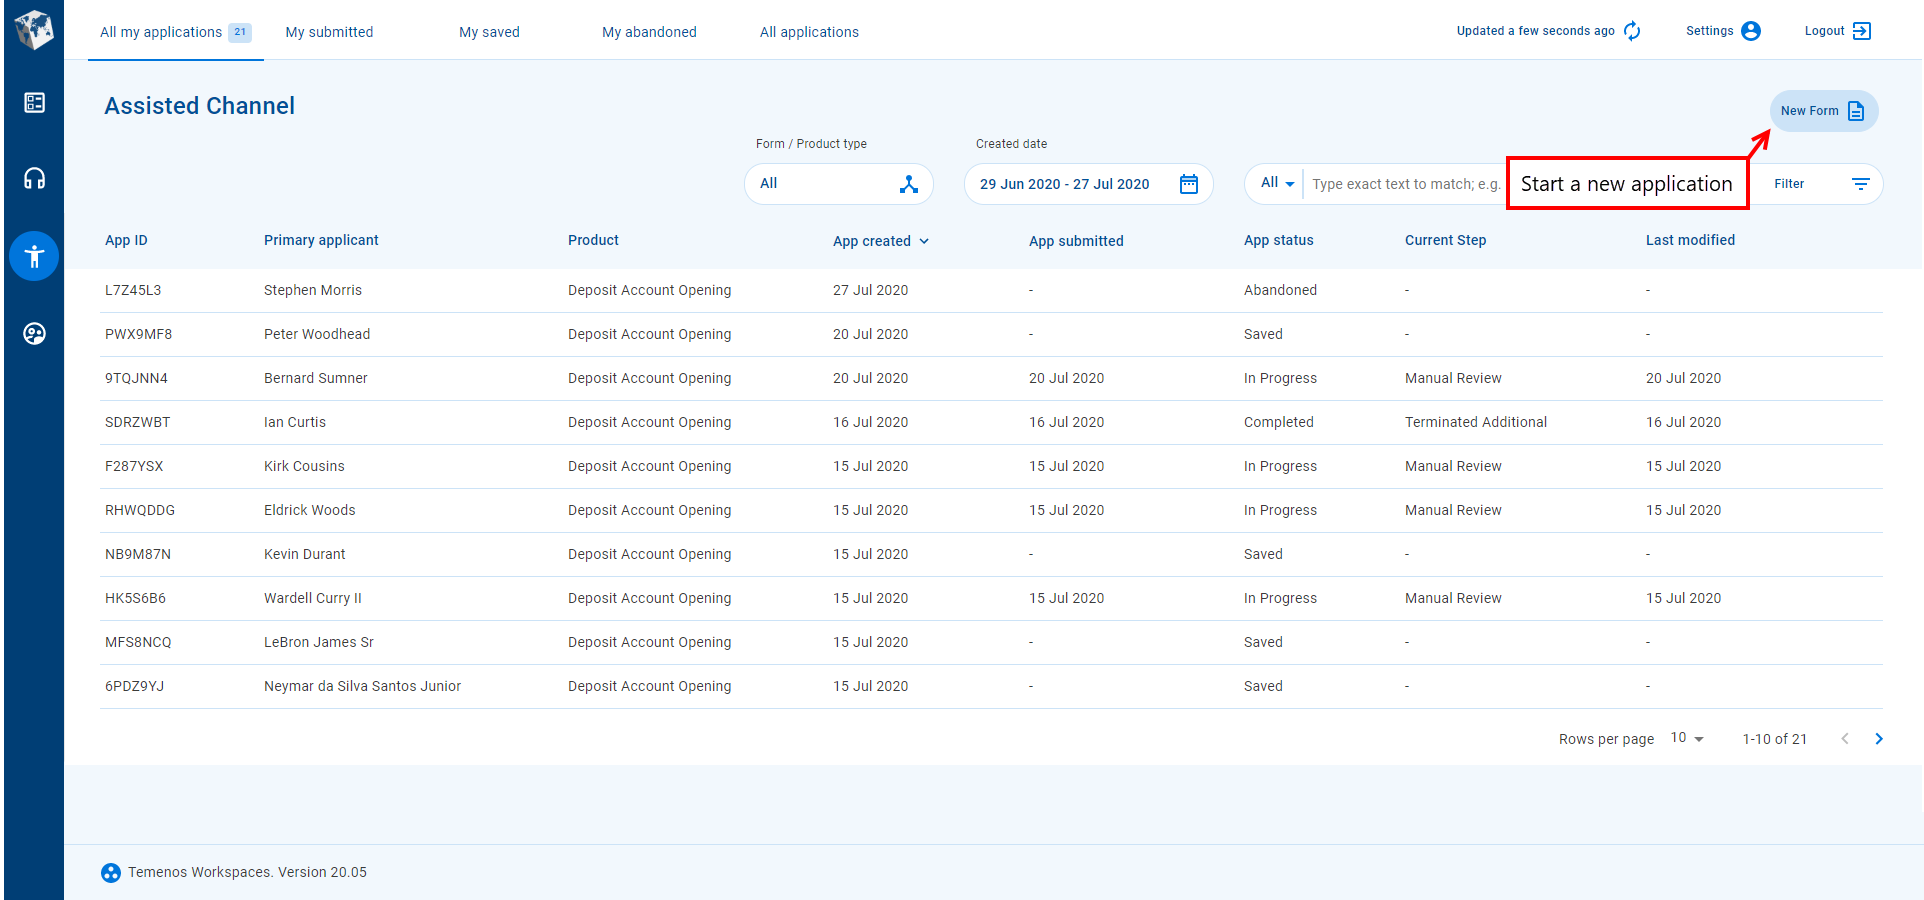
The New Form button is available in the top right corner of the Assisted Channel space's List screen. When you click New Form, a menu appears showing the list of available form / product types. Select a form / product type to display that form and start filling in the application. When you're finished filling in details you can save the application so that you can continue it later. For details about how to continue an application, see View a Form.
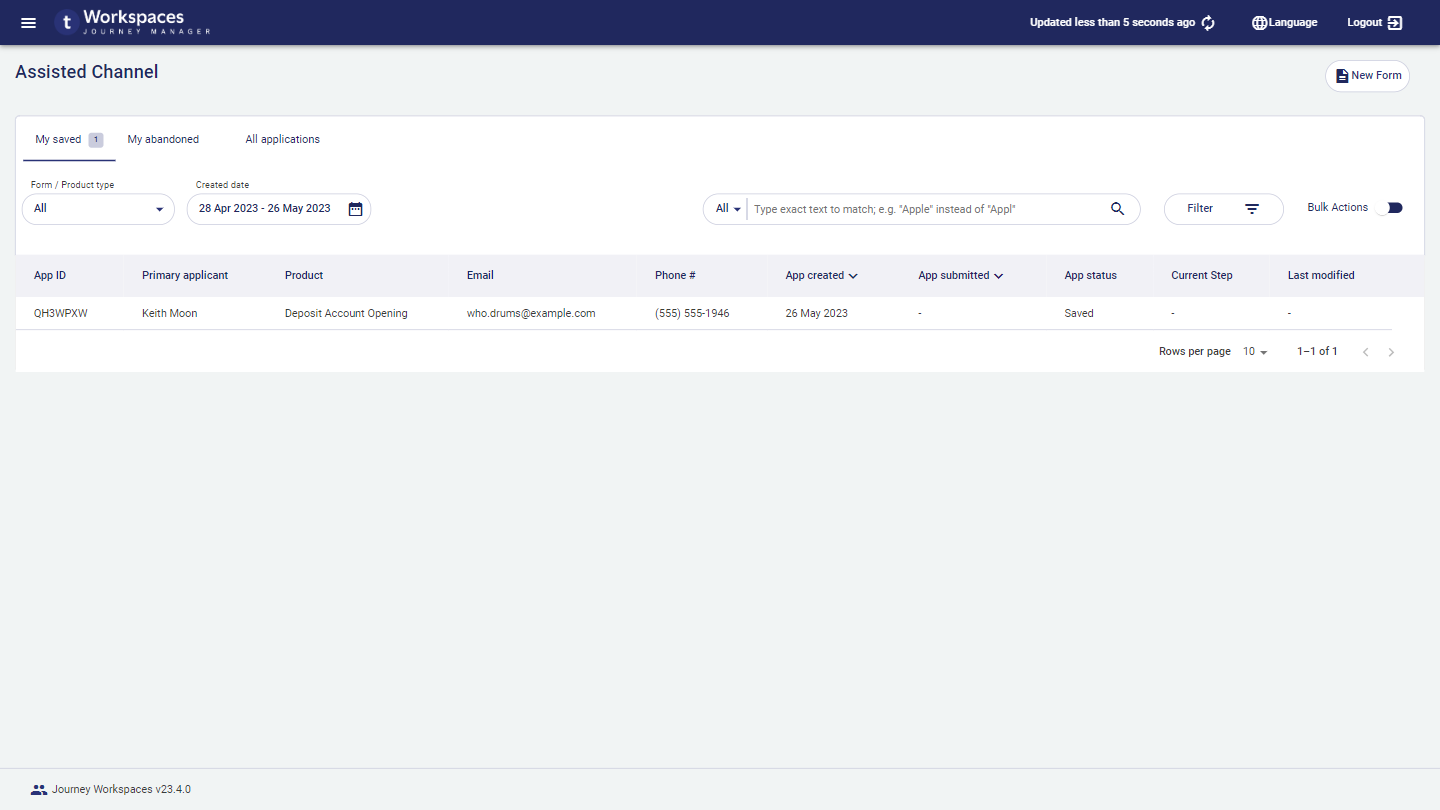
Applications you start in this way appear in your item list in the Assisted Channel space. This makes it easy for you to find an application to continue entering details, and then to monitor progress of the application's tasks once it has been submitted. While the application is yet to be submitted, the application's status is Saved and the submitted date is blank. Once the application has been submitted, the View Form action is no longer available and you can make no further changes to the application.
Action Examples
Let's go step by step through some examples to demonstrate how you can use the assisted channel actions to provide better customer service.
There are examples for the following actions below.
- Start an application on the List screen
Step-by-step examples are also available for other actions that you may find useful while assisting customers with applications.
- View a receipt on the (Helpdesk) Details screen
- View all notes for an application on the Details screen This feature was removed in the 23.04 release
- View a saved application form on the (Helpdesk) List screen
- Upload a document on the Details screen
- Recover an abandoned application on the (Helpdesk) List screen
- Withdraw an unsubmitted application on the Details screen
Start an Application
This example shows you how to kick-start an application on the List screen. In this example, we know some customer details which are entered before saving and closing the application.
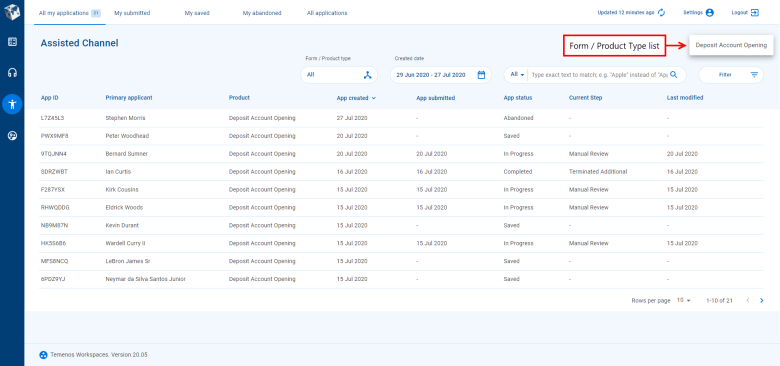
- Login to Workspaces and select the Assisted Channel space. The List screen is displayed.

- Click New Form, then select an item from the form / product type list. In this example, there's only a single form / product type, Deposit Account Opening, so we'll select this item.
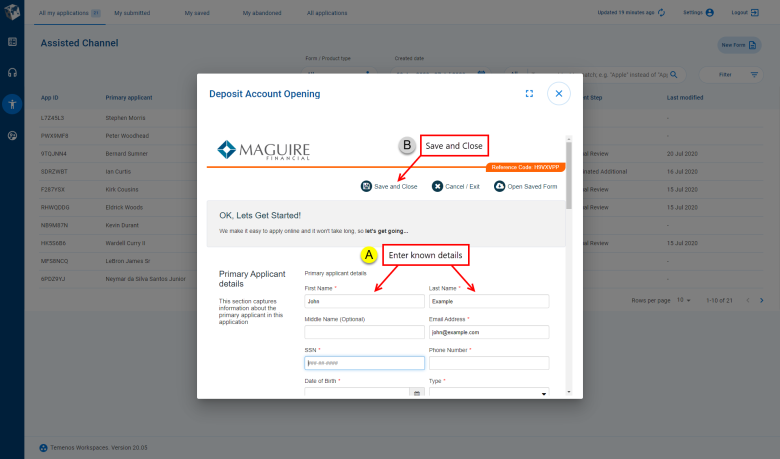
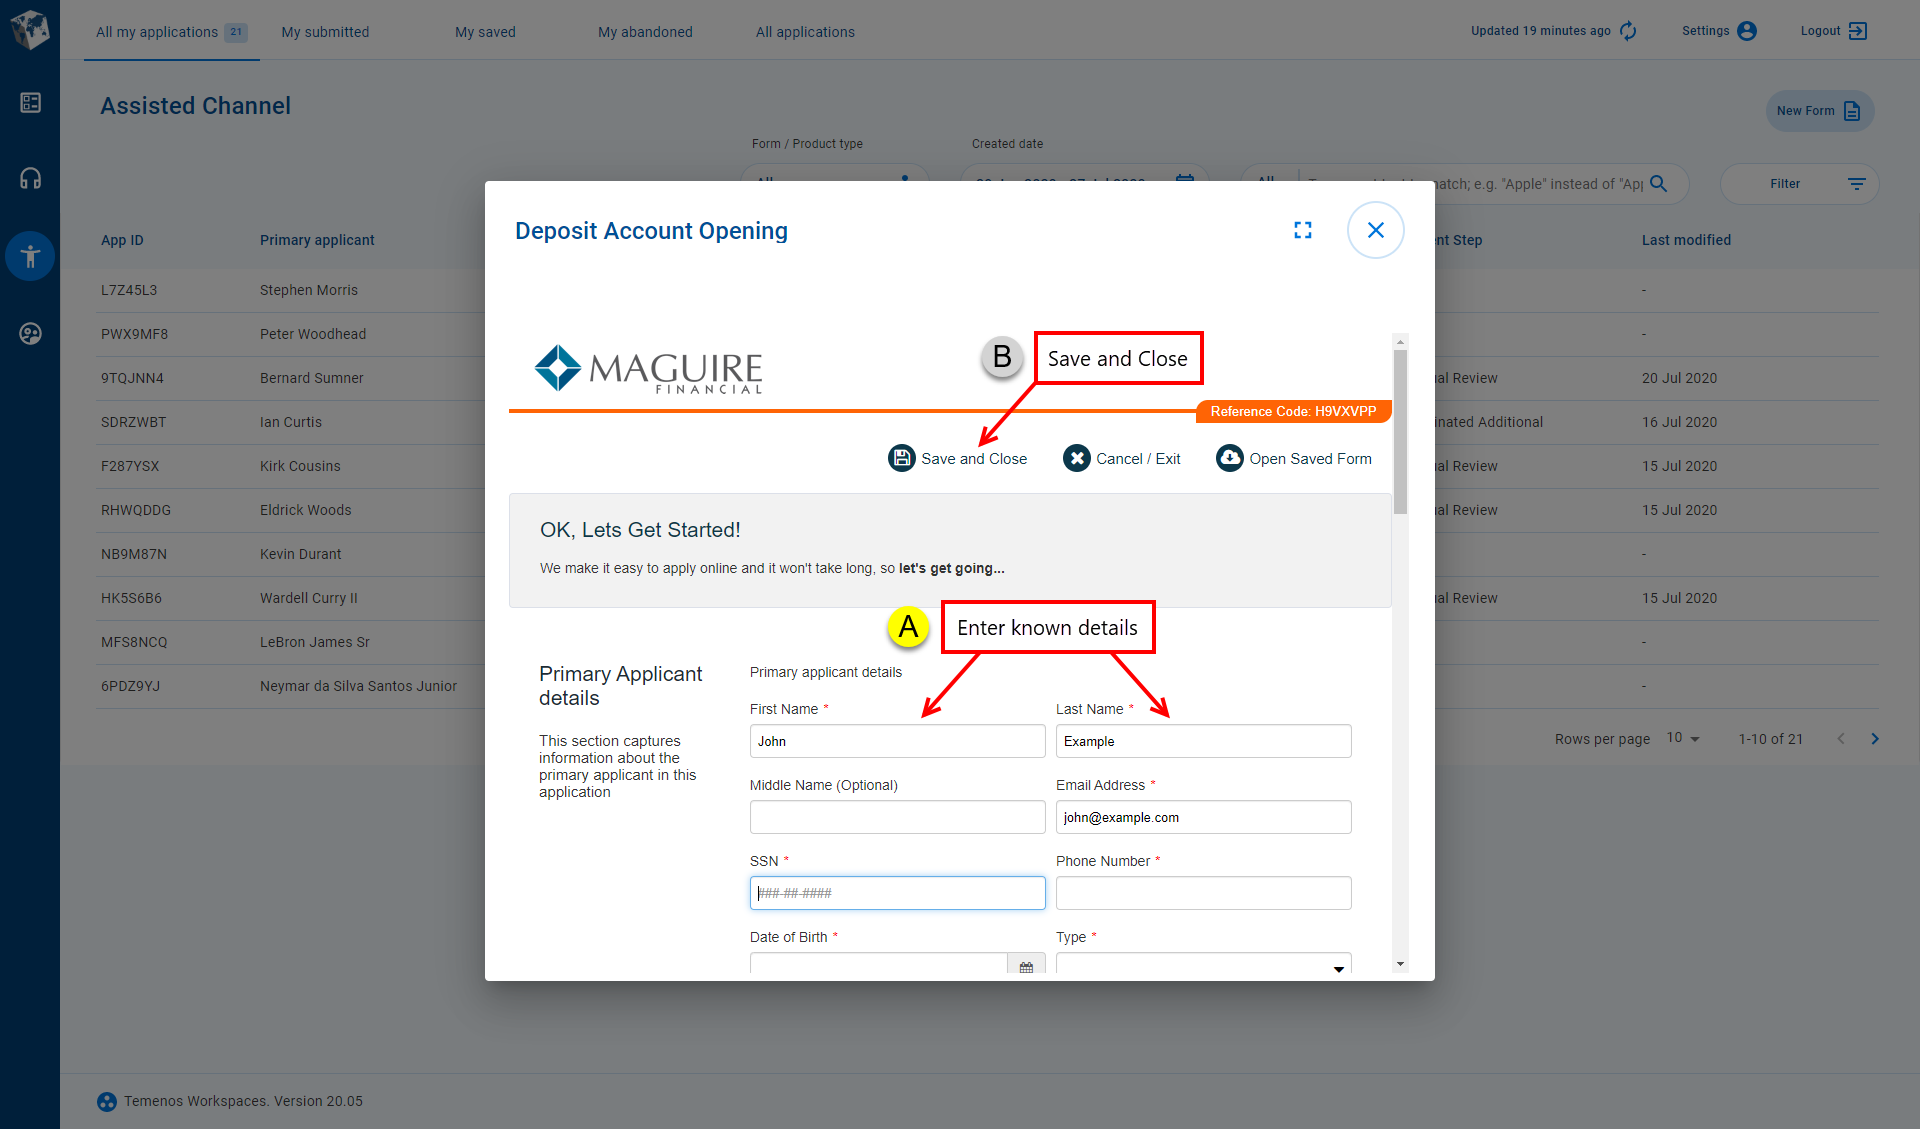
- A window opens containing the new form. Enter the known customer details, name and email address, then click Save and Close.
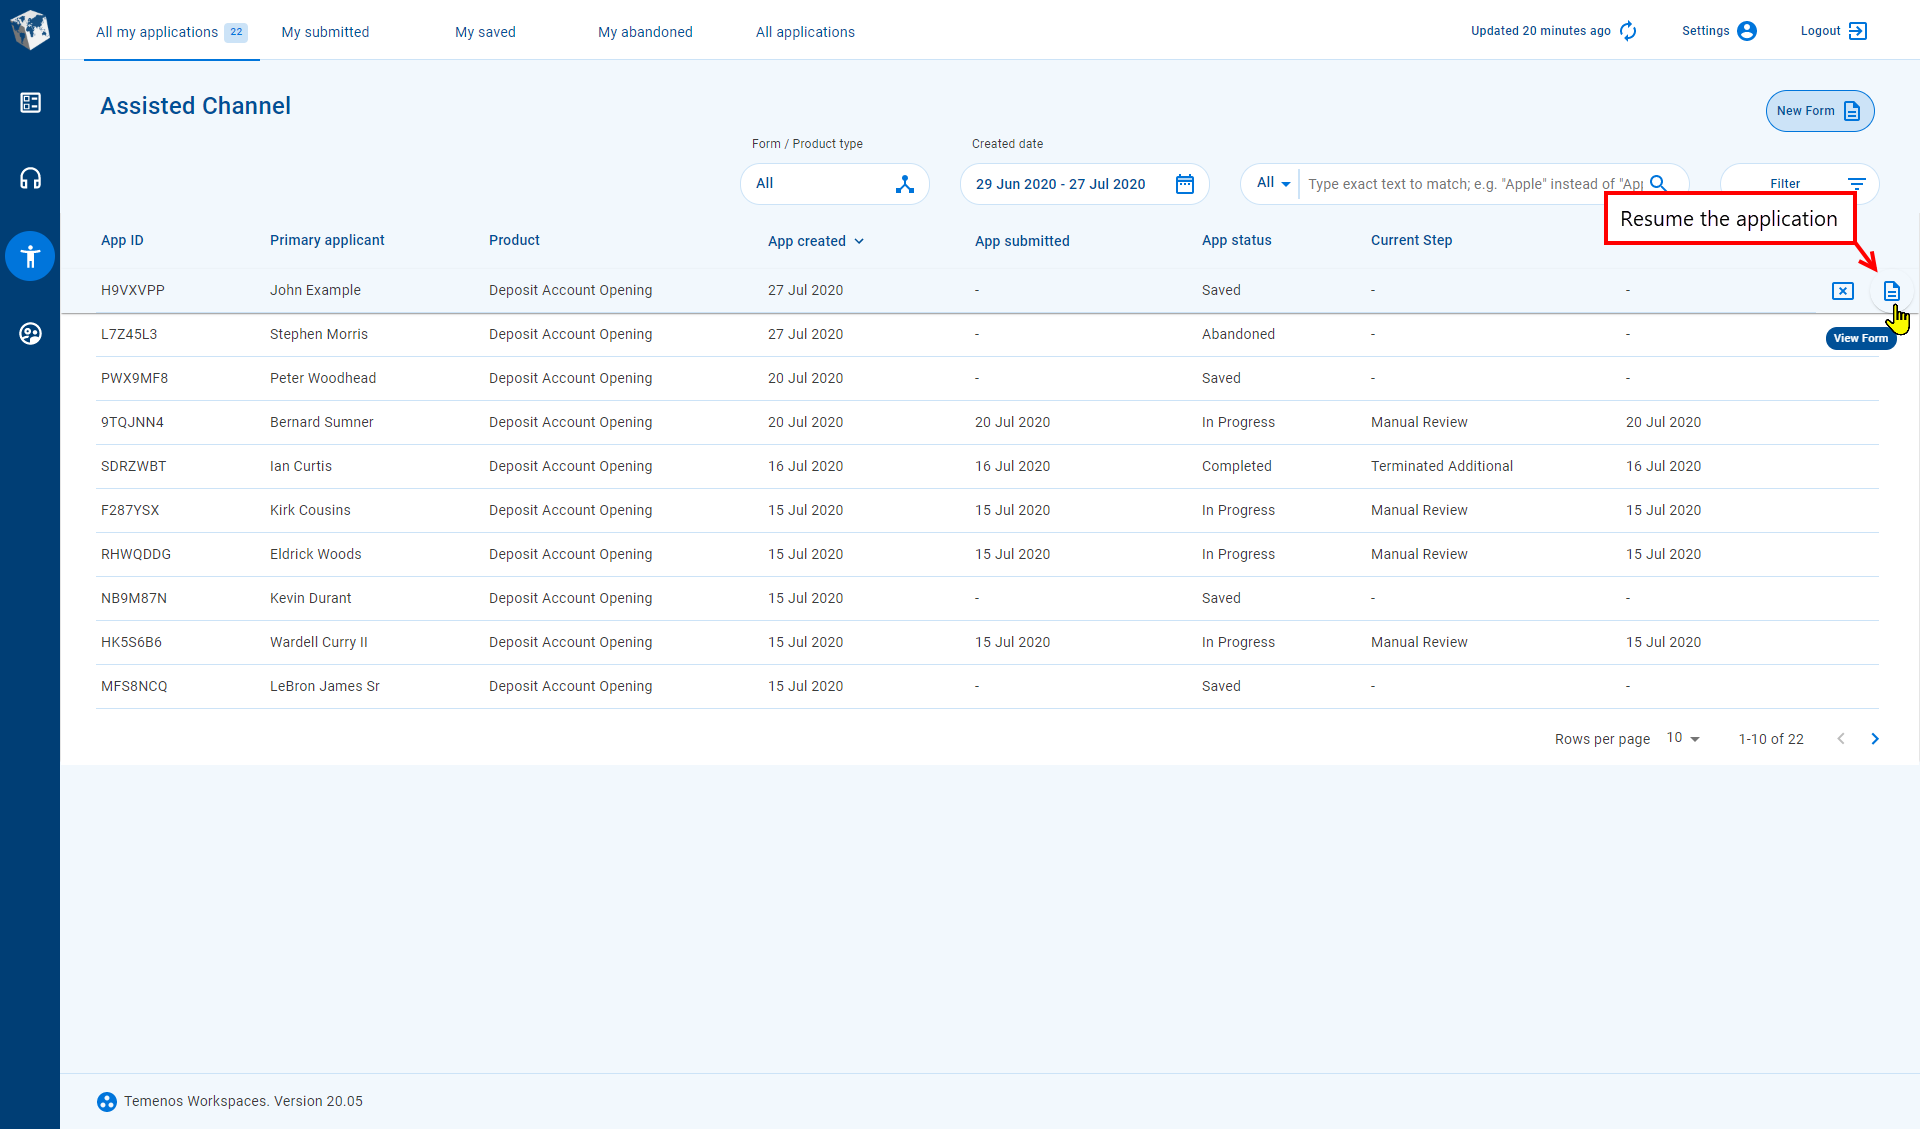
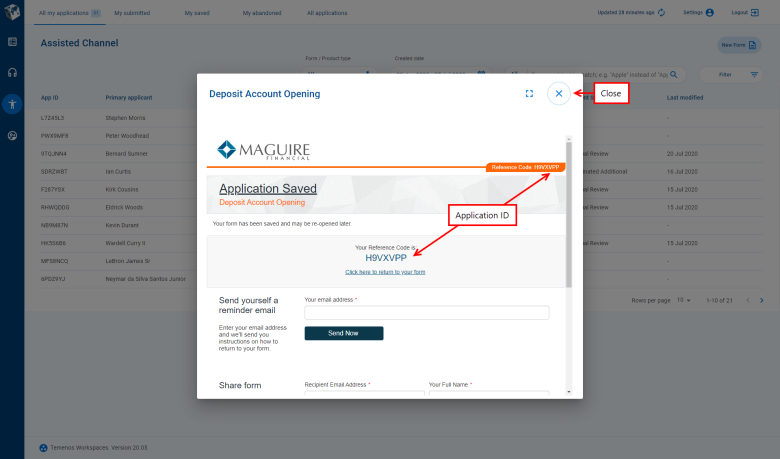
- The application ID, "H9VXVPP", is displayed. Click to close the form and return to the List screen.
- The new application, with application ID "PFFP7NZ", appears at the top of the list, and its status is Saved. If you can't see the new application, click to refresh the information shown on the page.
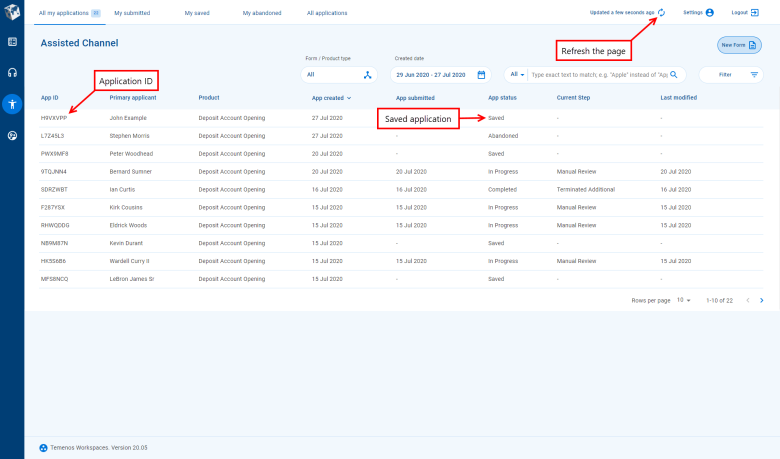


Once the application has been saved, anyone assigned to the task can use the View Form action to resume the application later. Also, if the customer has received a save confirmation email, this will include a link they can click to resume the application.
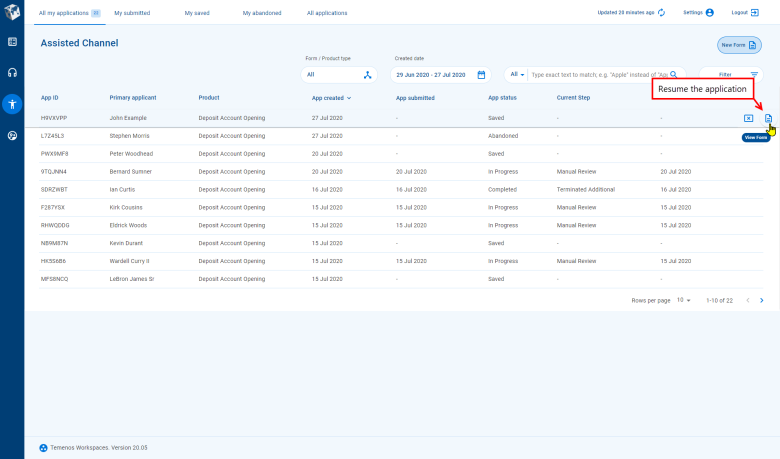
To resume the application using the View Form action:
- Locate the saved application. It's at the top of the list, but if it wasn't we could search for our application ID to find the task. In the box, type our App ID "PFFP7NZ", and just one task is found.
- Point your cursor at the item list item for our saved application – the available actions appear at the right-hand side.
- Click to re-open the form and continue filling in the application.
- When you're done, click Save and Close again, or Submit if you're ready to submit the application.