View Project Details
MaestroThe UI design product. | Form Builder | 21.05 This feature was updated in 21.05.
Journey Maestro allows you to view project details as well as update some of its configuration. You may need to do this after the project is created. For example, you may want upgrade your project to the latest Maestro's release version so you can start using the latest product's features.
To view the project details:
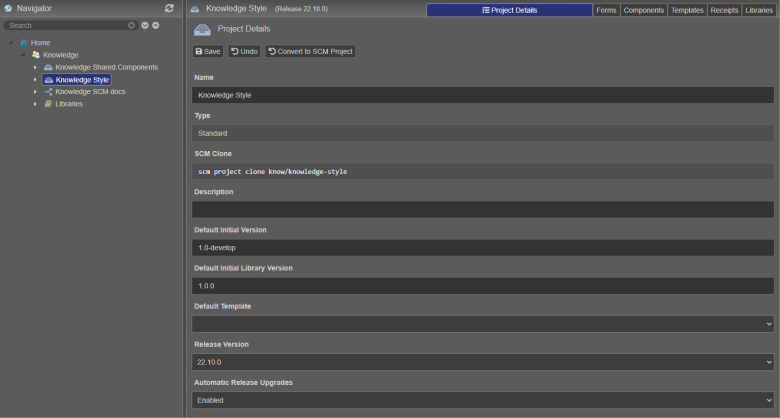
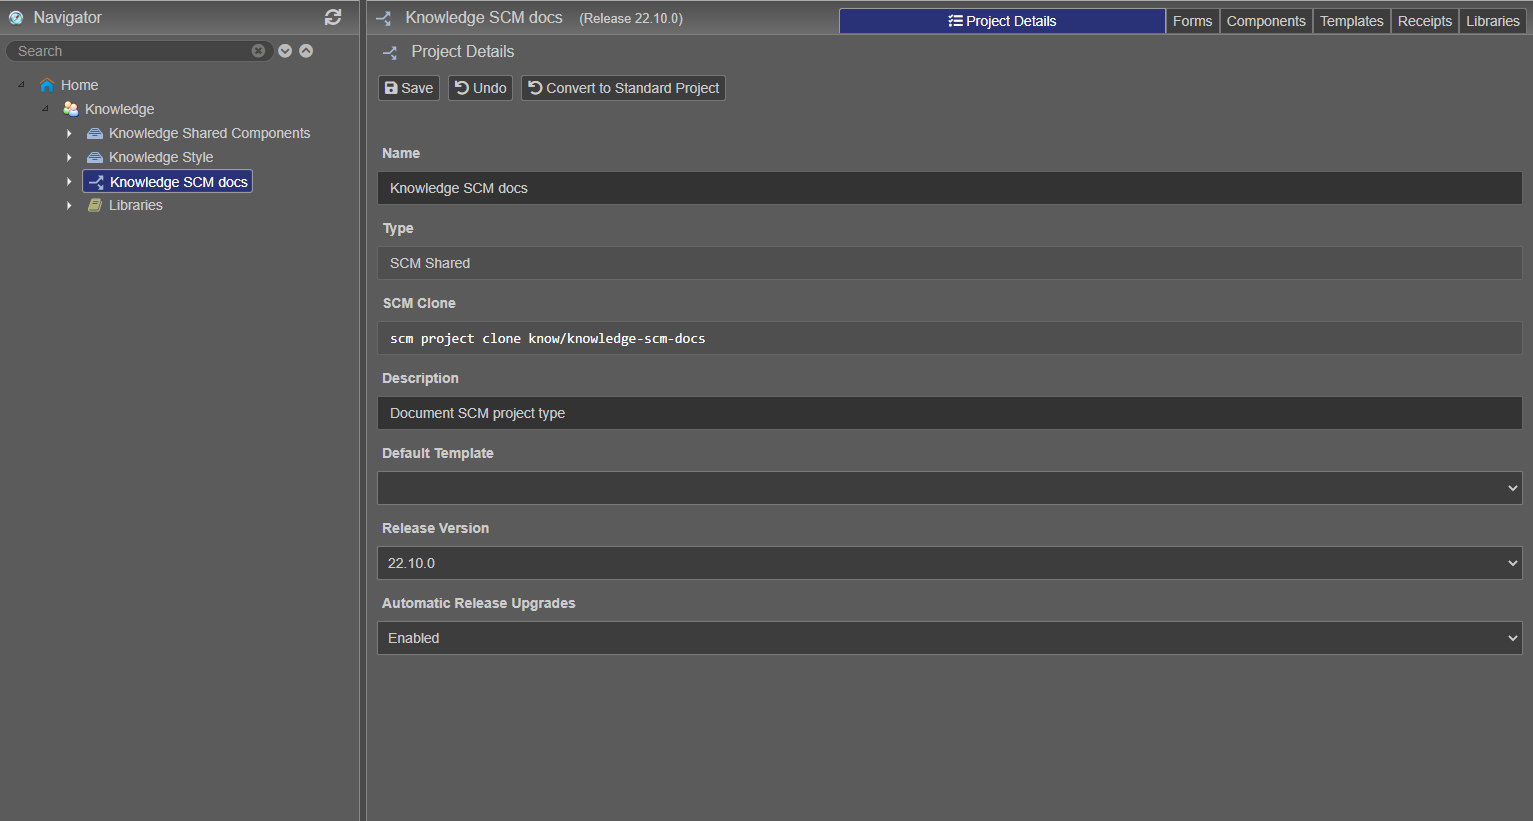
- Open a project in the Navigator pane and select the Project Details tab to view project configuration. The configuration is slightly different for the Standard and SCM projects as shown below:
Standard Project
SCM Project

- Check the current Maestro version used by the project. In this example, it is Release 22.10.0.
- Edit a project name in the Name field.
- Check a project type in the Type field, which can be one of the following:
- Standard - a source code of the project is managed by Maestro
- SCM - a source code of the project is managed externally using various SCM, such as GitGit is a version control system for tracking changes in computer files and coordinating work on those files among multiple people. It is primarily used for source code management in software development,[8] but it can be used to keep track of changes in any set of files.. Use this project type if collaborative work on a project is required.
Note The SCM project type doesn't have any impact on the content of forms. It only affects the versioning options shown in the Management Dashboard.
Note If you are a Form Builder, you need to have the SCM permissions assigned to you.
- SCM Private - same as SCM but only project owners and Maestro administrators have access to projects of this type.
Note This type is available only when the project is created with the
scm project addcommand.
- Copy a command from the SCM Clone field and copy it to your SCM tool to clone the project, for example,
scm project clone know/knowledge-style. - Provide a meaningful project description in the Description field.
- Select a version from the Default Initial Version dropdown list, which is used as a base version when new forms and form versions are created. You can change this value at any time, but this only impacts new forms and assets within this project. Version numbers of existing forms are unaffected.
- Select a template from the Default Template dropdown list, for example, Avalon Form Template.
- Select a Maestro version from the Release Version dropdown list to upgrade the project manually. You have to do it when the Automatic Release Upgrade setting is set to Disabled, see below, or then Maestro is upgraded to a major version.
- Select one of the following options from the Automatic Release Upgrade dropdown list:
- Enabled - to upgrade the project automatically, meaning whenever Maestro software is upgraded to a new, minor release, the project is automatically upgraded as well, for example, from 21.10.2 to 21.10.3. However, this feature only applies to minor releases. If Maestro is upgraded with a major release, projects always need to be manually upgraded. This is the default option and we recommend using it.
- Disabled - to upgrade the project manually.
- Click Save to update the changes.
- Click Undo to discard the changes.
- Click Convert to SCM Project to convert the project from the Standard type to the SCM type so you are able to manage its source code using your Source Code Management tools.
- Click Convert to Standard Project to convert the project from the SCM type to the Standard type so you can use Maestro functionality to manage versioning.

Next, learn how to view project's assets and resources