Organization Set-up
MaestroThe UI design product. | Form Builder | All versions This feature is related to all versions.
For a new organization or a new project in the existing organization, you must ensure that the organization is set up correctly. You have to do it only once. This step is very important as it provides many benefits in the long run. The set-up is all about creating the number of projects that constitute the structure within the organization:
- Shared Components Project - this project is used for creating and maintaining shared components
- Style Project - this project is used for template styles and all shared components' styles
- Shared Components Library - this organization-level library is used for all artefacts developed in the Shared Components project
- Style Library - this organization-level library is used for all artefacts developed in the Style project
The recommended organization structure is shown below, where the numbers correspond to the step-by-step instruction described in this topic:
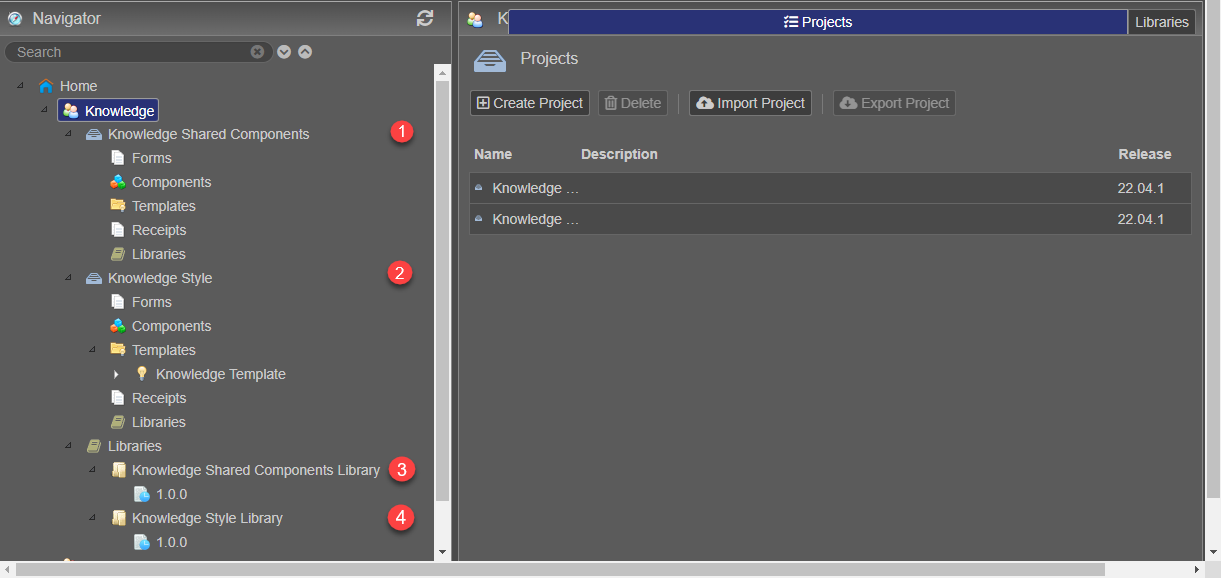
This structure enables you to build and maintain application forms efficiently. Maestro doesn't enforce this structure, so it is up to you to implement the best practice and we strongly recommend doing so. For more information about organization structure and resource management, see Maestro Organizations overview.
To set up the organization structure:
Step 1: Create the Shared Components Project
- Open your organization.
- Create a project and name it as Your Organization Name followed by Shared Components, for example, Knowledge Shared Components.
- Open the new project folder and select Libraries to list the default libraries, along with a custom project library.
- Select the custom project library, for example, Knowledge Shared Components Library and click Delete.
Note You do not need the project library for the Shared Components project because you will be publishing the project's artefacts to an organization library. This is a very important step as it prevents a lot of errors and confusion in regards to published shared components.
Step 2: Create the Style Project
- Open your organization.
- Create a project and name it as Your Organization Name followed by Style, for example, Knowledge Style.
- Open the new project folder and select Libraries to list the default libraries, along with a custom project library.
- Select the custom project library, for example, Knowledge Style and click Delete.
Note You do not need the project library for the Style project because you will be publishing the project's artefacts to an organization library. This is a very important step as it prevents a lot of errors and confusion in regards to published shared styles.
Step 3: Create the Shared Components Library
- Open your organization.
- Create a library within the organization.
Note This is the organization level library, not the project level library.
- Name the library as Your Organization Name followed by Shared Components Library, for example, Knowledge Shared Components Library.
Step 4: Create the Style Library
- Open your organization.
- Create a library within the organization.
Note This is the organization level library, not the project level library.
- Name the library as Your Organization Name followed by Style Library, for example, Knowledge Style Library.
Now, your organization has been set up correctly. We recommend spending some time on creating templates, shared styles and components before you start creating the form projects. Forms projects are used for creating and maintaining business specific application forms and resources, which are not meant to be shared. So, if you are ready to move to the form development, go ahead and create form projects as required.
For more information, check the Projects Best Practices video.
Next, learn how to view organizations.