Edit Languages
MaestroThe UI design product. | Form Builder | 23.04This feature was updated in 23.04
Maestro allows you to translate form's elements into different languages, including right to left languages. After you added a new language, you need to populate its dictionary with translated version of all labels and messages.
When you drag and drop a new component on a design or add a field to a component, Maestro automatically adds these elements to dictionaries of the default and all other configured languages. This means that you have to update or provide new translations for these new elements, even though it has been previously translated. You also need to edit the language dictionary as requirements for a customer onboarding journey change.
To edit a language dictionary:
- Open a form in the Maestro editor and click Translation.
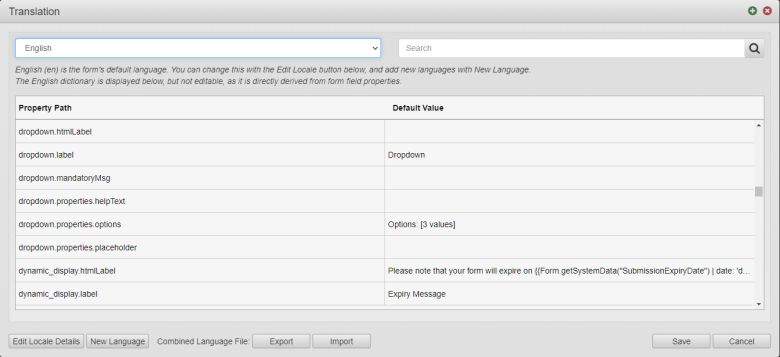
This open the Translation window with the default language selected, for example, English. The Translation windows lists the following details:
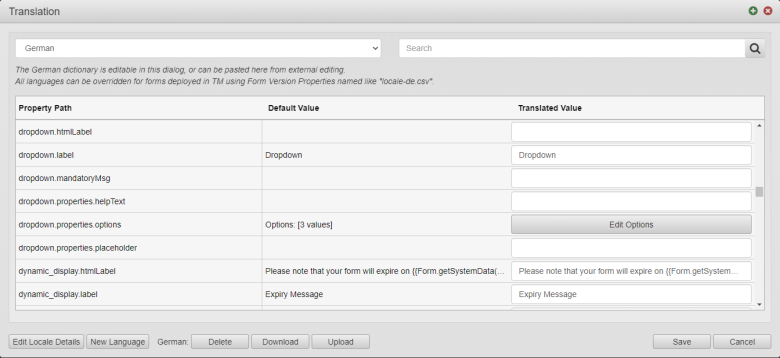
- Property Path - a unique identifier of a property within the design, which can be translated.
- Default Value - a default value of the property, which is rendered on a form for the default language, for example, English.
- Translated Value - a translated value of the property for the selected language, for example, German.
Note If you have a component selected when you click Translation, the list is scrolled to the Property Path of the selected component. The scroll position remains as you switch between languages.
Note Some UI options, such as Export, Import, Download and Upload, are shown only when there are more than one language configured for the design.
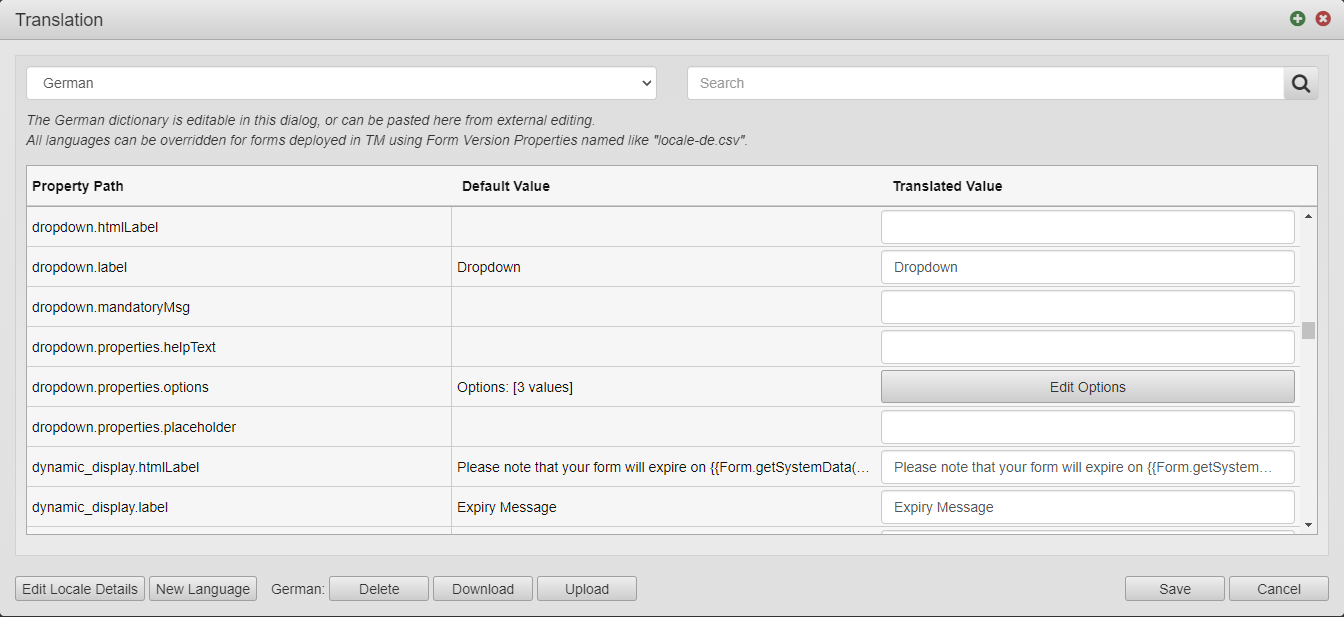
- Select a language from the dropdown list to switch between multiple languages.
- Type a part of a property path name or a text of a label or a message and click Search to find a property to want to edit. Alternatively, you can scroll to a property you need.
- Edit the property's value.
Note You can copy and paste values from one property field to another as long as the text is shorter than the field it is displayed in. | 23.04 This feature was introduced in 23.04
Note You are not able to edit the default language, as it is directly derived from the form's component properties.
- Click Save to save the changes.

Updating each property manually to populate a new language dictionary for the first time can be a daunting task. The Maestro editor allows you to export a new dictionary to a file so you can share it with a translator who professionally converts its content from one language to another. Then you import this file into a design and do small edits as needed. | 18.05 This feature was introduced in 18.05.
Export a Language Dictionary
To export a language dictionary using a CSV file:
- Open a form in the Maestro editor and click Translation.
- Click Export to export all form's language dictionaries as a CSV file, for example,
locales.csv. -
Alternatively, select a language of a form's translation from the dropdown list and click Download to export that language dictionary only. The CSV file will include only the selected language, for example,
locale-de.csv.Note Use this option to configure form's translation in Manager.
- Open the downloaded CSV file in a CSV editing tool, such as MS Excel. The file has the following format:
- 1st column - named as Property Path or System Path - the labels and messages of the design, for example,
addressLine1.label. - 2nd column - named as Default Value or Base Value - the default language of the default locale, which is English, for example,
Address Line. - 3rd column - named as locale-xy - a translated language, for example,
locale-defor German. - Other columns - other translated languages.
Note 4th, 5th, etc. columns are only present if you clicked the Export button.
Note If the translation has not been provided yet, then the default language is used as a placeholder.
- 1st column - named as Property Path or System Path - the labels and messages of the design, for example,
- Update the language dictionary in the corresponding column of the file. For example, provide German translation for
Address Line 1andAddress Line2:addressLine1.label,Address Line 1,Adresszeile 1 addressLine2.label,Address Line 2,Adresszeile 2Note Maestro doesn't support multiple sheets in a single workbook, so when you edit the CSV file, don't create multiple sheets.
- Save the CSV file. The name of the file is not important but the file type (CSV) is.
Note If the new language translation uses non-ASCII characters, you need to save the CSV file as UTF-8.
Now, as you have populated the translation file, you can import or upload it.
Import a Language Dictionary
- Open a form in the Maestro editor and click Translation.
- Click Import to import the form's translation as a CSV file. Maestro shows a confirmation message that a multilingual file was imported.
- Alternatively, select a language of a form's translation from the dropdown list and click Upload to import that language dictionary only as a CSV file, for example,
locale-de.csv.Note Use this option to configure form's translation in Manager.
-
Select a language from the dropdown list to work with.
- Click Save to save the translation.
Next, learn how to mark for translation.