Custom Theme Option
MaestroThe UI design product. |
Template Designer  Form Builder | 21.11
This feature was updated in 21.11.
Form Builder | 21.11
This feature was updated in 21.11.
Maestro allows you to create a new custom theme options in a template, so you can add new variables and use them across various styles to improve usability and maintainability of your templates and forms. Usually, a Template Designer creates new theme options in a template as there may need to be some UI design and considerations done prior to that.
Before you create a new variable, we recommend checking the list of existing variables to see if there is one that suits your needs.
View Custom Theme Options
To view custom theme options in a template:
- Open a template in the Maestro editor.
- Click Brand in the Maestro toolbar.
- Click Custom Theme Options to see the list of all custom theme options created in the template.
.
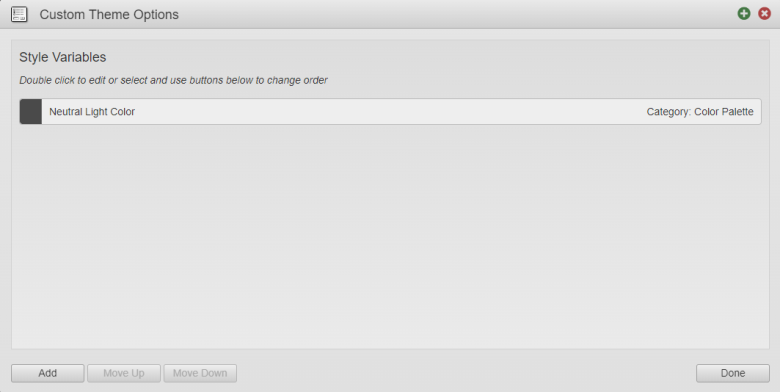
- Double-click a style variable from the list to open it in the editor. For more information, see how to create a custom theme option.
- Click Move Up to change the order of the precedence of the selected theme option by moving it up.
- Click Move Down to change the order of the precedence of the selected theme option by moving it down.
- Click Done to save the changes.

If you don't see variables you need, you can create a new theme option.
Create Custom Theme Options
To create a custom theme option in a template:
- Open a template in the Maestro editor.
- Click Brand in the Maestro toolbar.
- Click Custom Theme Options and then click Add to create a new theme option.
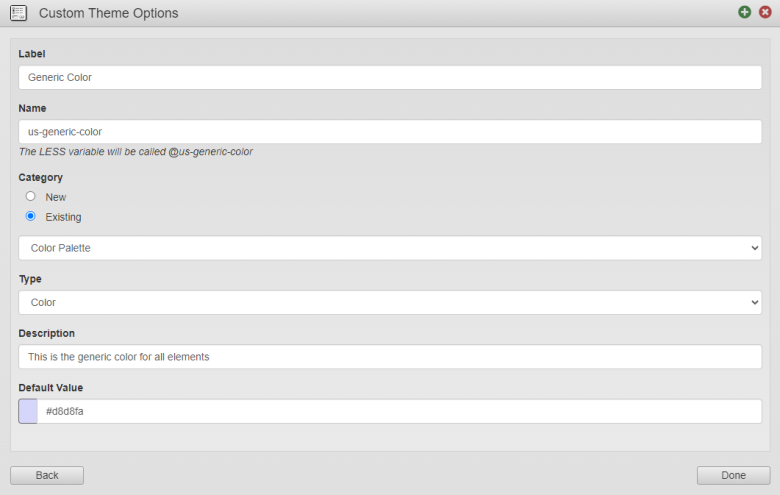
- Enter a meaningful name for the theme option in the Label text field.
Note Try to create more generic theme options so they can be used in various styles or parts of a style, for example, Neutral Light Color.
- Correct a variable name in the Name text field. The Maestro editor auto-generates this name based on the label you have entered above, but you can change it as necessary.
- Select a category under the Category section that can be:
- New - to create a new category
- Existing - to select from the list of existing categories, which can be one of the following:
- Navigator
- Layout
- Fonts
- Color Palette
- Fields
- Buttons
- Select a variable type from the Type dropdown list, which can be one of the following:
- Text
- Color
- Pixels
- Enter a meaningful description in the Description text field.
- Provide a default value in the Default Value text field.
- Click Done to save the changes.

The new theme option should appear in Theme Options under the category you have selected. Now, you can use it in styles of your components. It's important to understand that you don't really publish new variables so they will become available in styles. Instead, you publish the template, which defines the variables, and you publish shared styles, which use these variables, to the organization-level stye library. For more information, see organization structure.
Next, learn how to configure item properties.