Journey Space Help Desk
Journey Manager (JM) The transaction engine for the platform. | System Manager / DevOps | All versions This feature is related to all versions.
Journey Space comes with the Help Desk tab that allows you to search for forms that have been saved, completed, or abandoned by users.
By default, the Help Desk is not shown to authenticated users and doesn't display any forms. You have to configure the following role permissions in Manager to allow users to use it:
- Assign the Work Space Staff role to the users so they can see the Help Desk tab in their work space.
- Make sure they have the Help Desk View permission so they can view the Help Desk tab.
- Assign the Help Desk Authenticated Edit permission to the users so they are able to work with customers' transactions.
You can customize the help desk page according to customer's requirements. It is often the case for companies with large transaction volumes, when special configuration needs to be performed to be able to filter form submissions within their form space help desk page:
- The user can filter the help desk list by a date range using the Last dropdown. | 18.05 This feature was introduced in 18.05.
- The user can filter the help desk list by form.
- The user can filter the help desk list by form group, for example, to include authenticated users.
- The Help Desk page doesn't automatically load form submissions when it's displayed first time, so the user can revise the filters first and then click Go to fetch the required transactions. This is particularly useful for system with large volumes of transactions.
To demonstrate the recommended configuration, consider the following examples for anonymous and authenticated user form submissions.
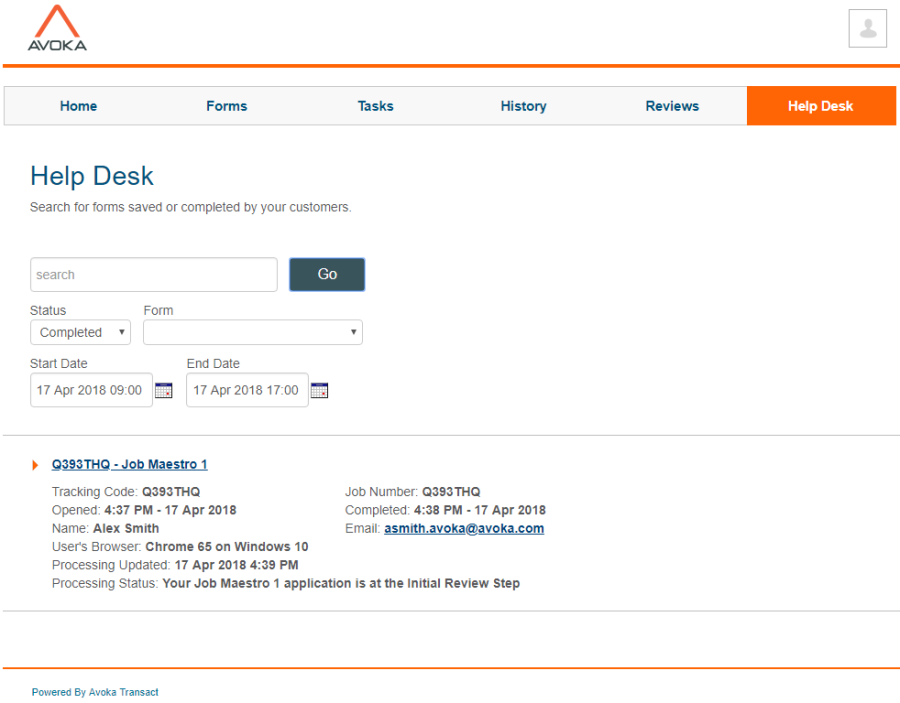
Anonymous Users Only
Help desk users often check specific transactions and enter their tracking code in the search box and the click Go. To limit the volume of displayed transactions, you can use these filtering options:
- Enter a complete transaction's job number, tracking code or one of the data extract fields in the search text field. By default, any saved forms are listed.
- Select a transaction status from the Status dropdown list to see the forms that were saved, completed or abandoned.
- Specify a date range from the Start Date and End Date. A Start Date must be selected before any submissions are displayed.
- Select a form name from the Form dropdown list.
- Click Go to fetch the list of transactions, as shown below.

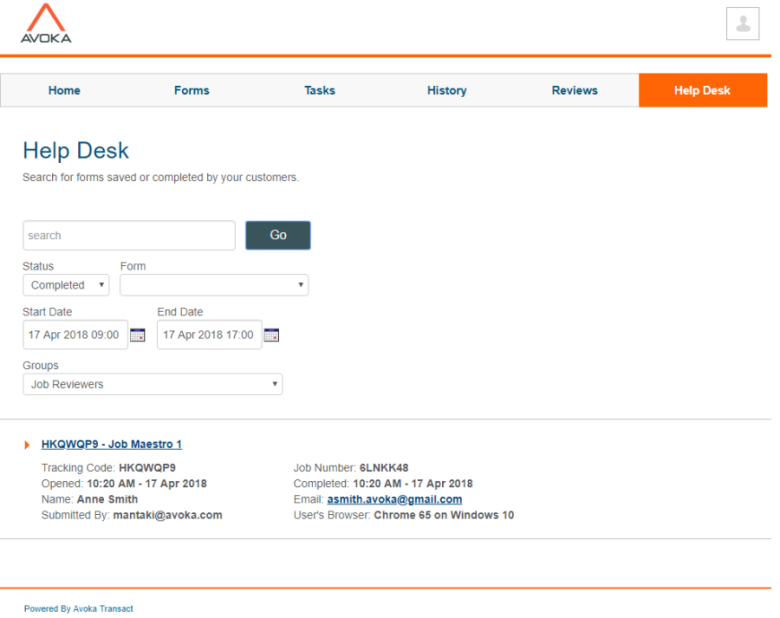
Anonymous and Authenticated Users
You can configure the help desk page to include submissions from authenticated users. This allows help desk users to narrow down their searches with the Groups filter. To limit the volume of displayed transactions, you can use the filtering options explained above with this additional option:
- Select a group from the Groups dropdown list, which has the following options:
- Blank to search for forms that are not assigned to any group. This is the default option.
- [ All Groups ] to search for forms that belong to all form groups.
- An individual form group name for forms that belong to a specific form group.
- Click Go to fetch the list of transactions, as shown below.

Next, learn how to update account settings.