Assign Users to a Role
Journey Manager (JM) The transaction engine for the platform. | System Manager / DevOps | All versions This feature is related to all versions.
Manager allows you to assign user accounts to a role. These users are known as role members. You can also assign role members from their individual user accounts.
You must be a Journey Manager administrator to create or configure this functionality.
After you have created a role, you can assign users to it. As an ongoing maintenance, you can assign new members or remove existing members for an existing role.
To assign users to a role:
- Select Security > Roles.
- Locate a role and click the Members tab to view role members. The Role Members column displays users that are currently assigned the selected role and the User Accounts column displays users you can assign to the selected role.
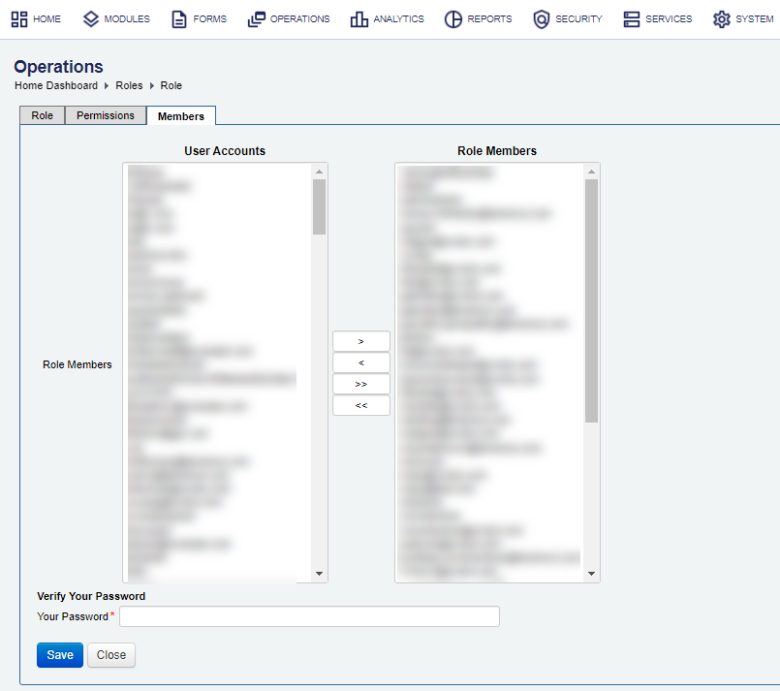
- Select one or more users from User Accounts to add them to the role or remove them from it.
Note You can use the Shift and Ctrl keys to select multiple permissions on Windows PC.
- Click > to move the selected user accounts from User Accounts to Role Members.
- To revoke any assigned user accounts, select the user accounts from Role Members and click <.
- To assign all user accounts, click >>.
- To revoke all user accounts, click <<.
- Provide your password in the Your Password field, for security reasons.
- Click Save to update the changes.
All user accounts assigned to a role are loaded when the user logs in. Any changes will be visible to users as soon as they log out and then log back into the space.
Next, learn how configure role expiry.