Field Overlay Receipts Using AcroForms
Journey Manager (JM) The transaction engine for the platform. | System Manager / DevOps | All versions This feature is related to all versions.
By default, Manager generates a PDF receipt for every completed transaction. This receipt, however, is based on the design of the completed Maestro form, which might not meet your organization's design or legal requirements. Your organization, for instance, might prefer to use PDF forms they've already designed, such as AcroFormsAcroForms are the original PDF forms technology that accepts input in both Forms Data Format (FDF) and XML Forms Data Format (XFDF). Many 3rd party vendors support AcroForms.. If this is the case, you should consider using Field Overlay Receipts.
Field Overlay Receipts allow organizations to use a PDF form as a receipt template. Then, when a transaction is completed, the customer's data is inserted into the fields of the PDF.
The advantage of this approach is that receipts will look identical to the original PDF. This means:
- They won't need to be re-approved by design or legal departments.
- No one will need to be retrained on how to process the receipts.
- The same form can be used if there is a need to partially complete it, print it out, and complete it with pen and ink.
There are, however, some potential draw-backs:
- Additional development is required to overlay the data fields over the existing PDF.
- Hide and show rules are not honored. All fields are always displayed.
- Repeats are only honored to the extent that they're repeated on the original form. The Form Designer must be careful not to allow more repeats than are presented on the PDF.
- Field lengths must be limited to ensure they don't overflow the space allocated on the PDF.
- The ability to re-design the data entry experience is limited. No new fields can be added, since there is nowhere to place them.
Despite these draw-backs, Field Overlay Receipts are an excellent option for organizations that need to move quickly and integrate Manager with their current processes, rather than adapting to Manager's way of doing things.
Getting Started
Before we continue:
- Download Adobe Acrobat Pro DC. This is the easiest software for converting a PDF form into an interactive form, which is what Manager needs to insert data into a PDF. The software requires a monthly subscription, but there is a 7-day free trial.
- Choose a PDF form to use as a receipt template. If you don't have a PDF form available, either use this example PDF from Adobe or create your own PDF in Microsoft Word.
- Create a form in Maestro.
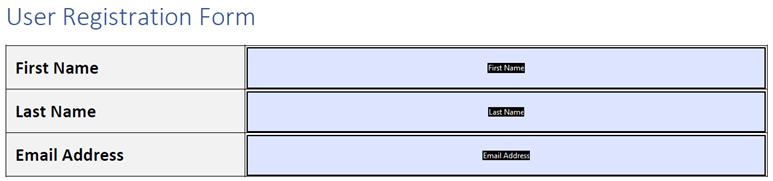
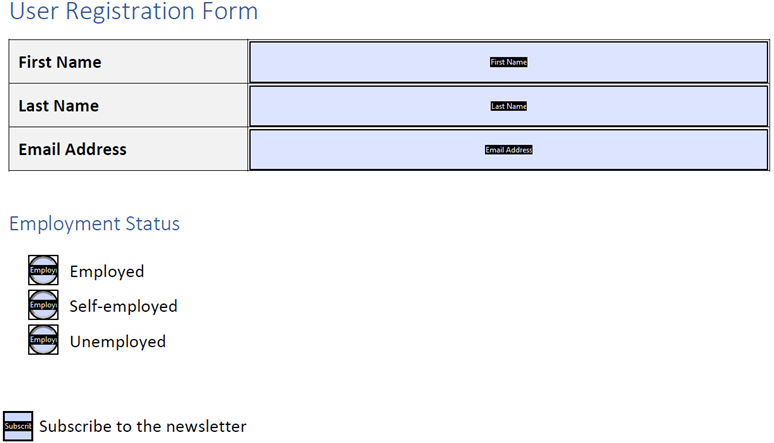
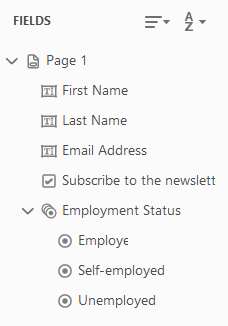
In this topic, we'll be using this Maestro form as an example:

As we can see, this form has various field types, including text fields, a radio button group, and a checkbox. This will allow us to see how different types of data can be represented in a receipt.
Step 1: Add Data Extracts to form fields
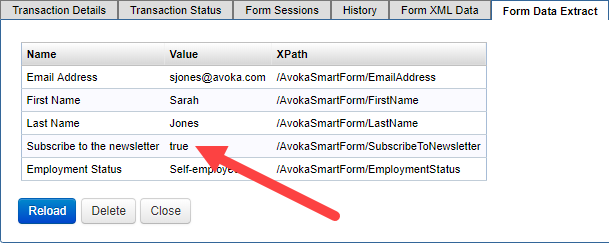
Data Extracts allow you to extract data from a completed transaction and integrate that data with external systems. One use of this feature is to transfer data from a form into a PDF file.
To implement Data Extracts:
- Login to Maestro.
- Open a form.
- Select a form field.
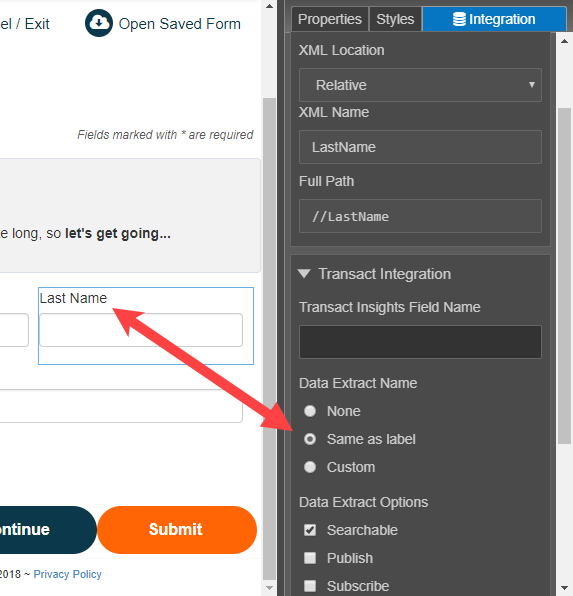
- Open the Integrations tab.
- Expand the Transaction Integration panel.
- For the Data Extract Name field, select Same as Label.
- Repeat the previous step for every field that needs to be inserted into the PDF form.
- Click Save to update the changes.
Step 2: Export the form from Maestro
- Click Build.
- In the modal that appears, click Build.
- Click Download TM Form Version.
Step 3: Publish the form to Manager
- Login to Manager.
- Navigate to Forms.
- Click Import Form.
- Upload the Form Version Archive File. This is the TM Form Version downloaded in step 2.
- Select Create a Form.
- Click Proceed to Import.
- Click Import.
Step 4: Create a fillable PDF with Adobe Acrobat Pro DC
In this step, we're going to convert a PDF into what Adobe calls a fillable PDF. This will allow Manager to insert data into the PDF file.
To do this:
- Open Adobe Acrobat Pro DC.
- Go to Tools > Prepare Form.
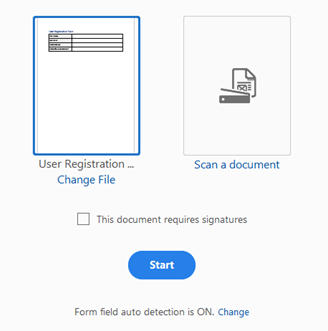
- Click Select a file.
- Select the PDF file.
- Click Start.
During this process, Acrobat will attempt to detect and create fillable form fields inside the PDF. This isn't a seamless process though, so manual adjustments may be necessary.
In this example, Acrobat recognized three text fields:
But the radio buttons and checkboxes need to be manually inserted via the toolbar.

Step 4.1: Insert a checkbox
- Click the Check Box icon in the toolbar.
- Click inside the PDF to place the checkbox.
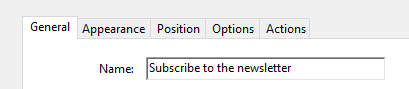
- Double-click the checkbox to open the Check Box Properties window.
- On the General tab, update the Name field. This name should match the field's label that was defined in Maestro. In this example, the label is "Subscribe to the newsletter".
- On the Options tab, set the Export Value as "true".

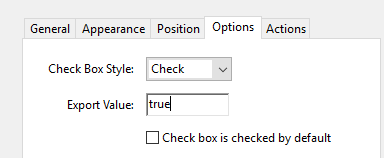
We need to set the value to "true" because this is how the value is stored in Manager. When the Export Value matches the value in Manager, the checkbox will be checked in the PDF.
Step 4.2: Insert a radio button
- Click the Radio Button icon in the toolbar.
- Click inside the PDF to place the radio button.
- Set the Group Name field to the radio button group's label that was defined in Maestro. In this example, the radio button group's label is "Employment Status".
- Double-click the radio button to open the Radio Button Properties window.
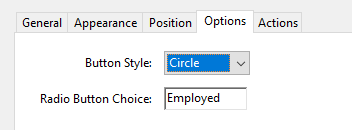
- On the Options tab, set the Radio Button Choice field to the value of an individual radio button that was defined in Maestro. In this example, the first radio button value is "Employed".
- Repeat this process for all of the form's radio buttons. In this example, the remaining radio button values are "Self-employed" and "Unemployed".

You should end up with a form that resembles the following:
The structure of the form should also be visible on the right side of the screen:
If any of the labels in this list don't match the labels in Maestro, fix them before continuing. If you have any other issues preparing the form, read the official documentation for Acrobat Pro DC.
To end this section, navigate to File > Save As... and save the form.
Step 5: Upload the fillable PDF to Manager
- Return to Manager.
- Navigate to Forms.
- Open the published form. If you have a lot of published forms, you may need to use the search feature.
- Click the Form Versions tab.
- Click the Edit Form Version icon.
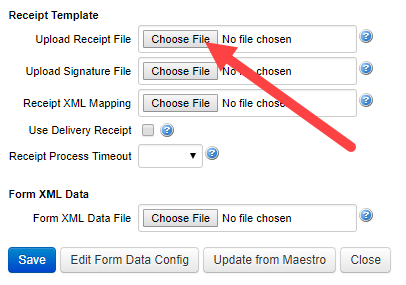
- Upload the fillable PDF file to the Upload Receipt File field.
- Click Save to update the changes.
Step 6: Configure the Receipt Render Service
Within Manager, services are used to access a range of business-related functionality on demand. One such service is the Receipt Render Service, which is used to generate PDF receipts.
To enable this service:
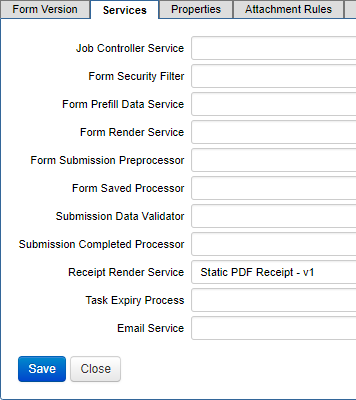
- On the Form Version page, click the Services tab.
- From the Receipt Render Service dropdown, select Static PDF Receipt v1.
- Click Save.
Step 7: Verify the results
- Navigate to the Form Dashboard.
- Click the Test Render icon for the latest form version.
- After the form loads, submit some sample data.
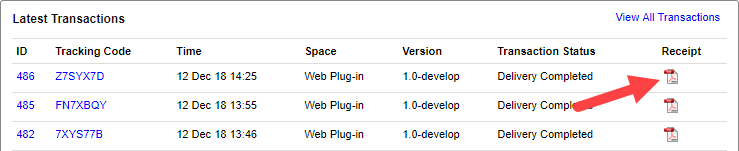
- Refresh the Form Dashboard.
- Click the View PDF Receipt icon.
![]()
The receipt should contain data from the completed transaction:

Next, learn how headers and footers are rendered.