Assign Form Spaces to an Organization
Journey Manager (JM) The transaction engine for the platform. | System Manager / DevOps | All versions This feature is related to all versions.
Manager allows you to assign form spaces to an organization to host all organization's forms and their resources. You can assign both default form spaces, as well as any custom form spaces you have configured in your journey manager environment. This determines what form spaces will be available to forms assigned to the organization. You can also assign form spaces at the form level.
You must assign the Web Plug-In form space to each organization so the Pull From Maestro button works.
To assign form spaces to an organization:
- Select Forms > Organizations.
- Locate an organization and click Edit.
- Select the Spaces tab to see all assigned form spaces in the Assigned Spaces field.
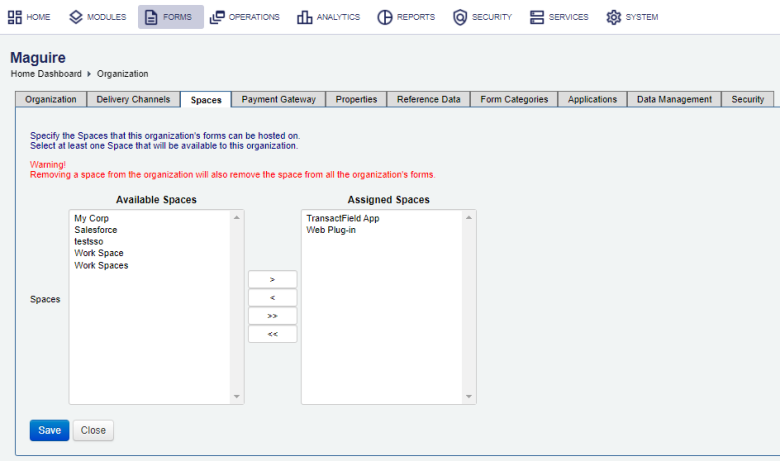
- Select one or more form spaces, which you want to assign to the organization, from Available Spaces.
Note You can use the Shift and Ctrl keys to select multiple spaces on Windows PC.
- Click > to move the selected form spaces from Available Spaces to Assigned Spaces.
- Click < to revoke the selected form spaces from Assigned Spaces.
Note Removing a form space from the organization will also remove the form space from all forms belonging to this organization.
- Click >> to assign all form spaces.
- Click << to revoke all form spaces.
- Click Save to update the changes.

You can assign or re-assign form spaces to an organization at any stage.
Next, learn how to configure an organization payment gateway.