Move Rules to a JavaScript File
MaestroThe UI design product. | Form Builder | 17.10 This feature was introduced in 17.10.
Traditionally, Maestro and other Transact tools relied on built-in code editors to create, edit, and manage Maestro business rules. However, with the move to Source Code Management (SCM) tools into the Transact platform, Maestro provides the Move Rules to JS (JavaScript) File feature, which allows you to move all selected business rules from a Maestro form to an external JavaScript file. This file can be later referenced in any Maestro form.
By default, all code in a Maestro design is created and edited via the integrated code editors. If you're using Maestro's source code management features though, it makes sense to move most of that code into one or more external JavaScript files. Then you can edit the code on your local computer, using the tools you're already comfortable with. You can also organize related rules into separate files.
You should use the Move Rules to JS File feature to create a resource that holds all required JavaScript rules for a Maestro form. This file can then be edited in any SCM tool before being referenced into a Maestro form by using the JavaScript library component from the Maestro Palette.
The Move Rules to JS File feature should be used when you are looking to extend the functionality of your form by using Source Code Management (SCM) tools such as Git. Or if you want to consolidate all the rules for your form into one place to make editing easier as your form grows and matures.
To move all configured business rules of a form to an external JavaScript file, follow these steps:
- Open a form that has multiple business rules configured.
- Click Code.
- Click Move Rules to JS File.
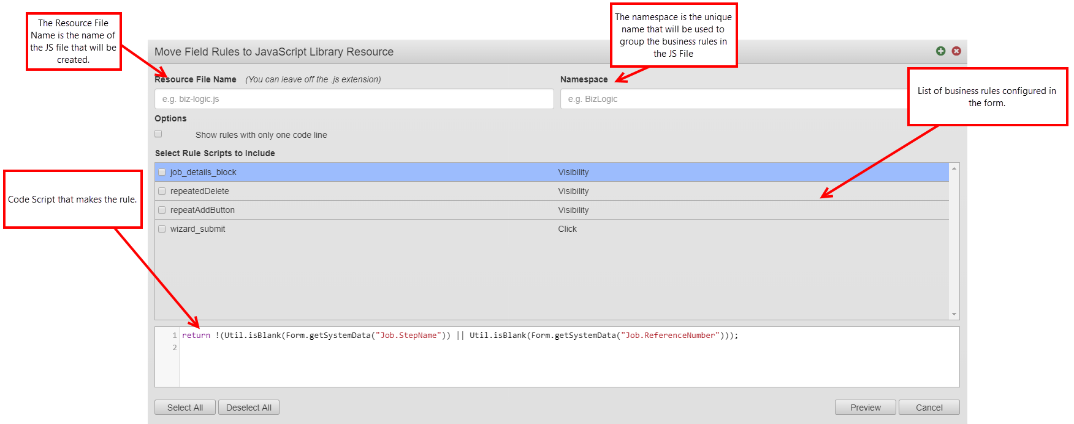
- This dialog displays all the business rules that have been configured for the selected form. Each rule is identified and if selected, the script that creates the rule is shown as a JavaScript in the code box below the list of the rules. If your form’s rule has only 1 line of code, a checkbox is presented that you can select to display these one-line rules.
- Provide a Resource File Name for the JavaScript file. This is the name of the JavaScript file that is created when you move the selected rules to.
- Provide a Namespace for the JavaScript File, which is the unique name that is used to group the rules in the JS file.
- Enable the Show rules with only one code line option to display all rules. If disabled, only rules with more than one line of code will be shown.
- Select the rules that you want to move to a JavaScript File. Click Select All to select all the available rules.
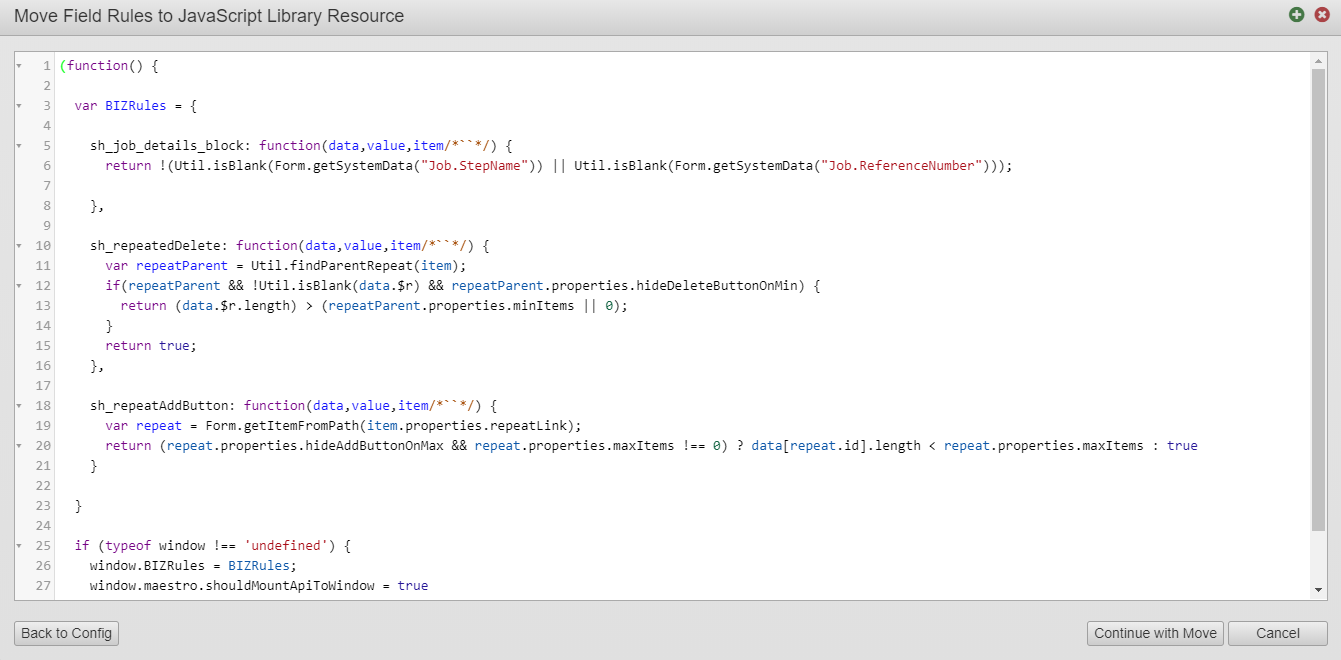
- Click Preview to display a preview of the JavaScript file. The screenshot below displays an example of a preview for a JS file.
- Click Continue with Move. If you want to return to the previous dialog and select or clear other rules, click Back to Config. It creates the JS resource and displays the following dialog.
- Click OK.

Once the Maestro rules have been moved to the JS file, you can then reference the created JS file directly in the form that you just used to create the JS file (using a JavaScript Library component), and then download the JS file and edit it using a SCM tool before uploading the JS file back into Maestro.
When the rules are moved, Maestro will create a JavaScript Library component that references the file and update the original rules with calls to the rules in their new location. This ensures that all rules continue to work as expected.
Next, learn how to reference a JavaScript File into a Form.