Configure a New Language
MaestroThe UI design product. | Form Builder | 21.11 This feature was updated in 21.11.
Maestro allows you to translate form's elements into different languages, including right to left languages.
To add a new language:
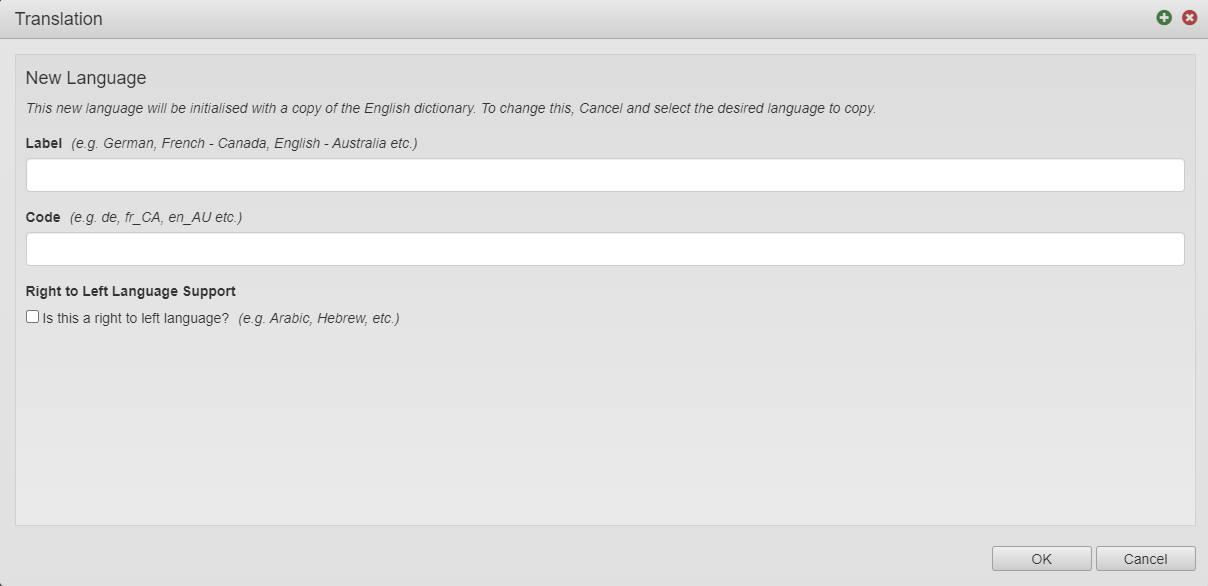
- Click New Language to add a language.
- Enter a language name in the Label field, for example, German.
- Enter a language code, which is an identifier for the new language, in the Code field, for example, de.
- Select the Is this a right to left language checkbox to add a right to left language, for example, Arabic.
- Click OK to add a language.
- Enter translated values of the form's elements into the Translated Value column and click Save when you are done.
Note You can use the search functionality to quickly find the Property Path you want to translate.
- Click Edit Locale Details to update the name and locale code of the default language.
- Click Delete to remove the translation for the new language.
Note This option is shown only when a non-default language is selected.
- Click Download to download the translation in the new language as a CSV file on your local PC.
Note This option is shown only when a non-default language is selected.
- Click Upload to upload the translation in the new language as a CSV file from your local PC.
Note This option is shown only when a non-default language is selected.
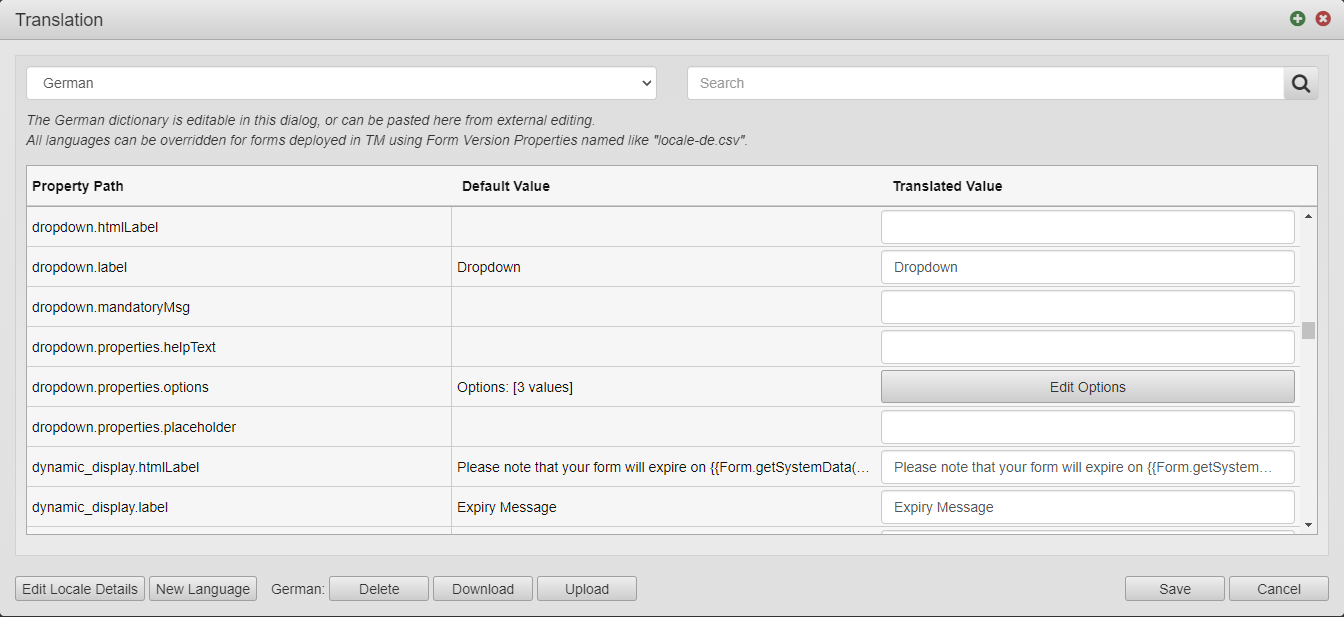
The window now displays an additional column - Translated Value - which you can use when the German language is selected.
To manage a language:
- Open a form in the Maestro editor and click Translation on the .
- Select a language from the dropdown list to switch between multiple languages, if more than one language is configured.
- Type a part of a key name, which are listed in the Property Path column, and click Search to list keys and values based on the search criteria.
- Click Export to export form's translation as a CSV file.
Note This option is shown only when a new language is added.
- Click Import to import form's translation as a CSV file.
Note This option is shown only when a new language is added.
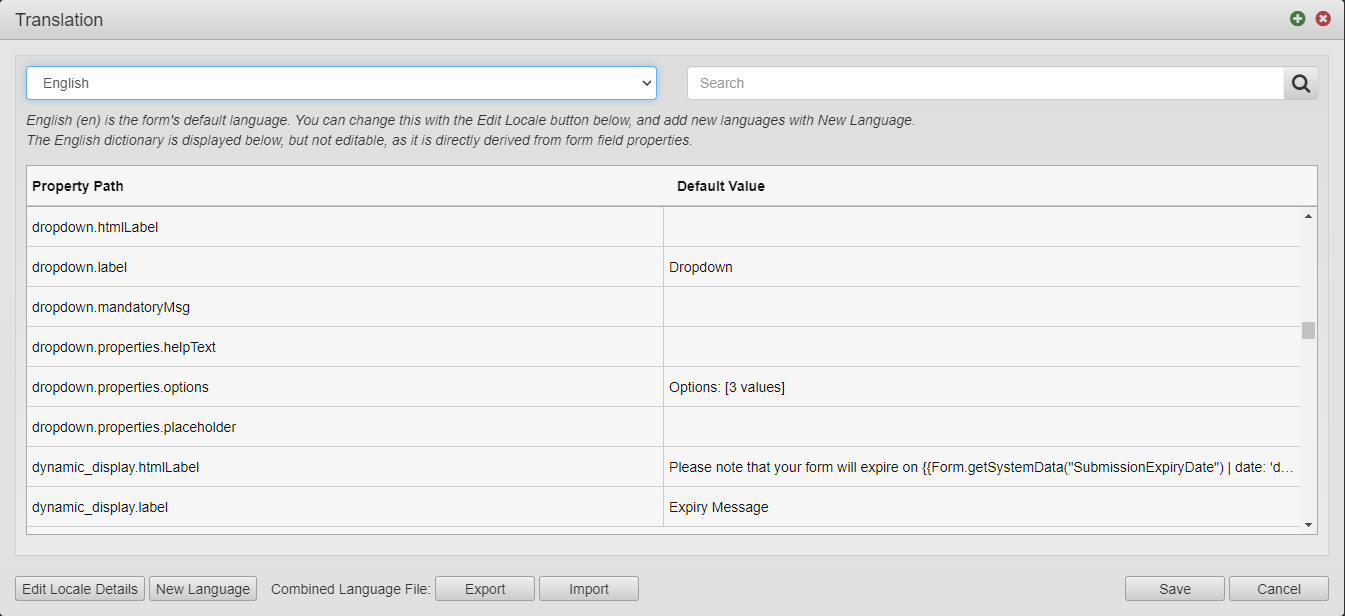
The window lists keys for objects within the form, in the Property Path column, that are mapped to labels based on the selected language, the Default Value. The window opens with the default language selected, for example, English.
You are not able to edit the default language in the Translation window, as it is directly derived from the form's component properties.
If you have a component selected when you click Translation, the list is scrolled to the selected Property Path. The scroll position remains as you switch between languages.
Now, when you have set up the new language, you can configure the form with the Select Language component. The message is shown using a Form.showProgress call, for example, Form.showProgress("Loading..."). You can right click the string in the rule and turn it into a translatable key. For the save, cancel and submit calls you can change this value on the root form item and it would also be a translatable key.
Since Maestro 21.11, you have ability to specify the source of a translation CSV so that it can be stored externally to the form. A service or URL can be used to load the translation. This allows users to maintain their translations outside the form without needing to republish the form to get updates. You can use the Translation.fetch() function to load the translation for the specified language code. If the translation loads, the interface will refresh with the localized terminology. If the translation doesn't load, an error will appear in the JavaScript Console. A simple way to implement it in a form is to add a button that calls Translation.fetch("myLanguageCode", false, "/web-plugin/resources/mynewCSC.csv").This translates the form based on a translation file that's at an external URL. In this example, it's in a portal resource on the Manager server, but it could be anywhere.
Next, learn how to mark for translation.