Add a Component
MaestroThe UI design product. | Form Builder | All versions This feature is related to all versions.
Maestro allows you to add components to a design, such as a form, template or another component, so you can capture various types of form data required to implement customer onboarding journeys.
When you work on a design in the Maestro editor, adding components is a frequent operation you will do, so our tool provides you with 2 efficient ways of doing this by using the wireframe or component hierarchy. In both cases, you either drag and drop a component or select an action from a component's menu.
The Maestro editor uses the to show you where the component is going to be inserted at, as well as, warns you where you are not allowed to put it. This is illustrated with numbered elements on the images below.
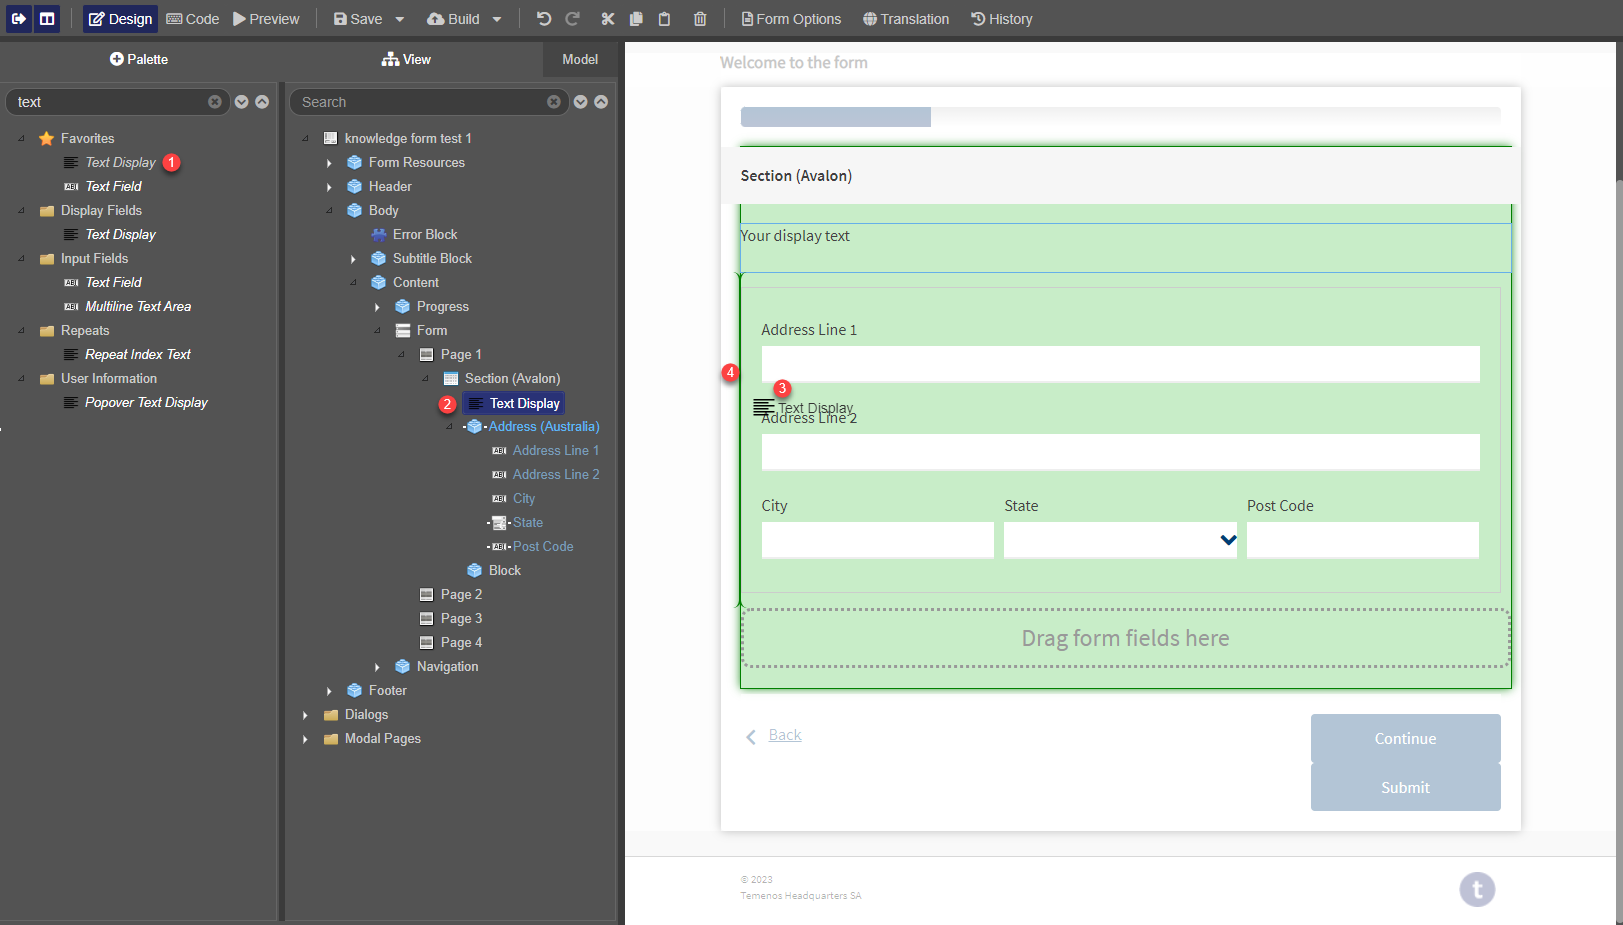
- A component you want to add to a form, for example, the Text Display component.
- A location of the Text Display component in the component hierarchy as you are dragging it over the component tree to find a suitable location to drop it off.
- A location of the Text Display component in the wireframe as you are dragging it over the form to find a suitable location to drop it off.
- The vertical (darker green vertical line) indicating where the component will be located.
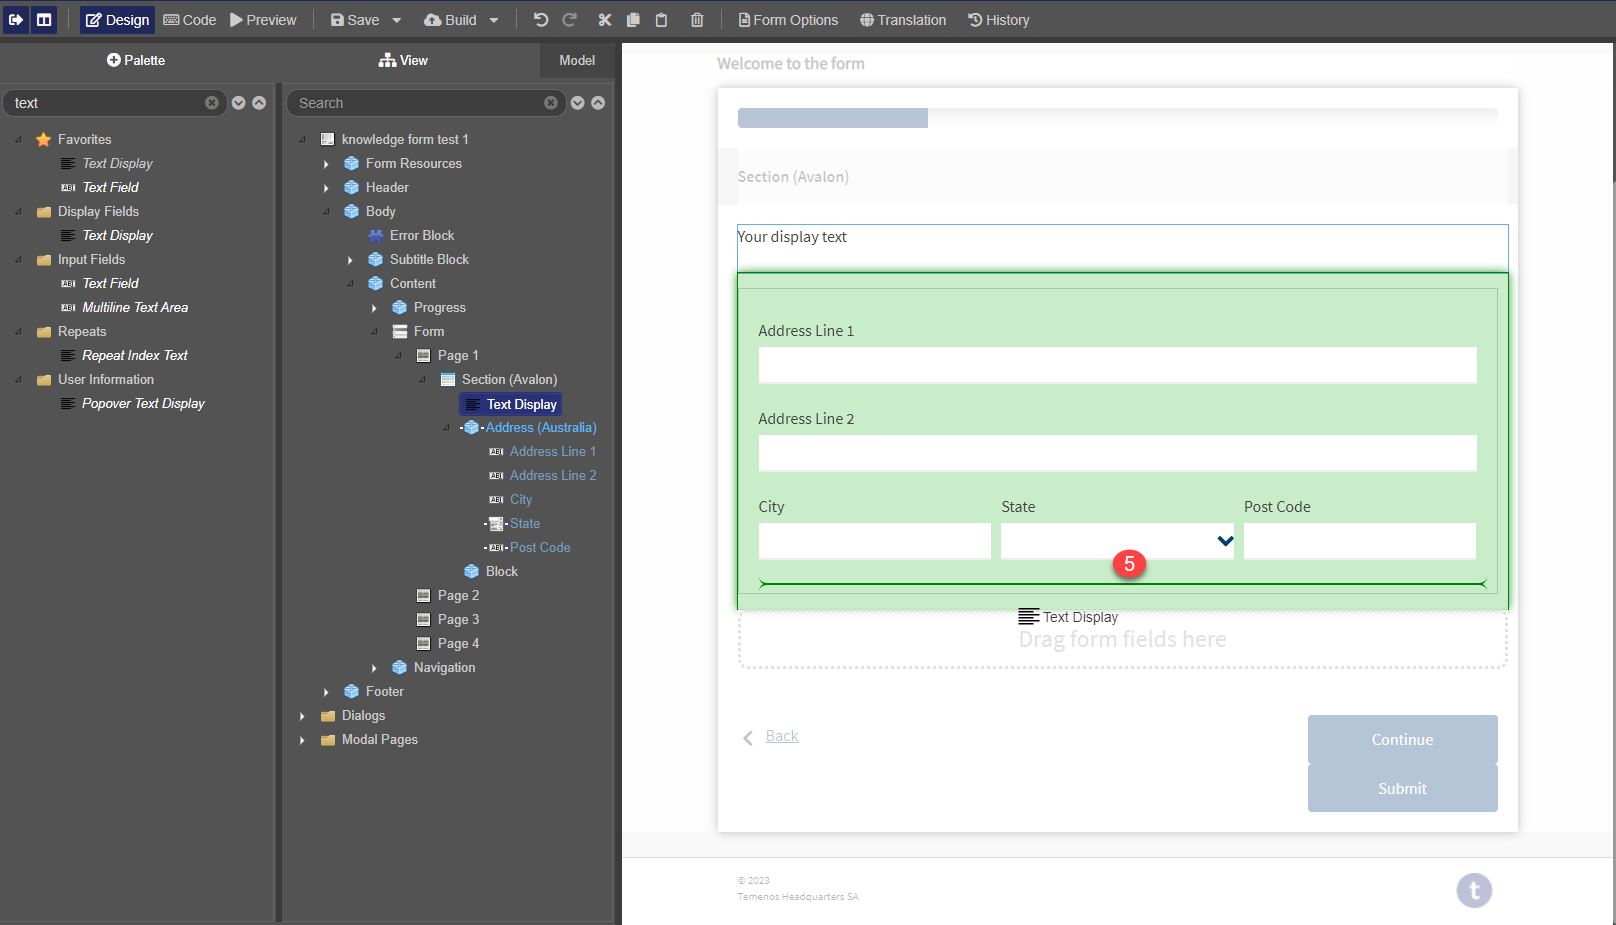
- The horizontal indicating where the component will be located.
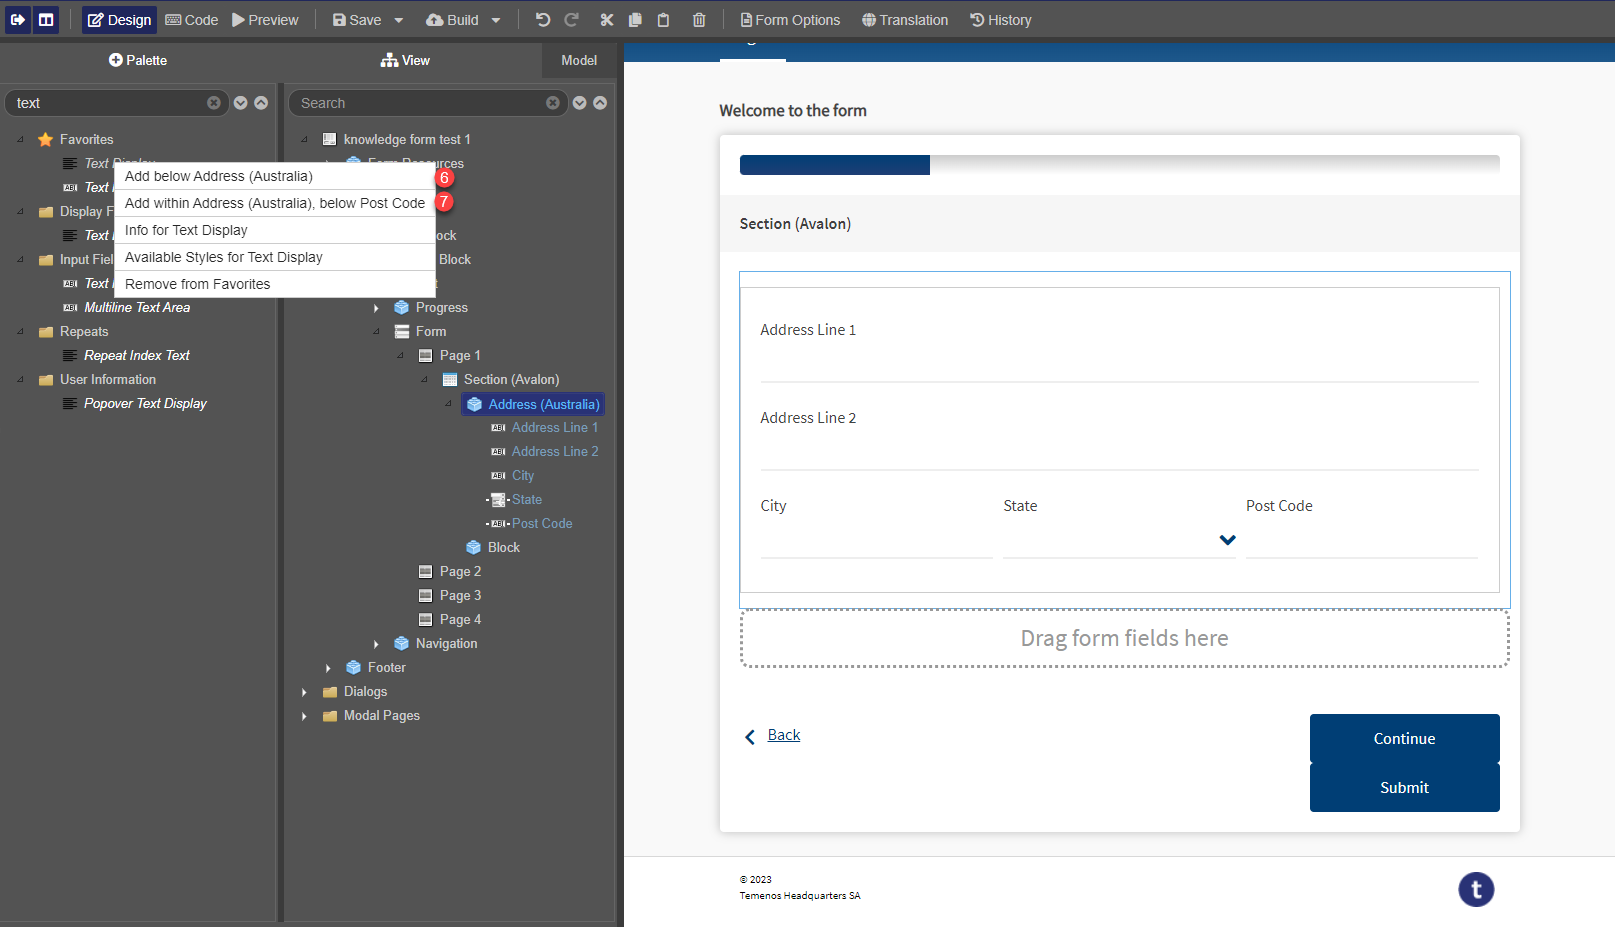
- The action menu - Add below Address (Australia).
- The action menu - Add within Address (Australia).
Let's look at this in more detail.
Add a Component Using the Wireframe
To add a component to the Wireframe, use one of the following:
- Drag a component from the Palette to the wireframe
- Choose a component from the Palette pane and drag it onto the form near where you want it to appear.
- Check the shape and orientation of the and drop the component when the indicates the desired location.
- Double-click a component
- Select the component or container in the form where you want a component to be inserted. Double-click a component in the Palette. The component is inserted directly below the selected component or at the bottom of the selected container.
Note If you have multiple components to add, you can keep double-clicking – each new component is added below the previous component that was added.
- Add below an existing component
- Select a component in the design above the location where you want to insert a new component to.
- Locate a component in the Palette pane, right-click on it and select Add below <Existing Component Name>. The component is inserted directly below the component which you selected in the design. For more information, see Palette pane.
- Add within an existing component
-
Note You can see this option only if the selected component is a container component, for example, the Address (Australia) component.
- Select a component in the design where you want to insert a new component to.
- Locate a component in the Palette pane, right-click on it and select Add within<Existing Component Name>. The component is inserted as the last child of the component which you selected in the design. In this example, the Text Display component will be added after the Post Code component of the parent's Address (Australia) component. For more information, see Add a Component to an Existing Component.
The insertion bar indicates a wide variety of possible insert locations by using different positions, sizes and shapes to represent the insertion point. The insertion point is represented by a selection area, which indicates the parent layout of the component, and an insertion bar which indicates its position to its siblings.
The insertion bar appears either as a vertical or horizontal bar. A horizontal insertion bar means that a component will be inserted vertically between two other components, and a vertical bar means that a component will be inserted horizontally between two components.
If the insertion point is at the beginning or end of the list of siblings, then the component will be inserted regardless of the insertion points horizontal or vertical orientation. If the insertion point is vertical, and there is space for the new component to occupy within the layout, the new component will appear on the same line as an previously placed components. If there isn't sufficient space to accommodate the component, it will be placed on the following line.
Add a Component Using the Component Hierarchy
If the Palette and View panes are displayed side by side, you can drag a component from the Palette pane and drop it in the View pane. The new component is added to the form at a position determined by where in the View pane you dropped the component. If you drop the component on a container, the new component appears at the bottom of the container. Otherwise, the new component is positioned where you dropped it relative to the other components.
Similar to the wireframe, an insertion point is displayed when you drag a component from the Palette panel to the View panel.
In the View panel, the insertion point appears as a triangle above, below or on the desired component if it's a container. You can change the insertion point while dragging by moving up and down the hierarchy. If the drag target is a component, the insertion point will appear above indicating the dragged component will be inserted before the drag target, and the same is true for below and after.
Add a Component to an Existing Component
In some situations, you want to add a simple component to an existing pre-defined component, such as a container of components. You can do this by dragging and dropping a component over the target component. Releasing the dragged component will add the component to end of the children. If you drag a component onto a container that is collapsed, the container will expand, displaying any children it contains, allowing you to navigate deeper into the structure without releasing the dragged component.
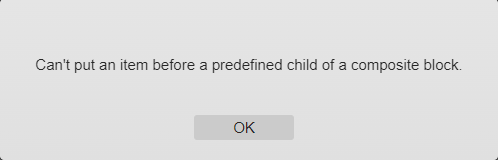
You can only add new components to a predefined component at the end of the component, for example, the last row, or to a block as a new column to the right. Some components can be embedded and modified but some are not. For example, the wizard navigator bar can get buttons added to it but they have to be at the end.
The Maestro editor warns you if you can't add the component with this dialog displaying the error message: Can't put an item before a predefined child of a composite block.
Move a Component
You can always change a component's location by dragging it to where you need it to be. All the above rules apply so you will see the as you are moving the component to a new place.
You can select multiple components in the component hierarchy and drag and drop them where you wish to put them.
If you places or moved a component by mistake, you can click the Undo button or use the History functionality to revert the action. Also, you can simply delete the component in the wireframe or the component hierarchy and try to add it again.
Next, learn how to change a component's ID.