Change a Component ID
MaestroThe UI design product. | Form Builder | 17.10 This feature was updated in 17.10.
Every component in a form must have a unique identifier, also known a component ID, which you can use to refer to the component. This ID is initialized when you create a component, but you can change it at any time using the ID field in the Properties panel.
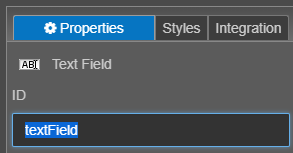
When you add a new component to a form, the ID property is assigned a default value and is highlighted automatically so that you can start typing into the field. The ID’s default value is based on the component type. For example, the default ID for a Text Field is textField.
Maestro comes with the Auto-ID functionality that automatically generates a component ID and assigns it to the new component when you add it to a form. | 17.10
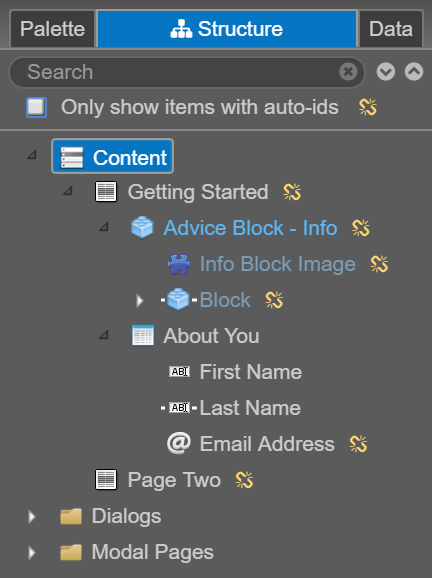
This feature was introduced in 17.10. On the Structure pane, a link icon  appears next to each component that has an automatically generated ID, or Auto-ID.
It is recommended to limit the use of auto-ids on a form.
You may need to create a form quickly and choose to save time now by letting Maestro generate auto-ids that you can update later with better IDs. Being able to view only the components on a form with auto-ids allows you to find all components that need their IDs updated. You can select the Structure pane option Only show items with auto-ids to show only components that use an auto-generated ID name.
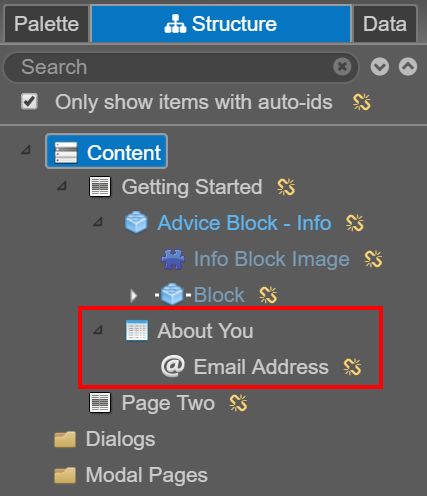
If a container is not using an auto-generated ID, but at least one of the child components is, you will still see the container listed in the Structure panel when Only show items with auto-ids is selected.
The example below shows the About You section when Only show items with auto-ids is selected. Even though About You does not have an auto-id, the child component Email Address does, so the About You section is also displayed.
Change Component ID
You can change the component ID from this default value at any time. Changes to ID are reflected in other properties.
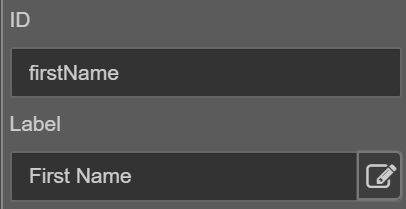
- The first time you change the ID property, the Label property is updated based on the ID. The value for Label is the ID with spaces removed and converted to camel-case. For example, if you enter “firstName” as the ID of a new Text Field, Label is updated to display “First Name”. Any subsequent change to ID does not update Label. However, you can change the Label property directly if needed.
- Every time you update the ID property, the XML Name and/or Full Path properties on the Integration tab are also updated to match the ID.
The example below shows a partial view of the Properties pane with a new component added to a form. ID was initialized with the value firstName, causing Label to be updated automatically with the value First Name.
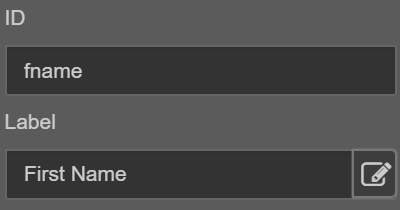
The following example shows that Label remains as First Name when ID is updated to fname.
The ID property is also linked to the XML Name and Full Path properties. When ID changes, XML Name and/or Full Path are updated if Use Auto-generated XML Name or Use Entity XML Path on the Integration tab is selected. If these options are not selected, the XML Name and/or Full Path will not be updated automatically when ID changes but can be changed directly as required.
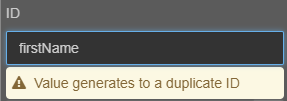
As you type a value into the component ID property field, Maestro checks whether there is an existing component with the same name and reports a duplicate ID if one is found.
When you leave the component ID property field, Maestro checks whether there are any references to the existing ID. If any such references are found, a dialog box is displayed with options to review or accept your change.
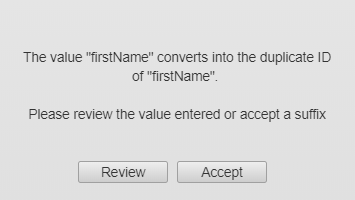
You can do one of the followings:
- Click Review to view a brief analysis of the impact of changing the component ID.
- Click Accept to change the component ID and update all references.
- Click Cancel to close the dialog and leave the component ID unchanged.
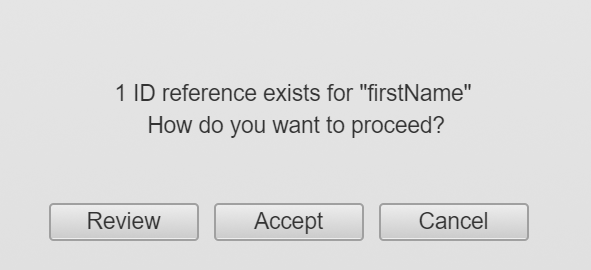
If you decide to review your change, the Impact Analysis dialog is displayed showing a list of references to the original component ID prior to the change. The Impact Analysis dialog provides options to accept or cancel your change.
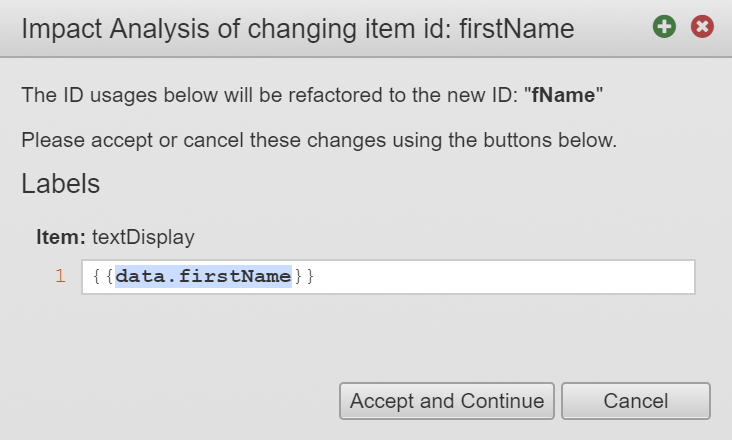
You can do one of the followings:
- Click Accept and Continue to change the ID and refactor all the references listed.
- Click Cancel to close the Impact Analysis dialog and return to the Maestro Editor without changing the ID.