How to Use Organization Libraries
MaestroThe UI design product. | Form Builder
Maestro allows you to create and update libraries. If you've never used a library before, or if you're not sure how they fit into the Maestro workflow, follow along to see them in action. This guide assumes you understand the basics of libraries; if you don't, you should read the Maestro Libraries Overview first, then come back to this topic.
Step 1: Create a Library
You can create a library at the organization or project level. If a library is created for an organization, its resources will be available to every project and form within that organization. If a library is created for a project, its resources will only be available to the forms within that project.
In the following exercise, we're going to create an organization library that makes a component available to all of the projects and forms within that organization. If you were creating a project library instead, you would need to create a project first then create the project library; otherwise, the process is quite similar.
To create a library:
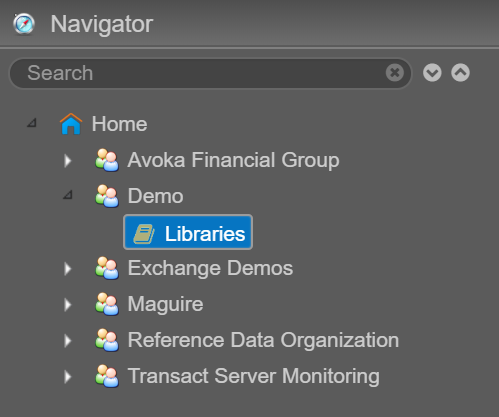
- Login to Journey Maestro.
- Expand an organization in the Navigator pane and open the Libraries item. (If there are no organizations that you can use, you'll need to create one first.) We'll use the same organization throughout this exercise.
- Click Create Library.
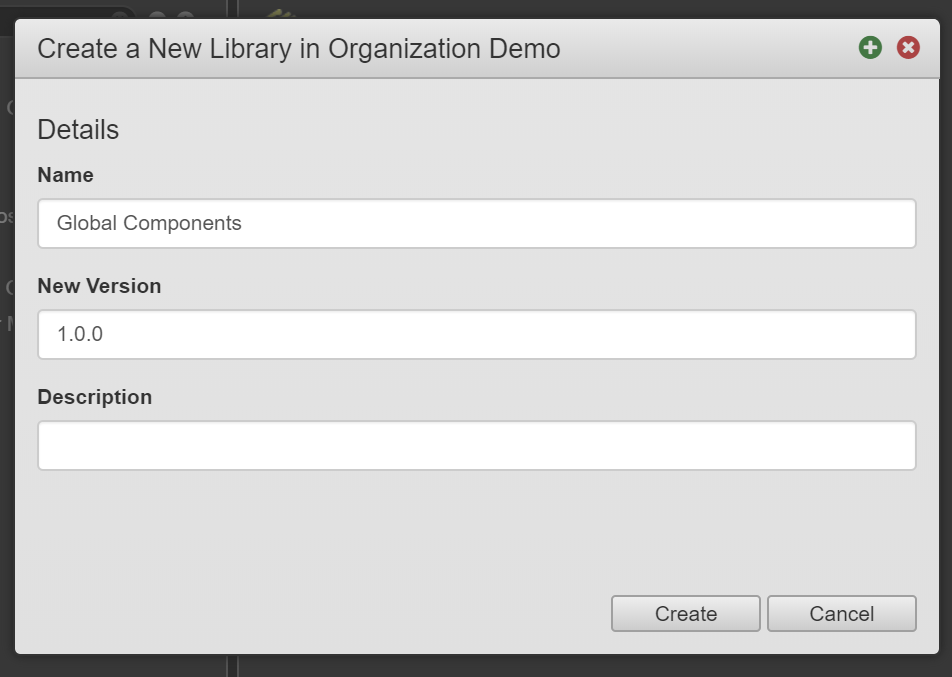
- In the Create a New Library modal window, enter a Name for the library and click Create. You can ignore the other fields for the time being.
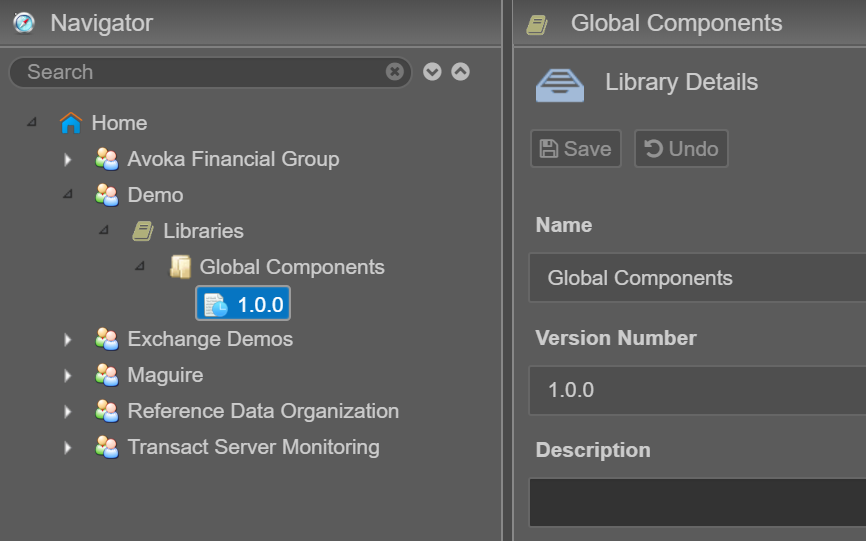
- After creating the library, you'll be taken to its Library Details page. Here you can update the library'sDescription, or switch to the Resources tab to view the resources published to this library.

The new library has a version number of 1.0.0 which was entered on the Create a New Library modal. You can see the library's Version Number on the Library Details page, as well as in the Navigator pane under the library.
The library version number is significant because:
- All libraries are automatically versioned. You don't have to use this functionality, but versioning does help in managing form development.
- All libraries must have at least one version. If you delete the last version of a library, you'll be forced to delete the library itself.
Step 2: Create a Project
We've created a library but there's nothing in it. We'll create a project and work on the resources for our library in that project. Then we'll publish the resources to the library in a later step.
To be clear, we don't have to create a new project for every library we create. We could create a single project and work on all of our library resources in that project. However, this is not recommended as it becomes difficult to keep track of where the resources are stored. Creating one project per library is best practice, with the advantage of being a very scalable approach.
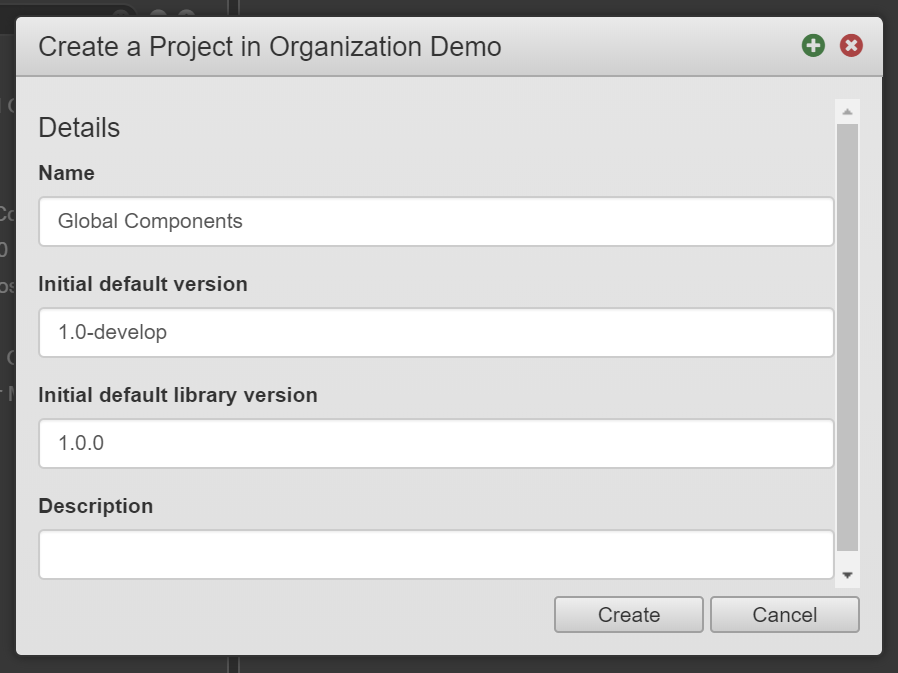
To create a project for our library:
- Select your organization from the Navigator pane.
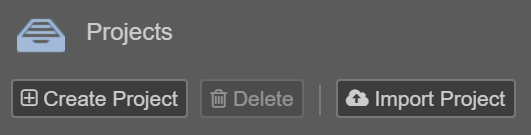
- Switch to the Projects tab and click Create Project.
- In the Create a Project modal, enter a Name for the project. It's a good idea to make this name similar or identical to the name of the library, so the relationship between the project and the library is apparent. The other fields can be ignored for the time being.
- Click Create.
On the Navigator pane, we can see four folders in the project we just created:
- Forms
- Components
- Templates
- Libraries
These four folders are included in every project by default.
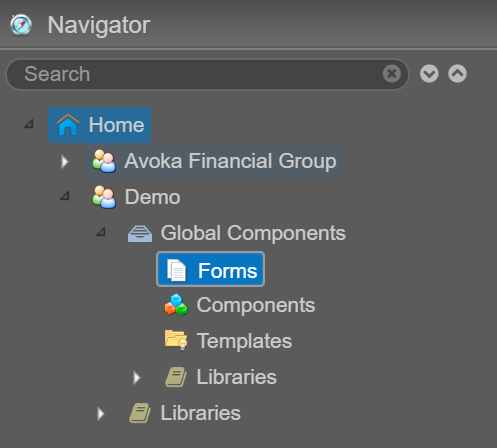
For the purpose of the current exercise, the Components folder is the only one that interests us now because a) forms can't be published to a library, b) we don't want to publish resources to our project's library, and c) creating a template is beyond the scope of this topic.
Step 3: Create a Component
In this section, we're going to create a component. This component will become available to all of the projects in our organization.
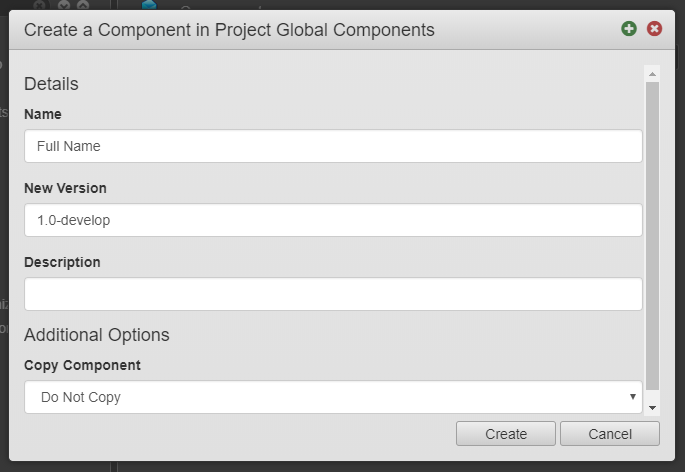
To create a component:
- From the Navigator pane, select the Components folder under our project.
- When the Components tab loads, click Create Component.
- Enter a Name for our component. To follow along with this example, call it "Full Name".
- Click Create.
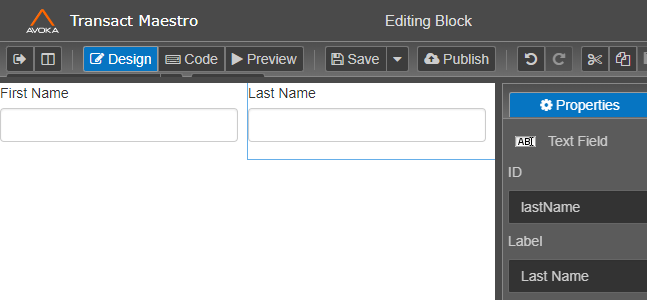
- The Maestro Editor opens a new tab for the new component. After the component tab opens, drag two Text Field components into the main work area. Set the ID of the first text field to "firstName" and the ID of the second text field to "lastName".
- Click Save.

Step 4: Publish a Component
For our component to become available via the library we created earlier, we need to publish it to the library.
To publish a component:
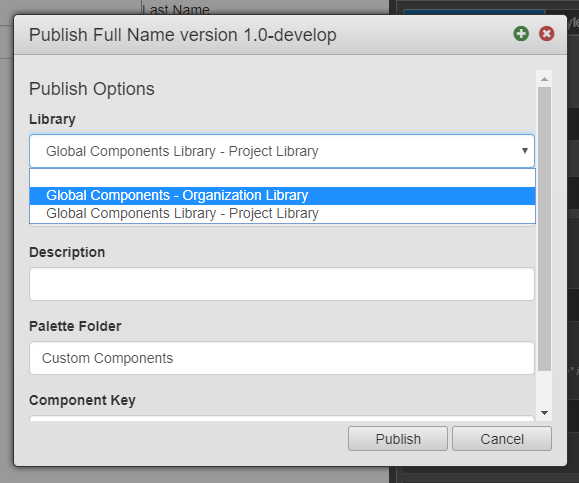
- With the component still open in the Maestro Editor, click Publish.
- When the Publish modal appears, select the organization library from the Library drop-down. Note that each library in the drop down list is identified as being either an organization or project library.
- Click Publish.
Select your organization library version in the Navigator pane and switch to the Resources tab, and you'll see your component included in the library's Component resources, meaning it is now available to be used in any project in your organization.
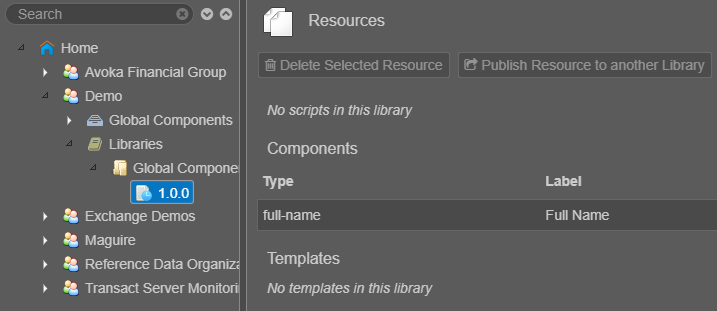
If the component doesn't appear, verify that you published the component to the organization library, not the project library. You may also need to refresh the page.
Step 5: Use a Published Component
Using a published component is similar to using any other component. The only difference is that components published to a library are not available everywhere. They're only available within the organization or project they're published to.
To see this in action, follow these steps:
- Create a new project within your organization.
- Select the Forms folder in your new project and click Create Form.
- Enter a Name for your new form and select a Template, then click Create.
- Your new form will open in the Maestro Editor in a new tab.
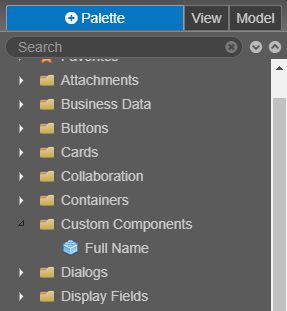
- Expand the Custom Components folder inside the Palette pane. You'll see that the "Full Name" component is available for use in our form.
The Advantage of This Approach
Let's say you need to change the "Full Name" component, perhaps to add a new feature. You can return to the project where that component exists and make whatever changes you want without worrying about breaking the component. This is because changes are only reflected throughout the organization's forms when the component is re-published. Until then, you can develop components with the peace of mind that the changes you're making are private and will not impact Form Builder's who are using your component.
When you've finished the changes to your component, you just need to re-publish it and every instance of that component is automatically updated. This means the component has a single source of truth that you can evolve as requirements change.
Next, learn about shared libraries.