Submissions & Attachments
Composer This topic is related to Transact Composer. | Form Builder | v4.3 & Higher This feature is related to v4.3 and higher.
So far, we have discussed
how to use the Form Designer,
Navigation, and
Layout, all of which are meant to lead to submission. When users fail to complete
submission of the form, the form is said to be abandoned. This is a most
unwanted result and a waste of time for everyone.
Users are often asked to upload files, called attachments, as supporting
documentation. Most attachments are generated outside of the form, and can
be scans, Word documents, PDFs, JPEGs, PNGs and so forth.
However, there are form elements capable of generating attachments from
within the form, for example: scribble pads for users to make their
signature
camera widgets for uses to take pictures with a mobile device's in-built
camera barcode-reading widgets for use with a device's camera.
Defining attachments (i.e. files uploaded with the form) used to done
exclusively in Transaction Manager. Now these can also be defined in
Composer.
The Preview function of Composer does not include user interactions when
they upload attachments; for that, you will have to
publishtoTransactionManager.
File Uploading
Defining Attachments in Composer
There are two attachment widget types. You add all of these to the one
section on the form, here called "Attachments". It makes sense to
have these in the last section of the form which usually contains the
"Submit" button.
TM Attachment Table
Add one only of these, and its rows will automatically be populated with the
details of the attachments.
TM Attachment Rule
Add one of these per attachment at the same structural level as the TM
Attachment Table. Use the "Create a New Field" wizard, which pops
up on adding the rule to the form, to give it an "Internal Name".
You can also further specify each attachment's properties in the rule's
"Edit Properties" dialog.
TM Submission Block
You also need submit buttons, so we have added a
TM Submssion Block (as "MySubmitBlock") to the section. This block adds several
submission buttons to the form, which give users the options to "Submit
Now", "Save Online" or "Save to My Computer:"
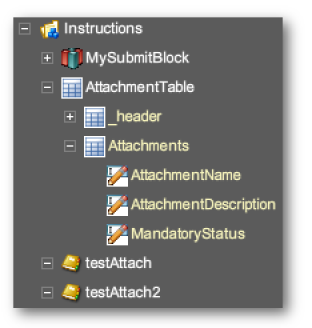
Here is the resulting structure of adding a "TM Attachment Table"
and two "TM Attachment Rule" widgets to a section containing a
"TM Submission Block".
You can then preview the rendition of the form, where the Attachment Table
gets populated according the the Attachment Rules:
How this structure renders in preview.
The table informs users that they will be requested to supply these
attachment after clicking on the "Submit" button. This behaviour
cannot be previewed in Composer: to see this, the form must be published to
Transaction Manager. In our example, the form was published without further
modification in Composer; all that was done in TM was to assign the form to
a portal and to turn off its "Test" mode. The resulting screen
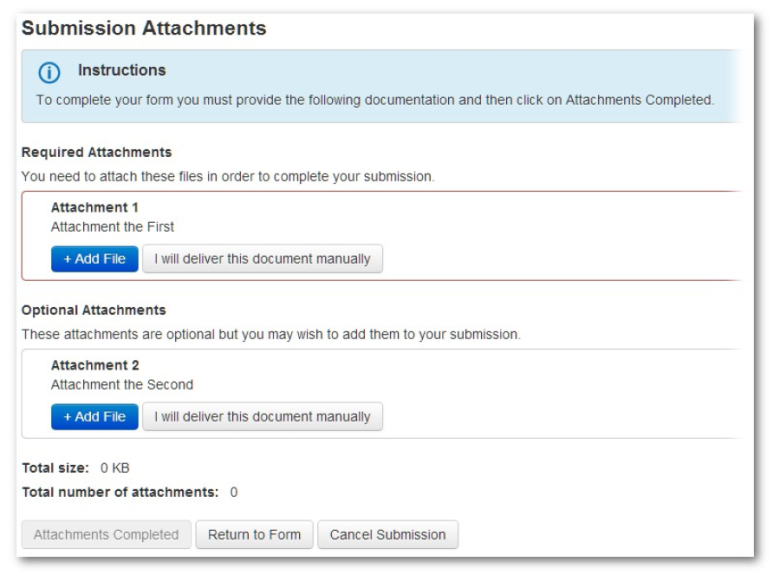
after the "Submit" is:
Resuling "Submission Attachments" page.
Delivery of Attachments
The "I will deliver this document manually" buttons appear on the
"Submission Attachments" by default for each attachment. To remove
them, set in Composer the "Edit Properties -> Data -> Submit
Method" for each rule to "Electronic".
Email Acknowledgements
If you require an email to be sent to the user as an acknowledgment, receipt
or any other business reason, this must be set-up in Transaction Manager.
There is currently no way to specify emails through Composer. Transaction
Manager, though, has a great deal of functionality and control of email
messages, Please refer to the Transaction Manager Administration Guide.
Signatures
There is a range of signature widgets:
Signature [Wet] and TM Signature [Wet]
Dropping these on to the form has the same effect. Pre-submission, the form
presents the user the message, contained in "Edit Properties ->
General -> Instruction Set". The default is:
"Signatures are not required at this time. After you have submitted this form, print the receipt, sign it and send it in."
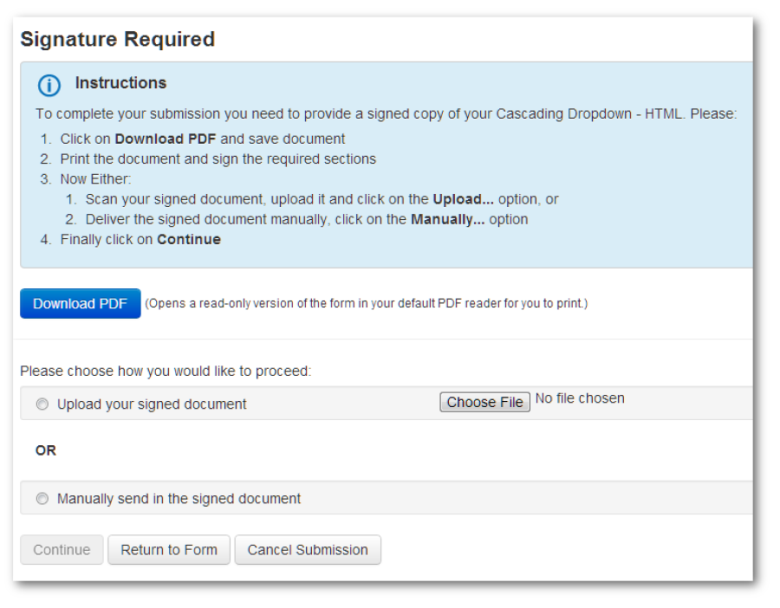
After users have clicked "Submit" they are presented with:
Wet signature form after submission.
DocuSign Signature
Creates a block to handle
the DocuSign eSignature process. The users fill in their names and email addresses and DocuSign verifies
the users via a two-step process. Note: use of the service
incurs a service charge.
Signature Pad Widget [HTML]
The widget's "Edit Properties -> Properties -> General ->
General -> Signature Type" can be set to "Draw It",
"Type It", and "Choose at Runtime". "Draw It"
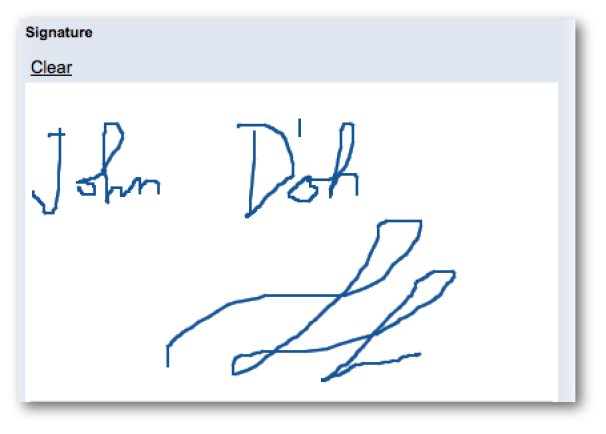
gives users a signature canvas to sign with their finger or mouse (see
below). "Type It" presents users with a text field.
The signature canvas.
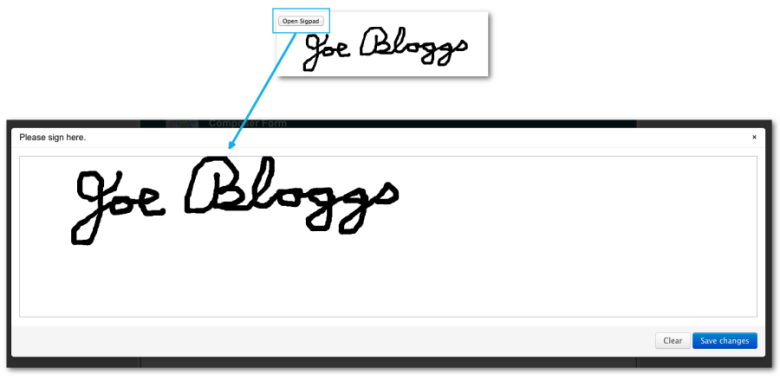
Signature Pad Popup [HTML]
Similar to the signature pad above, except that the pad appears in a
separate
lightbox superimposed over the form. On "Save", the lightbox vanishes and
the signature shows as a thumbnail.
Notes
Use a true Digital Signature if users have a certificate or smartcard
available.
Allow the end-user to click a "Sign" button, and specify their
username (and the date) if they don't have a digital signature.
In HTML, just use their username and the date.
If in Adobe Reader, and the form is not "reader extended", just
use their username and date.
The name and date from a true digital signature will also populate the
form's username and date, so in HTML even if users re-use the form, we still
have a record of the signer.
When either the true Digital Signature or the Signature field is signed, an
invisible checkbox is checked. This will allow standard editability rules to
be defined so that the form can be locked down after signing.
