Create a User Profile
Journey Manager (JM) The transaction engine for the platform. | System Manager / DevOps | All versions This feature is related to all versions.
Manager allows you to create several user profiles for the existing user account.
To create a new user profile:
- Select Security > User Accounts.
- Locate a user account and click Edit.
- Click the User Profiles tab to see all user profiles for this user account and click New.

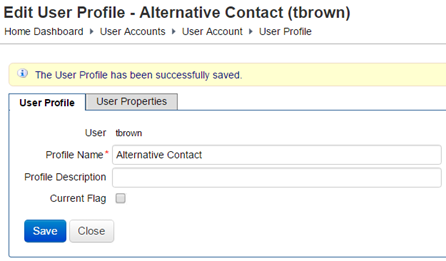
- Enter a unique profile name in the Profile Name field.
- Enter a description in the Profile Description field.
- Select Current Flag to make this the current user profile for this user account.
- Click Save to update the changes.
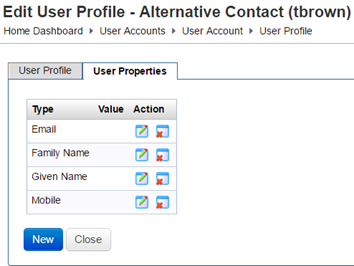
- Select the User Properties tab to list all user properties for this user profile. The properties are copied from the list of all property types with the User scope, so you may need to remove ones you don't require.

The list displays the following details:
- Type: a type of a property.
- Value: a value of the property. After a user profile is created, all values are set to nil / blank.
- Action: a list of actions you can perform on the property: Edit and Remove.
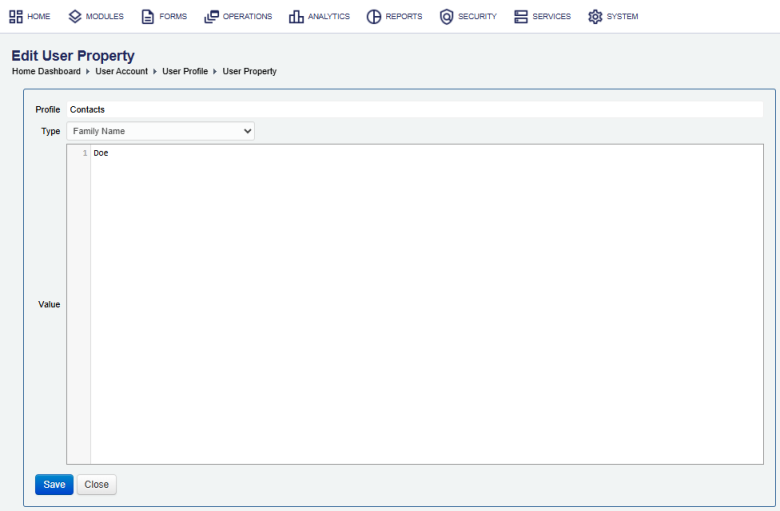
- Click Edit to set a value for each property.

- Enter a value in the Value, for example a family name. The following special characters are not allowed to be entered and are automatically replaced as per the mapping below:
- & replaced with
and >replaced with''(blank)<replaced with''(blank).
Warning Don't use these characters in the properties of your solution relies on them.
- & replaced with
- Click Save to update the changes.
You can remove a user property, if it is not required. However, it's not recommended to delete a user property as this can cause the user profile to be inconsistent with other user profiles. If you want to remove the user property, leave its value field blank.
For prefilling a form with the user’s contact details sourced from a default user profile, you need to map each data item, such as Given Name and Family Name, to target locations using form data configuration.
Next, learn about user property types.