Create a Task
Journey Manager (JM) The transaction engine for the platform. | System Manager / DevOps | 23.10This feature was updated in 23.10
Manager allows you to create a task for a form to be filled or reviewed by a user, which can be an authenticated or anonymous user, or a group.
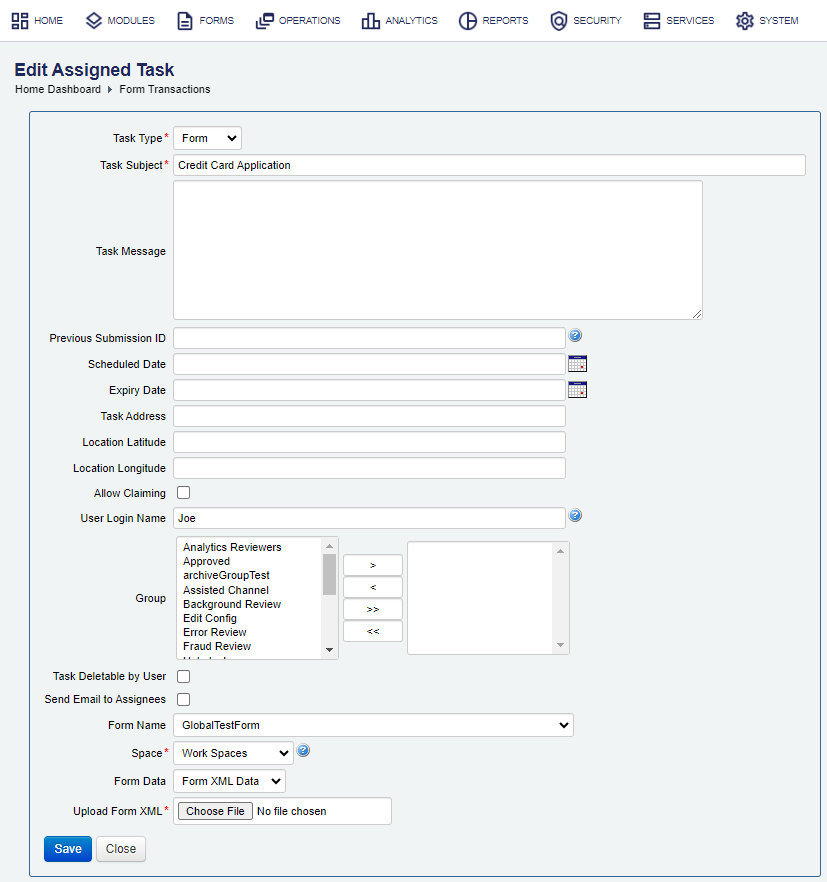
If a form, you are creating a task for, is a global form, you must choose a form space, which will be used to obtain a correct organization. | 23.10 This feature was introduced in 23.10
Manager uses the Job Task Assign service to create Form and Review tasks, so you can use Fluent API to configure it.
To create a new task:
- Select Operations > Assigned Tasks.
- Click New.
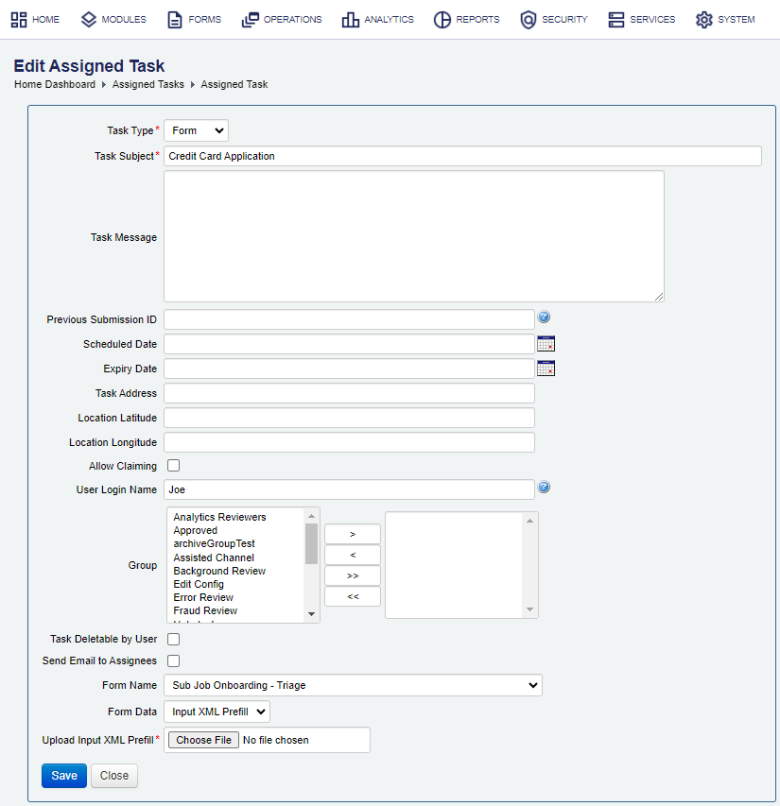
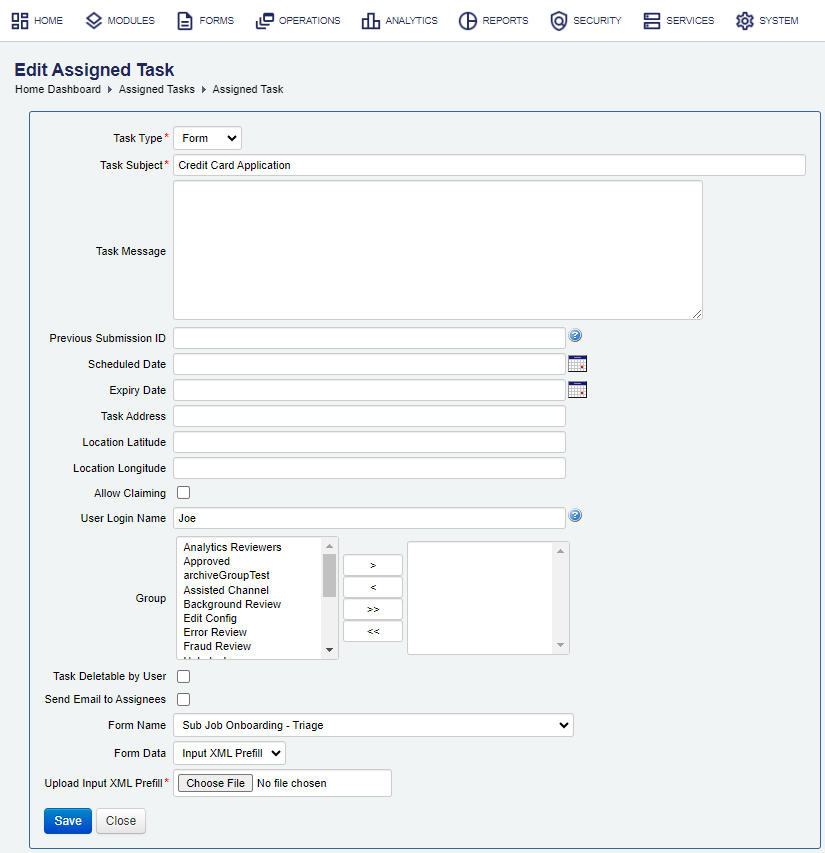
Create a task related to a standard form.
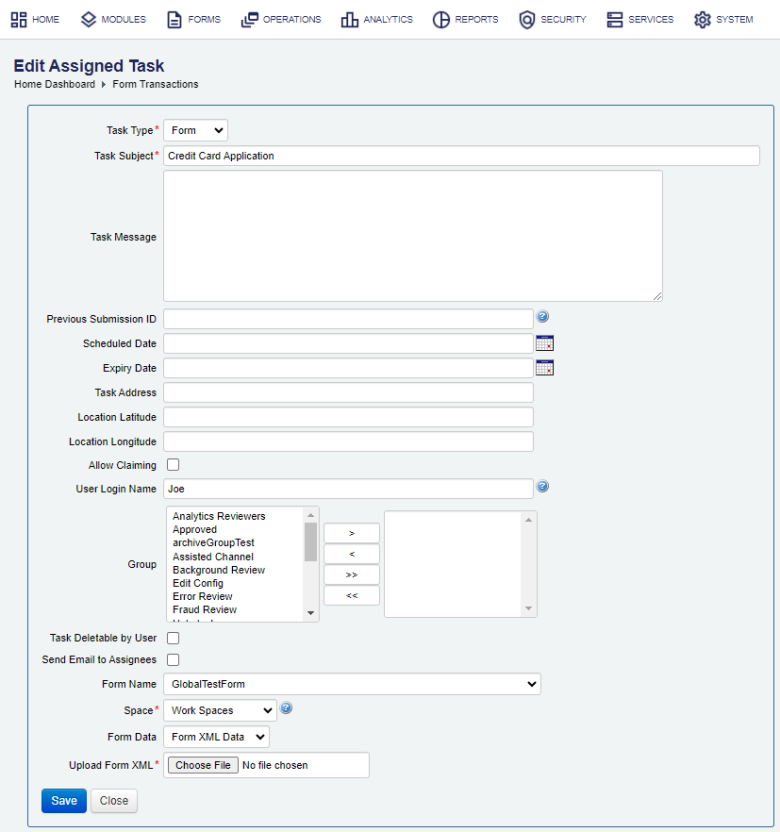
Create a task related to a global form.
- Select a task type from the Task Type dropdown list. A task type is very useful to determine the type of the transaction and to distinguish between submissions and review tasks.
- Form - a basic task that can be created using either form XML or prefill XML data.
- Review - a task associated with a previous submission, which is often prefilled with the submitted data for review purposes. It doesn't accept prefill XML data.
- Provide a brief description of a task in the Task Subject field.
- Enter a task message that describes the task to a user who will perform it, for example, reference numbers. This information is shown to assignees of the workspace.
You can use variables that will be dynamically substituted with configurable strings in runtime, for example,
Please review the Job Example 1 by Joe Public. $func.startSubmission().id() - Enter the submission ID that the task is based on in the Previous Submission ID field. This for review tasks only.
Note If the previous submission is of a global form, the Space dropdown list is shown and it's mandatory to select a form space. | 23.10 This feature was introduced in 23.10
Warning The experimental Global Forms feature has been temporarily disabled while we continue improving it. This feature will be disabled in releases starting from 24.10 and going back to 23.10.
- If the assignee needs to be informed that the task should be done on a specific date, complete the Scheduled Date field.
- Enter an expiry date in the Expiry Date field if you want the task to expire at a specific date and time. If a task is not completed before the expiry date, the transaction processing job will run in the background and change the task submission's form status to Expired. At this point, the default workspace will not allow assignees to complete the task. Expired task submissions can't be progressed any further.
- Provide the physical address of a location in the Task Address field.
- Enter latitude and longitude information in the Location Latitude and Location Longitude fields, if available. The latitude value needs to be in a range of
-90to90and the longitude value between-180and180. This information will be displayed to the assignee. The default form spaces include Google Map support. - Select the Allow Claiming checkbox to put the task into a special claiming mode, where users have to claim the task before being able to work on it. In addition to being claimed, such tasks can be reassigned to other users by the claiming user or other space users with special privileges.
- Provide a user's login name in the User Login Name field to assign the task to a specific user. Leave it blank if the task is assigned to a group, see below.
- Select a user group name from the Group dropdown list so any member of the group is able to view and complete the task.
Note Users joining a group will be able to view and work on all tasks existing for the group.
- Select the Task Deletable by User checkbox to allow assignees to delete the task.
Note Assignees will not be able to delete completed tasks to preserve the audit trail.
- Select the Send Email to Assignees checkbox to send an email to the assignees to notify them of the new task. In this case, you can also fill in the Email Subject and Email Message fields. Otherwise, the default values are used.
Note An email is sent to the current assignees only once. If new users join the group later, they will not receive a notification email.
- Select a form, which needs to be filled to complete the task, from the Form Name dropdown list. The form can have payment and attachments associated with it. For review tasks, you can leave the dropdown blank, so Manager will use a form, which the original submission was based on. For more information, see the Previous Submission ID field.
- Select a form space from the Space dropdown list.
Note If a form you have selected from the Form Name dropdown list is a global form, the Space dropdown list is shown and it's mandatory to select a form space. | 23.10 This feature was introduced in 23.10
Warning The experimental Global Forms feature has been temporarily disabled while we continue improving it. This feature will be disabled in releases starting from 24.10 and going back to 23.10.
- Select a way to prefill the form, that will be presented to the assignees, from the Form Data dropdown list, which can be one of the following:
- Input XML Prefill - for Form tasks to use standard XML prefill for forms, which are set up for XML prefill. Click Choose File to upload the prefill XML file in the Upload Input XML Prefill field.
- Form XML Data - for Form tasks if you have a populated seed file structurally matching the form seed XML data. Click Choose File to upload the seed file using the Upload Form XML field.
- Blank - for Review tasks the XML data of the previous submission is automatically used, if nothing else is specified.
- Click Save to update the changes. A task submission will be created with the form status as Assigned, and users will be able to fill in the form and complete the task using the Workspaces associated with the form.
Next, learn how to view all tasks.