Configure a Server Node
Journey Manager (JM) The transaction engine for the platform. | System Manager / DevOps | All versions This feature is related to all versions.
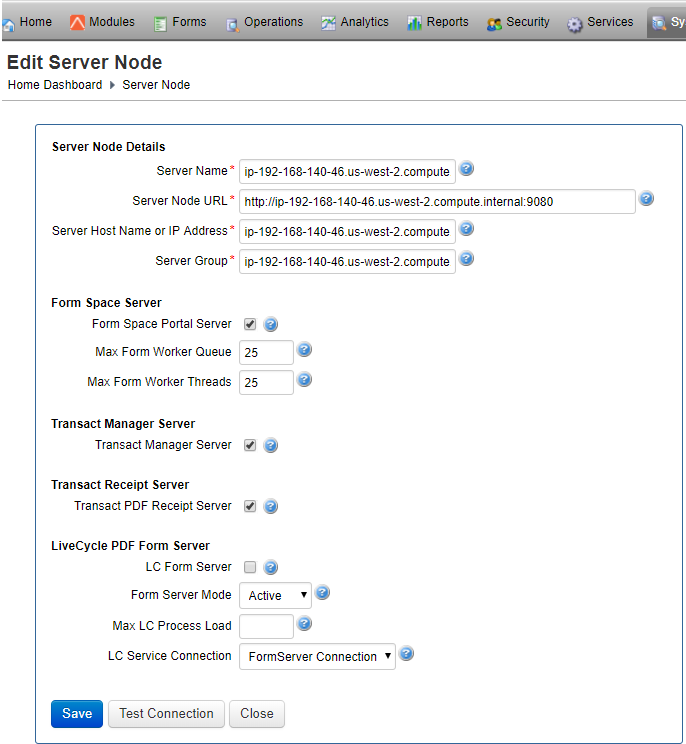
Manager allows you to configure server nodes, which you need to do after a server node is created.
You can configure a server node to host one or several Manager servers.
To configure a server node:
- Select System > Server Nodes.
- Locate a service node and click Edit.

- Provide a unique server name in the Server Name field. For example,
my-server-node-1. - Provide an URL of the server node in the Server Node URL field. For example,
http://my-server-node-domain-name:9080. You can use HTTP protocol (not HTTPS) because it's for internal communication between server nodes. - Specify a server host name or IP address in the Server Host Name or IP Address field.
- Specify a server group where the server node belongs in the Server Group field.
- Select the Form Space Portal Server checkbox if a server node handles public facing Internet traffic. It is not selected by default.
- Select the Journey Manager Server checkbox to mark it as a Manager admin dashboard server that supports development and operations staff.
- Select the PDF Receipt Server checkbox to mark it as a background PDF receipt generator.
- Click Save to update the changes.
Next, learn how to remove a server node.