Create a Maestro Rule
MaestroThe UI design product. | Form Builder | All versions This feature is related to all versions.
Maestro allows you to add various rules to components so you can implement a desired form functionality.
To create a rule:
- Open a Maestro form in the Maestro editor.
- Select a component. For a complex components containing multiple fields, select a specific field that must have a rule.
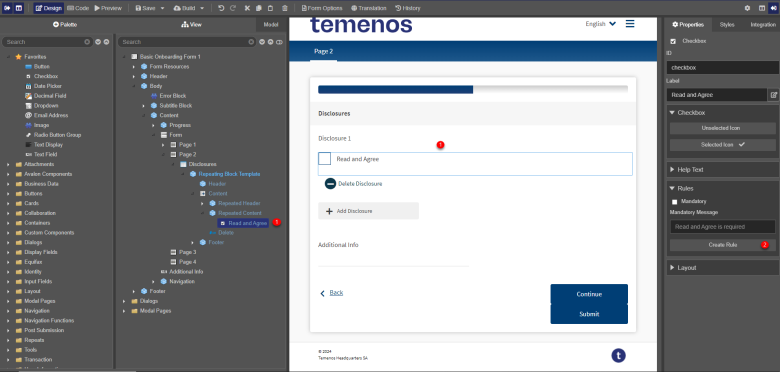
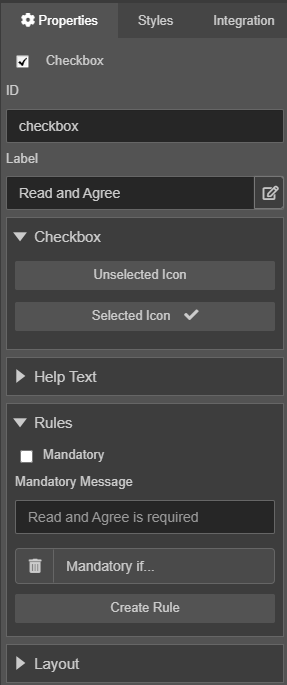
- Select the Properties tab and click Create Rule.
- Select the type of rule you want to create from the Create Rule dialog.
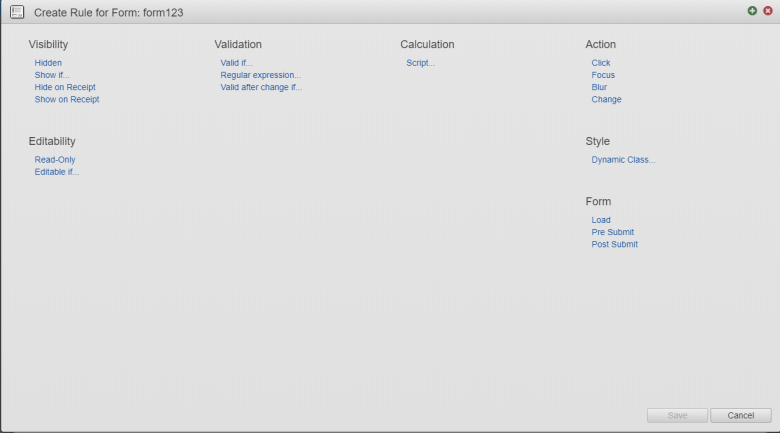
Note Different type of components, may have different set of rules. For more information, see List of Maestro Rules.
Note You can only create one rule of each type for each component, so if a component has a rule already added, this rule won't be shown in the list of available rules.
- Write a JavaScript to implement the rule logic.
- Double-click on an item in the tree to insert the field's data reference into the code pane where the cursor is currently located.
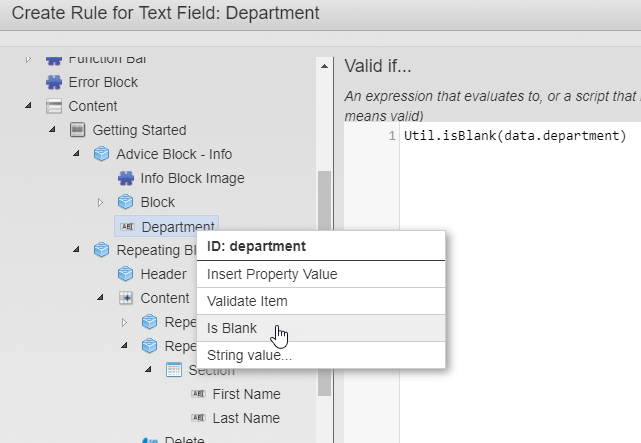
- Right-click on an item in the tree to bring up the list of rule helpers applicable to that item type. Then select from the list of pre-defined expressions to insert that templated rule code into the source, with the item data reference contained within it. Selecting one should inject an expression into the rule wherever the cursor is or Maestro will open another popup with additional options, depending on which expression is chosen. A Rule Helper used to insert code in the rule source is shown below.
- Insert Property Value: inserts the value of the selected property, which can be: options, arrangement, popover help text, etc. It’s not applicable to the Show if rule.
- Is Blank: creates a Show if rule that displays the hidden component if the selected component is blank.
- Selected option: creates a Show if rule based on one of the options created for the selected component. Use it for radio button groups or dropdown lists.
- Get selected option label: pulls the label from the selected component. It’s not applicable to the Show if rule.
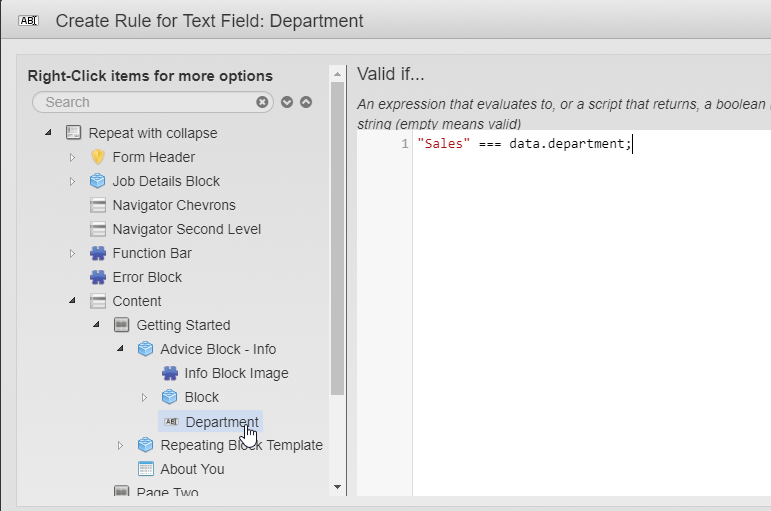
- Once generated into the rule source, it is only now necessary to place a
!in front of the generated code and the non-empty check code is complete. To illustrate how to insert adata.departmenttext into the JavaScript, double-click the Department field in the tree, so it’s added to the code as shown below. - Click Save.


The pre-defined options are based on the selected component type and may not be relevant to the specific rule you are creating. For example, the available expressions can be:
Edit a Maestro Rule
After the rule is created, you can edit the JavaScript by clicking a corresponding rule, for example, the Mandatory if rule, in the Properties pane, in the Rules section.
Remove a Maestro Rule
Maestro allows you to delete a rule. You may wish to use this functionality when you don't need a rule.
To remove a rule:
- Open a Maestro form in the Maestro editor.
- Select a component.
- Select the Properties tab and expand the Rules section.
- Click against a rule to delete and Click OK to confirm it.
Next, learn about the Maestro's data object.