Create a Code Library Quick Start
Journey Manager allows you to create different code libraries that can be used in your solutions by various Groovy services or deployed as global code libraries. You can also use this UI to review and troubleshoot code libraries.
You can create a code library using one of following options:
- UI: See Create a Code Library.
- SDK: See below.
Manager allows you to create and run code libraries using the SDK Maven plugin. This is a preferred approach for developers because it can be done from an IDE or a CI/CD pipeline.
The plugin provides the following goals:
- tm-sdk:code-lib-scaffold: This goal creates a code library Groovy class.
- tm-sdk:code-lib-package: This goal creates a code library ZIP archive for a code library project.
- tm-sdk:code-lib-typecheck: This goal performs type checking of a Groovy script of a code library project.
- tm-sdk:code-lib-deploy: This goal deploys a code library ZIP archive to a Manager server.
Let's look at how you can use these goals. As you have learned in Code Library Overview, code libraries can be used on global, organization, and solution levels. Let's delve into some details. We'll start with the solution level.
Create a Solution Code Library
A solution can be a bunch of services implementing specific customer onboarding flow. There can be common functionality among the services, so it makes sense to move it into a code library. The generic approach is to create a code library and then create a service that uses the code library. Finally, they are both deployed as a package into your Manager instance. In this scenario, the code library is unique for this solution only.
To create a solution code library:
- Open your solution project.
- Navigate to the
pom.xmland open it. - Update the
libPackageNameandlibClassNameelements with a new code library details, for example,com.avoka.tm.library.voandExample, respectively.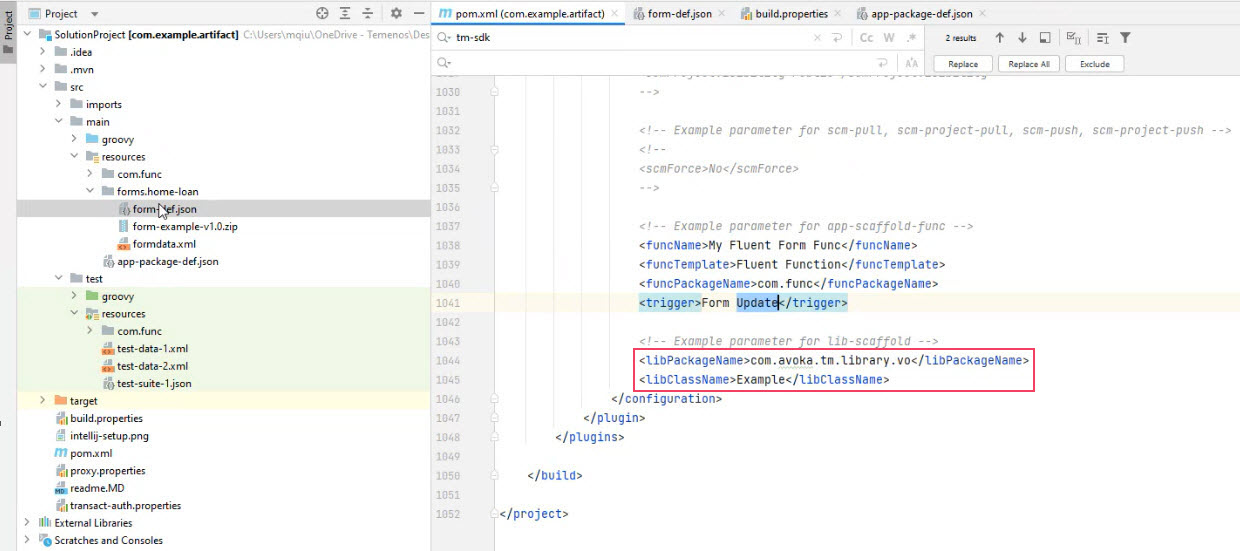
- Open the
app-package-def.jsonconfiguration file and add the service JSON configuration file names underservicesproperties.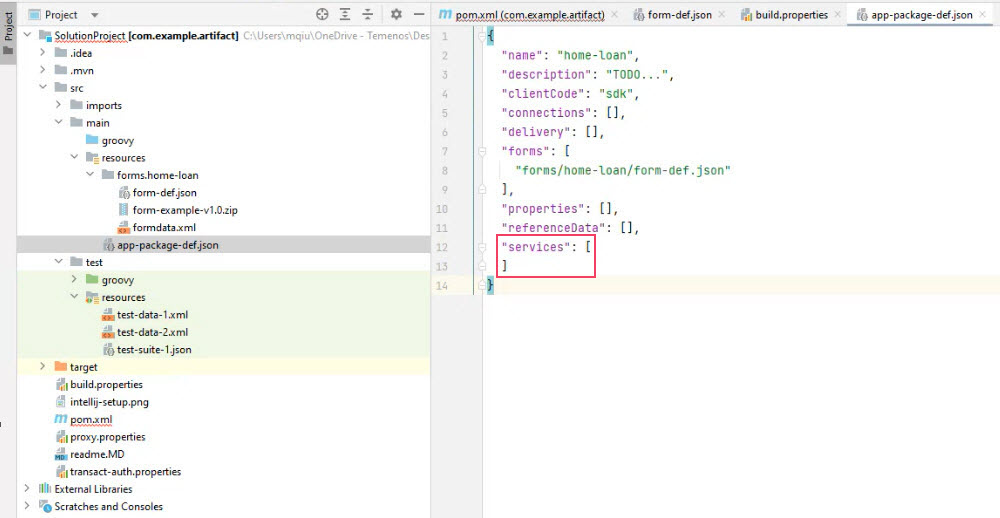
- Run the
mvn initialize tm-sdk:app-scaffold-funccommand to create the classes and functions defined in the configuration files above. - Run the
mvn initialize tm-sdk:lib-scaffoldcommand to create a code library specified with thelibPackageNameandlibClassNameelements. - Navigate to the new code library Groovy class under the
main/groovy/com/directory. - Open the code library class, for example,
Example.groovyand update the Groovy script to implement desired functionality. - Open the service, for example,
MyFluentFuncForm.groovyand update the Groovy script to call methods of theExample.groovycode library. Make sure you add the code library package name as theimportstatement.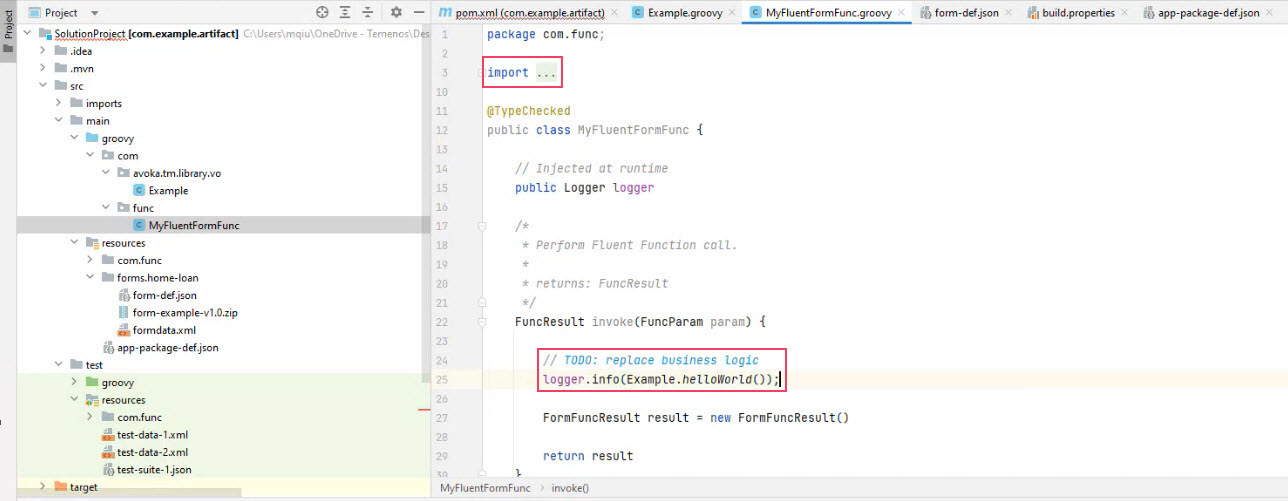
- Run the
mvn initialize app-deploycommand to perform a type check and then deploy a form, the service and code library as an application package into Manager. - View forms to check the form is deployed.
- View code libraries to check the code library is available. Open the code library Groovy script in UI to review it.
- Open the form to see it renders correctly and executes the service and code library as expected. Check the Groovy Log of the service to verify this.
Create a Centralized Code Library
You often need to create a project that contains code libraries only, so it can be deployed in Manager and used by various services in different organizations.
To create a global code library:
- Open your global library project.
- Navigate to the
pom.xmland open it. - Update the
libPackageNameandlibClassNameelements with a new code library details, for example,com.avoka.tm.library.voandGlobalLib, respectfully. - Run the
mvn initialize tm-sdk:lib-scaffoldcommand to create a code library specified with thelibPackageNameandlibClassNameelements. - Update the
pom.xmlwith anotherlibPackageNameandlibClassNameelements, for example,com.avoka.tm.library.utilandGlobalUtils, respectfully. - Run the
mvn initialize tm-sdk:lib-scaffoldcommand to create another code library. - Run the
mvn initialize lib-deploycommand to package and deploy these code libraries to Manager. - View code libraries to check two new code libraries are available. Open the code libraries Groovy scripts in UI to review them.
Use a Centralized Code Library
Sometimes you want to use a centralized code library in your solution project.
To use a centralized code library in a solution:
- Open your global library project.
- Navigate to the
pom.xmland open it. - Update
artifactIDelement with thegmavenplus-pluginvalue to tell Maven what Groovy source to pack. - Run the
mvn installcommand to create a JAR file with all code libraries as described in the Global Code Libraries sections above. - Open your solution project.
- Open the
pom.xmlfile and update the version.shared-code-lib element with the JAR file you created, for example,MyCentralizedLib. - Update the
dependencyandartifactIdelements with a new code library details respectfully. - Run the
mvn clean installcommand. - Open the service, for example,
MyFluentFuncForm.groovyand update the Groovy script to call methods of the centralized code library. - Run the
mvn initialize lib-deploycommand to package and deploy these code libraries to Manager. - View code libraries to check two new code libraries are available.