Maestro SCM Quick Start
This guide provides a quick introduction showing how to perform Maestro source code management using the T-CLI command-line tool to sync content between your local file system and a Maestro server.
Prerequisites
Prior to undertaking this exercise, you need to obtain the T-CLI jar file from the tools folder of the unzipped SDK distribution. Follow the initial steps in Setup Journey SDK, until the distribution is unzipped.
info
If your Maestro server is behind a proxy, we have guidance to help you; see Maestro SCM overview > Proxy configuration.
Overview
The instructions below will guide you through the following steps.
- Create and build a new project and form in Maestro – with some deliberate mistakes.
- Start T-CLI and connect to your Maestro server.
- Pull the Maestro project into the file system.
- Edit the
form.jsoncode to correct the deliberate mistakes. - Push the corrected form back into Maestro.
- Render the form again to verify the fixes have been deployed correctly.
Step-by-step instructions
Start T-CLI and connect to Maestro
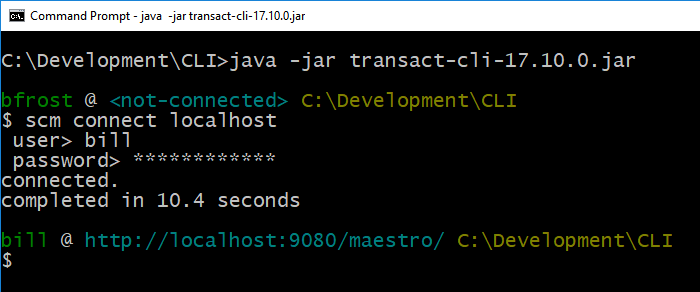
Start T-CLI and connect to your Maestro server.
Open a command prompt or a terminal session in your SCM folder, start T-CLI, and connect to your Maestro server.
$ cd \Development\CLI
$ java -jar transact-cli-23.4.0.jar
$ scm connect localhost
Provide your credentials.
Pull the Maestro project down to the local filesystem
Copy the SCM Clone command from the Maestro Management Dashboard and paste it into the T-CLI session.
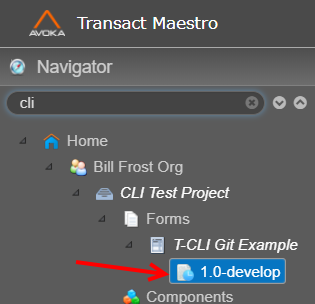
In Maestro, select the form project in the Navigator.
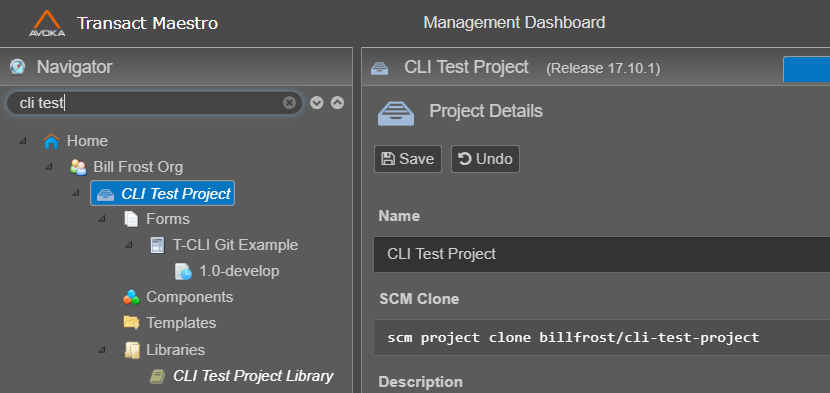
Copy the SCM Clone command to the clipboard.
In the T-CLI session, paste the command and press Enter.

Fix the form error
An error has been identified in the form, so we'll fix it in our local
form.jsonfile.Locate the
form.jsonfile that has been saved to the local filesystem, and edit the file in your preferred text editor.Replace all instances of the string
NameewithName. These occur in property values for the Last Name field as shown below.
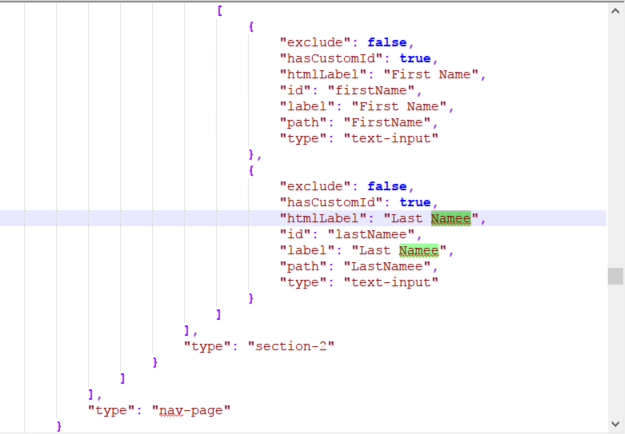
Save the
form.jsonfile.
Push the fixed form to Maestro
Push the form with fixes back into Maestro.
Change into the project directory; it's three levels below where the
scm clonecommand was issued.Enter the following commands:
$ scm project status # This shows there has been a local modification.
$ scm project push   # The locally modified file is pushed back into Maestro.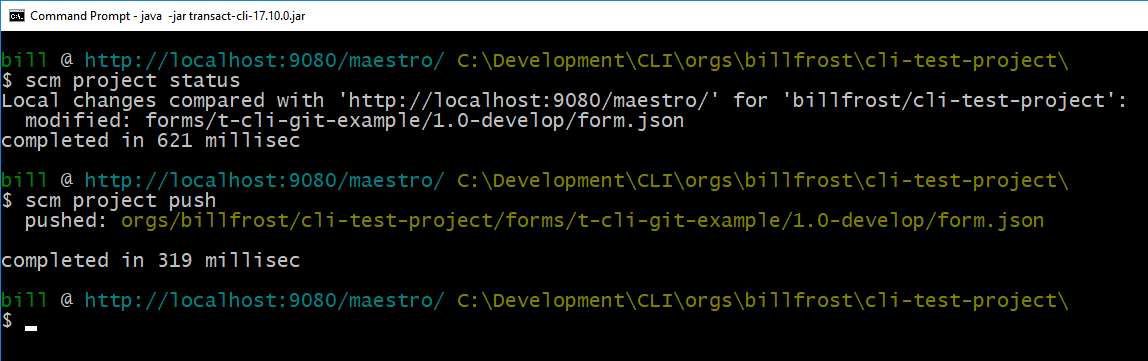
Verify the corrections
Render the form in Maestro and verify the fixes have been applied.
Open the form in Maestro.
Verify the error has been fixed.

Examine the Save History in Maestro
Examine the form's Save History in Maestro. This reveals where various form changes (versions) were made.
Select the form version in the Maestro Navigator.
Select the Save History tab in the form version detail panel.

You can see the original saved form with Maestro as the Source, and the corrected form with SCM as the Source.