Configure Organization Report Scheduler
Journey Manager (JM) The transaction engine for the platform. | System Manager / DevOps | 19.05 This feature was removed in 19.05
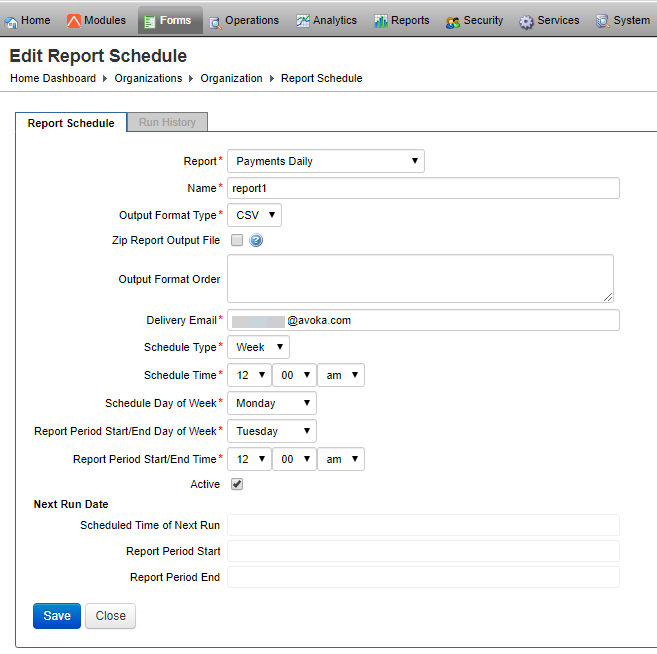
Manager allows you to configuring an organization report scheduler. You can choose the set of columns that will be included in the CSV file by specifying the column names in the report schedule configuration.
To configure organization report scheduler:
- Select Forms > Organizations.
- Locate an organization and click Edit.
- Select the Report Scheduler tab to see all available report schedulers.
- Locate a report scheduler and click Edit or click New to create a new report scheduler.
- Select a report from the Report dropdown list. The available options are:
- Client Operational Summary
- Client Operational Summary Error
- Payments Daily
- Provide a name for the report scheduler.
- Select a report format from the Output Format Type dropdown list. The available options are:
- CSV
- XLS
- Select the Zip Report Output File checkbox to compress the report in ZIP format before sending it out.
- Specify the order of the column names in the Output Format Order field.
- Provide the delivery email address in the Delivery Email field.
- Select a report interval from the Schedule Type dropdown list.
- Select the schedule time from the Schedule Time dropdown list.
- Select a day of the week from the Schedule Day of Week dropdown list.
- Select the report period from the Report Period Start/End Day of Week dropdown list.
- Select the report time from the Report Period Start/End Time dropdown list.
- Select the Active checkbox to make this report active.
- Click Save to update the changes.
Select the Run History tab to see the history of the report being run.
Click View the Report On Screen to run the report and show it in the browser.
Click Trigger the Report Schedule to run the report and send it as an email
Next, learn how to configure organization data management.
