Translation CSV Files with Multiple Languages
MaestroThe UI design product. | Form Builder | 18.05 This feature was introduced in 18.05.
Journey Maestro allows you to edit translation files containing not only one but multiple languages by downloading the CSV translation file, editing it, and uploading it back into the Maestro form.
To export, edit and upload the CSV file with all configured languages:
- Open a form with multiple languages configured.
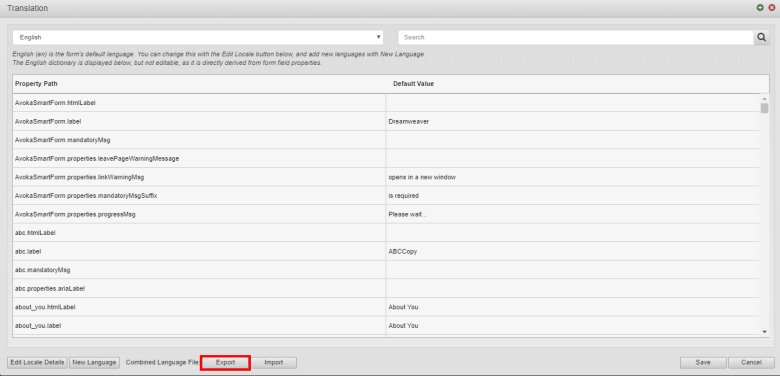
- Select Translation.
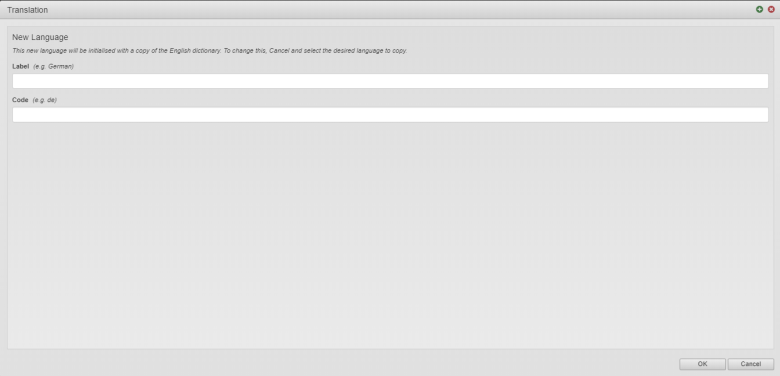
- Click New Language if you want to add new languages to the CSV file.
- Enter a Label and Code for the new language, for example, Hindi (Label) and hi (Code).
- Click OK.
- Click Export from the Combined Language Section of the window.
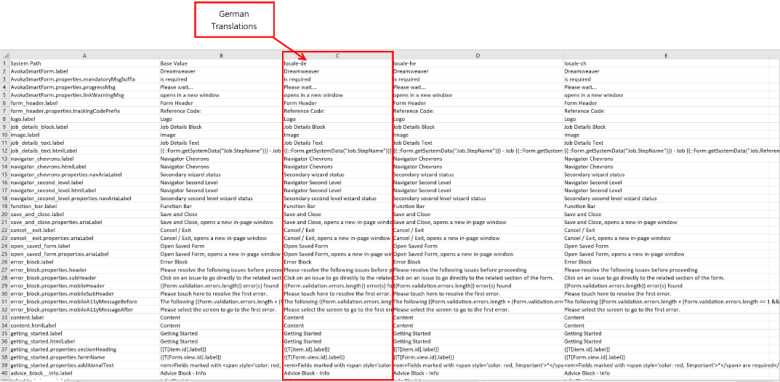
- Open the CSV file in any CSV file editor tool, such as MS Excel, as shown below.
- Edit the CSV file to contain the translations for the newly created language or edit any of the languages that have already been configured.
- Save the CSV file. The name of the file is not important but the file type (CSV) is.
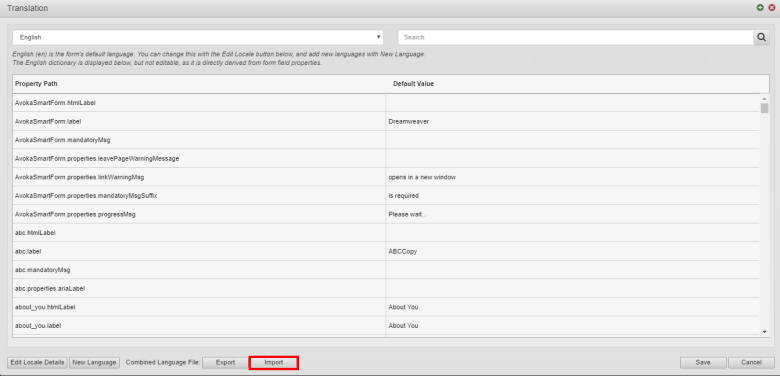
- Click Import from the Combined Language File option.
- Select the edited CSV file from your computer.
- Save your form. Once you save and build the form, the changes you made to the translation CSV file will be reflected in the form.
Each column contains a different language. A blank column will be created for the newly created language.
Maestro currently does not support multiple sheets on a single spreadsheet so when you edit the CSV file, it is recommended that you DO NOT create/use multiple sheets in a single CSV file.
If your translation uses non-ASCII characters, you need to "Save as" a UTF-8 CSV File.
ASCII characters include the digits 0 to 9, lowercase letter a to z, uppercase letters A to Z, and punctuation symbols (e.g. %,$,*,&). More information on ASCII can be found at https://www.computerhope.com/jargon/a/ascii.htm
Next, learn about translation CSV files for individual languages.


