Configure Composer Forms for Use with Collaboration Jobs
Composer This topic is related to Transact Composer. | Form Builder | All versions This feature is related to all versions.
Composer forms require configuration before you can use them with collaboration jobs.including:
- How to configure data extracts.
- What collaboration jobs widgets are.
- How to set rules, such as the section visibility and editability rules.
Data Extracts
Data extracts are used by collaboration jobs to access form data. In this example, we use the Composer form Job Example 2 Minimal.
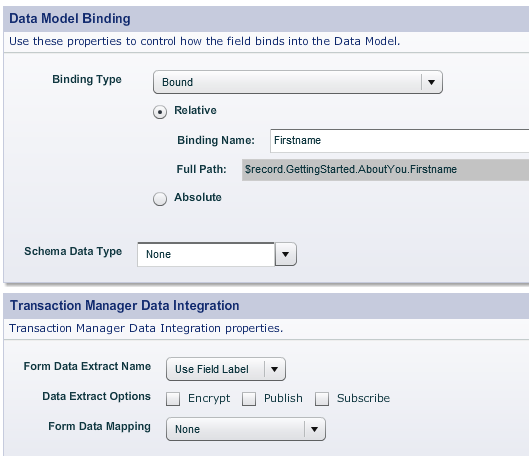
A collaboration job will put this into the $formDataMap.routeName values automatically. Data extracts are configured in Composer in the Data Model tab of the field's properties dialogue as shown below.
The easiest way to setup the data extract is to use the field label. However, you can use an alternative name. Composer version 4.3.0 and above has the Encrypt, Publish and Subscribe checkboxes to specify data extract options.
Form Data Mappings
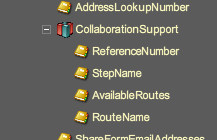
The collaboration components described in the section below rely on the 4 Job data elements that are read into form variables. These can be found in Nuts & Bolts -> Transaction Manager Support -> Collaboration Support as shown below.
The job controller sets the following XML data elements for each task:
- ReferenceNumber, which is a Job Number
- StepName
- AvailableRoutes, which is a pipe delimited list of the current steps route names
The Composer form sets the RouteName on Task Submission via a widget or business rule.
Collaboration Widgets and Components
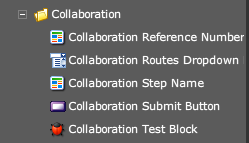
Composer has a number of widgets that can be used to build forms for collaboration jobs as shown below.
The Maguire template has additional collaboration support to display the step name and job number in the form heading.
Collaboration Reference Number and Collaboration Step Name
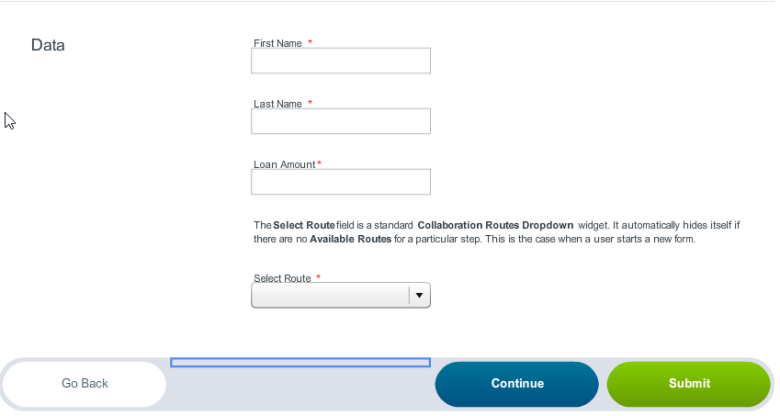
The Collaboration Reference Number (Job Number) and the Collaboration Step Name are Rich Text Fields to display the Job Number and Step Name on the form. Both fields can specify a prefix. The Minimal form contains Both fields above the data fields. We don't recommend that these fields be used as they are now both incorporated into standard Maguire 4.1 Template as shown below.
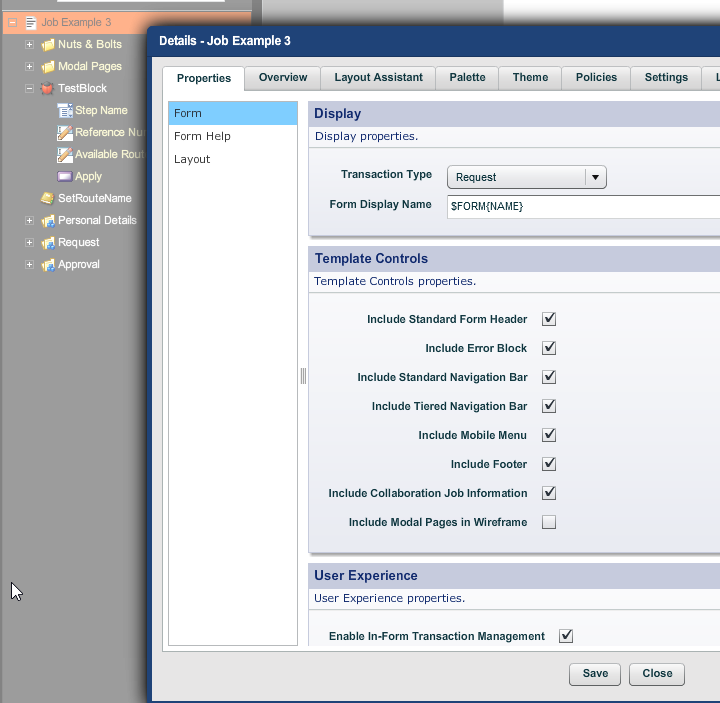
The template hides the Step - Job when they are blank such as when the applicant first fills out the form. To turn on this Maguire Feature double click on the forms root node, under the properties tab select the Include Collaboration Job Information check box.
Collaboration Routes Dropdown List
The Collaboration Routes dropdown List is the easiest way to make a user select the route to the next step.
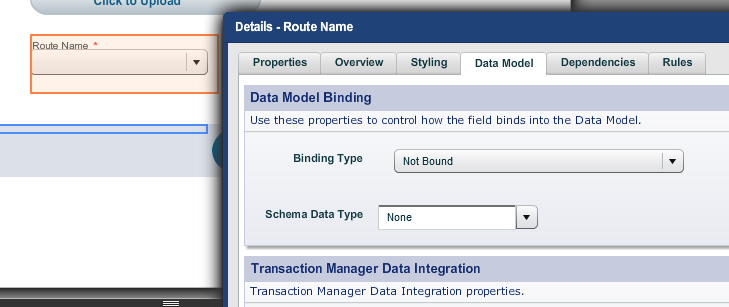
To ensure this item doesn't pick up the route of the previous step, its strongly recommended that the binding be changed to Not Bound. To do this:
Collaboration Submit Button
Don't use the Collaboration Submit Button widget, because the form using this button can fail to return the route. It was initially prototyped to create a submit button that sets it's label as a route.
We recommend that you either use the Collaboration Routes dropdown or the standard Radio Button Group as described below.
Collaboration Test Block
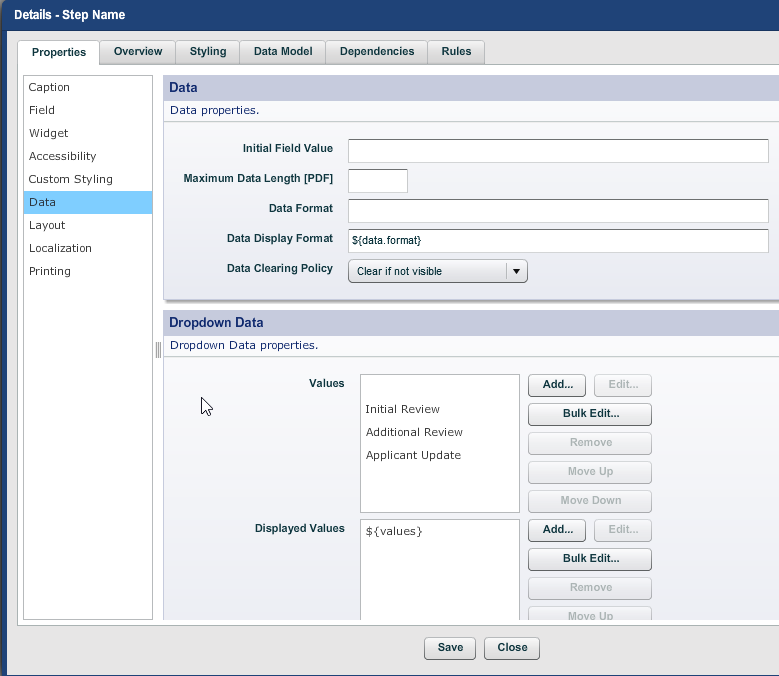
The Collaboration Test Block is used to test a form in the Composer preview. It has the Step Name, Job Number and the Available Routes. Composer version 4.2.0 and above has 3 fields that are used to test Task Assign Repeat tasks.
Select the collaboration job's step name from the Step Name dropdown list. Don't forget to include an empty row to test the field's behavior in the form before its submitted.
Routing Using the Standard Radio Button Group
This is the preferred method to use with the collaboration submit button.However, it doesn't dynamically create the radio buttons, so you have to hard code the values in your form. The advantages of using the radio button groups are:
- They look nicer than the drop down.
- The give feed back to the user as to what they intend to do.
- The route choice appears on the form receipt.
- They can specify an optional content block with additional user's instructions, which is useful for new form users. The content block can also hold addition fields that give feedback to the next review step.
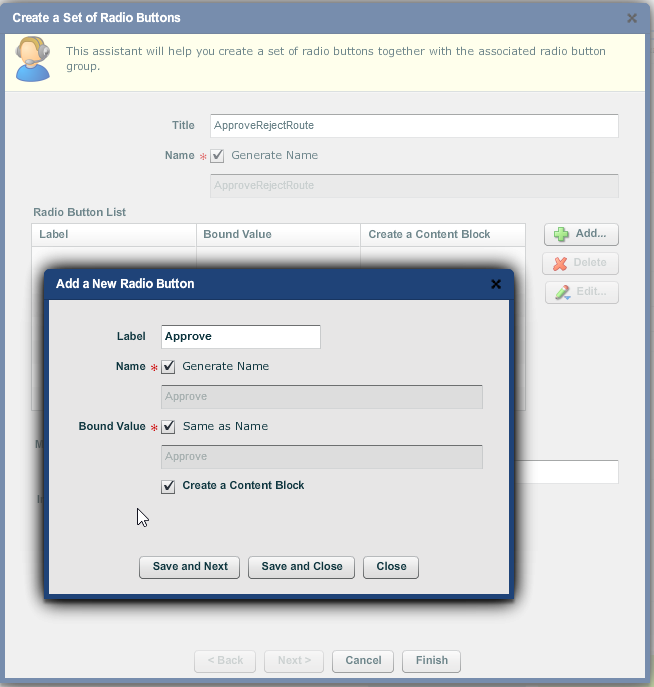
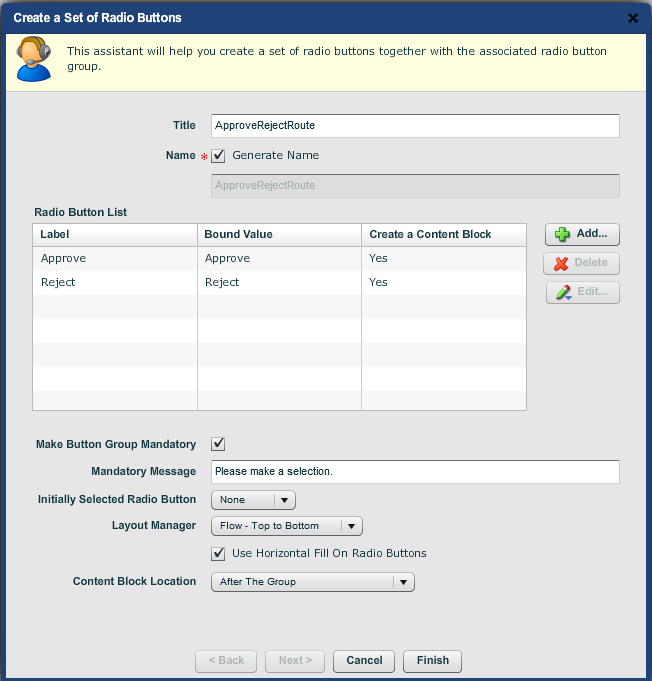
The following example creates a single radio button group that is used for form approval. To do this:
- Log onto Composer.
- Drag the Radio Button Assistant widget into you form hierarchy. This will open up the Create a Set of Radio Buttons wizard dialog.
- Add the route names as Radio Button Labels.
- Make the button group mandatory.
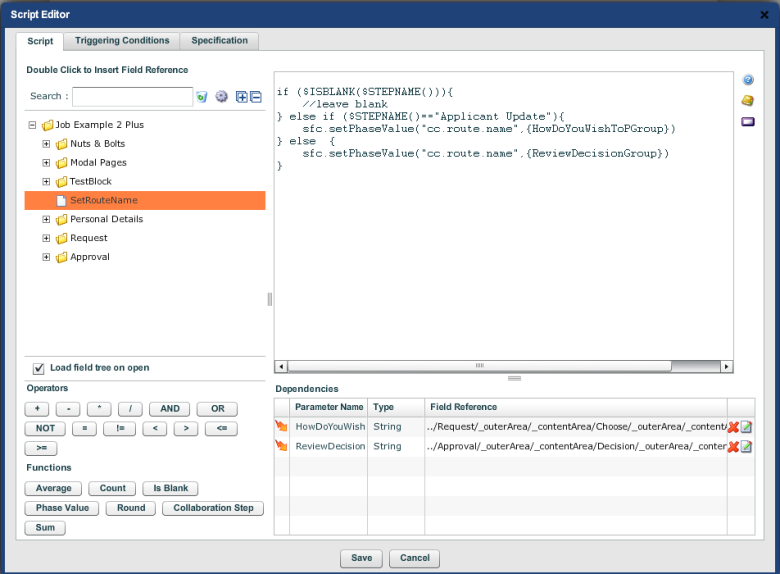
Business rules can be used to set the route. Your form has steps with different route choices like the Job Example 2 (Multi Step Review Job) with the business rule shown below.
if ($ISBLANK($STEPNAME())){
	//leave blank
} else if ($STEPNAME()=="Applicant Update"){
	sfc.setPhaseValue("cc.route.name",{HowDoYouWishToPGroup})
} else  {
	sfc.setPhaseValue("cc.route.name",{ReviewDecisionGroup})
}
Visibility and Editability Rules
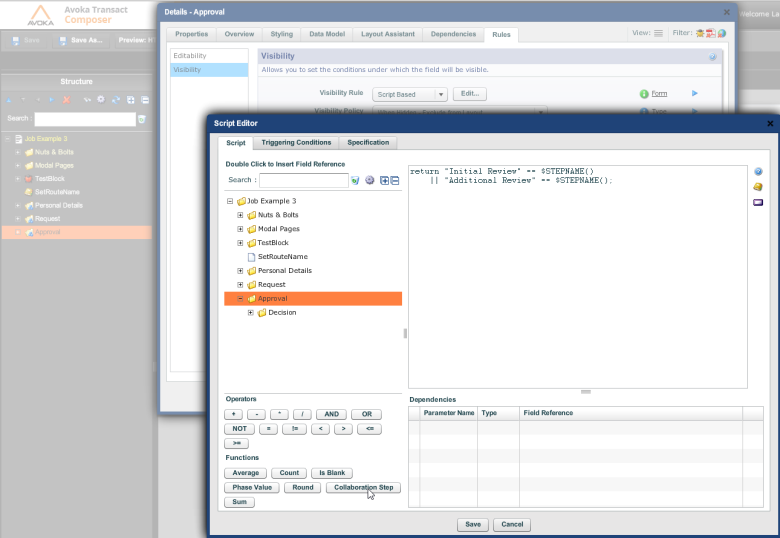
Scripts are used to setup visibility and editability rules for sections based on the Step Name. This can be used to hide the office use only section from the applicant or make the section of form that the applicant fills out read only. When configuring a script rule, use the collaboration step button that inserts a $STEPNAME reference to the step name into your script.
The step name is blank when this form is first submitted. The Visibility Rule that would show a section that is only visible when a user fills out the form for the first time return: isBlank($STEPNAME())
Attachments
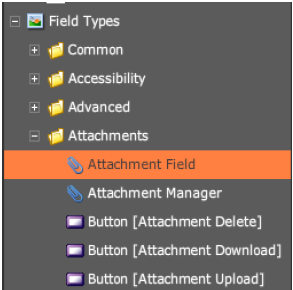
The Attachment Field is available with Manager version 4.1 and above that uses the Maguire Template 4.1 as shown below.
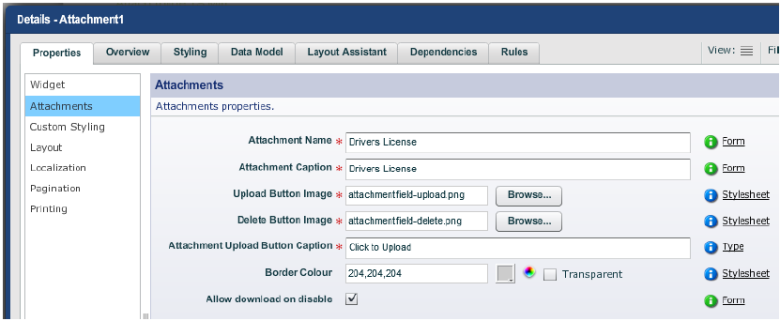
This widget will allow a file to be uploaded. A user may want to confirm the file is correct and can download the form by clicking on the file link. They can delete the file by clicking on the X. The field works as expected when a user saves the form any attachments that have been uploaded are available when the form is next opened. This field uses the same Editability and Visibility rules as discussed above. However, if the editability rules determine that the widget is not editable at a particular step, the attached file can't be uploaded, downloaded or deleted. There is an Allow download on disabled check box as shown below. This is useful where a reviewer may want to look at the form but not delete or modify it. This is on by default.
The widget has an internal field Attachment Manager, which must not be altered when using with Manager task assignments and the job controller.
Configure Routes with Business Rules
It is possible to set the route from within the form using a business rule, which is how the pre-built Collaboration Widgets and Components work. Using a simple script, you can set the route phase value, which allows for logical changes to the collaboration route based on form data.
To configure the route:
- Add a business rule to your form.
- Edit the business rule script with the following code.
if (condition) {
	sfc.setPhaseValue("cc.route.name", "Deliver");
} else {
	sfc.setPhaseValue("cc.route.name", "Review");
}
You can set a number of the values associated with the collaboration job, including the step name (cc.step.name), reference number (cc.reference.number), available route (cc.available.routes), and assignee (cc.assignee), using this method.
Next, learn how to configure Maestro forms for use with collaboration jobs.
