Creating Shared Components Exercise v5.1
PlatformApplicable to all products in Temenos Journey Manager. | Form Builder | All versions This feature is related to v5.1 and higher.
This exercise will allow you to practice your skills for creating shared components. During this exercise you will create a new shared component within a form.
Do your best to follow the provided information and complete each step.
If you get stuck, you can always re-watch any of the online training modules. This is a good way to refresh your form building skills. You’ll also find Extra Help at the end of this exercise, which contains additional information to help you complete the exercise.
You can find a sample of the completed exercise form in the Maestro Exercise Project: Maestro Training Exercises > Create Component Finish. Please note that this form uses a shared component with a different name to the one suggested in the steps below. Shared components cannot have the same name as other shared components within the same project.
If you have not already imported the Maestro Exercise Project please visit Exercise Setup - Importing the Maestro Exercise Files for more information.
Step 1 Open Create Component Begin
- Expand Organization.
- Expand Project.
- Select Forms.
- Double-click Create Component Begin.
- Click the Edit Version button to open the form
You can create components directly from the Components folder, rather than from within a form.
Step 2 Setup a Repeating Block and Add Components
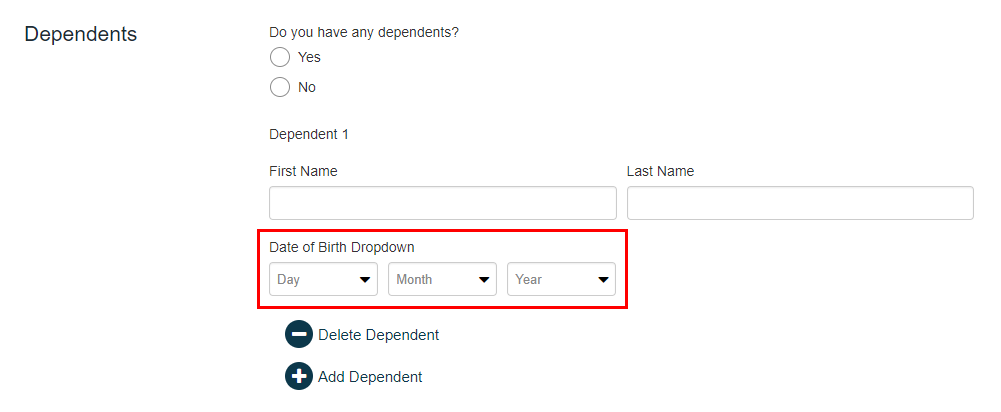
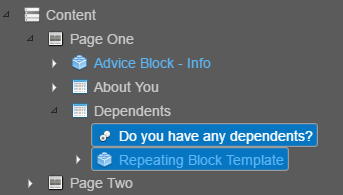
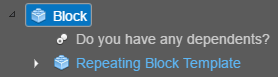
Add a Repeating Block Template and components to the Dependents section so it matches the image below.
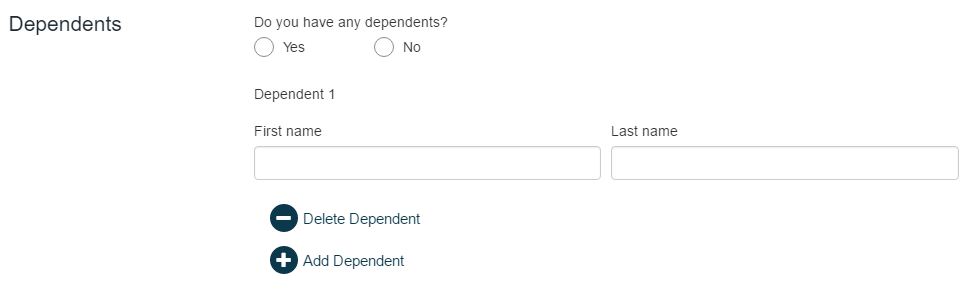
The First Name and Last Name components are within the Dependent 1 Repeating Block Template. Before you add components, make sure you add the Repeating Block Template first, then add the components.
Step 3 Create Visibility Rule
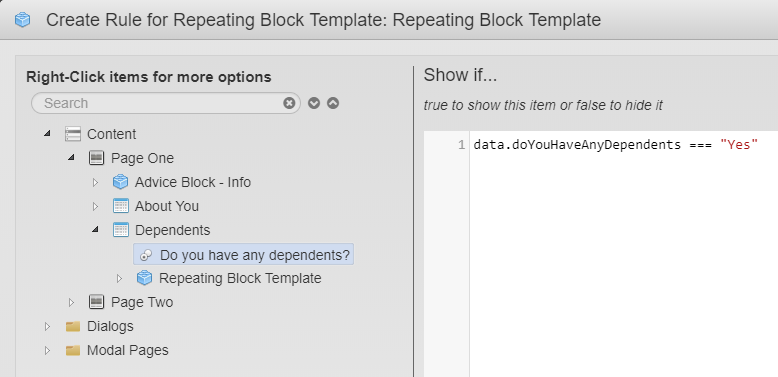
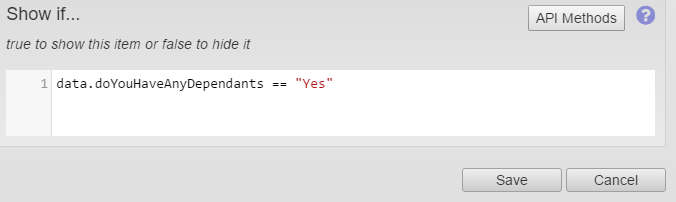
Create a visibility rule so that the repeating block does not show unless the user selects Yes to having dependents.
Create this rule on the Repeating Block Template (see below).
Step 4 Wrap in block
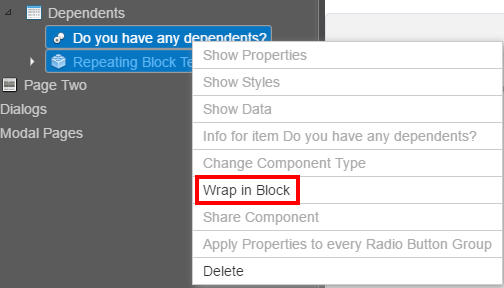
Wrap all the components (i.e. Radio Button component and Repeating Block) from the Dependents section into a block. See the image below for guidance.
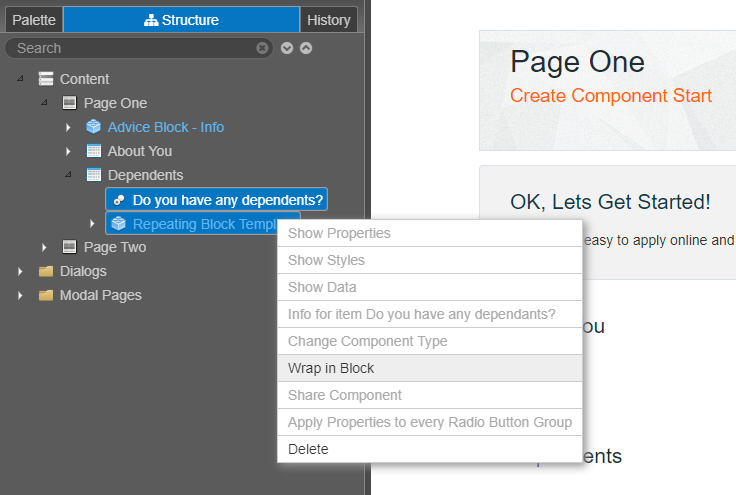
If more than one component is going to be part of a shared component, you must wrap the relevant components into a block. Your Structure panel should look like the image below.
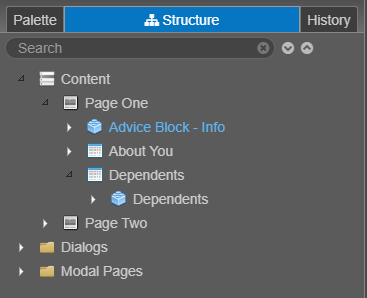
Step 5 Create a Shared Component
Create a shared component that combines the components you just created. Your Structure panel should match the image below.
Use the following details for the shared component:
Name: Dependents_Exercise
Description: Contains the components for applicant’s dependents.
Palette Folder: Custom Components
Instant Publish: Select Publish for immediate use and select Replace item with shared component
Publish Library: Select the appropriate project library (e.g. Maestro Training Exercises Library)
Remember: the instant publish options will publish the shared component to the library and replace the existing ‘Block’ with the shared component. This will ensure the current form is updated if the shared component changes.
To finish, click Save to save the Create Component Begin form - then close the form.
Step 6 Edit a Shared Component
Important: make sure your refresh the browser window (Press F5) that displays the Management Dashboard before you proceed.
From the Maestro Management Dashboard, open the shared component you just created and make a change to the component.
- Expand the Organization.
- Expand the Project.
- Select Components.
- Double-click Dependents_Exercise.
- Click Edit Version to open the Component.
Add the Date of Birth dropdown to the repeating block. Your shared component should match the image below.
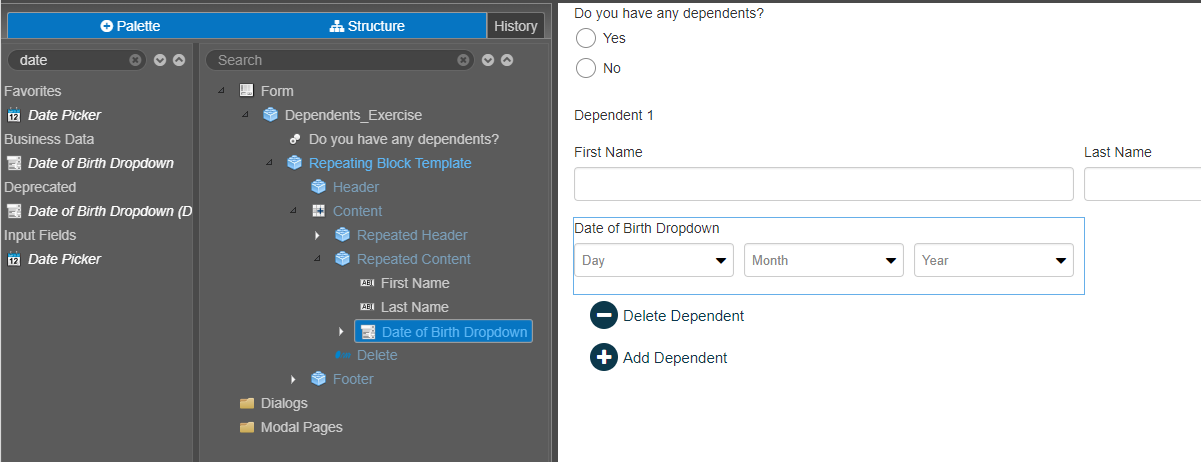
Note that the shared component won’t include form elements like the navigator or sections because it’s not linked to a specific template.
Click Save to save the changes to the shared component.
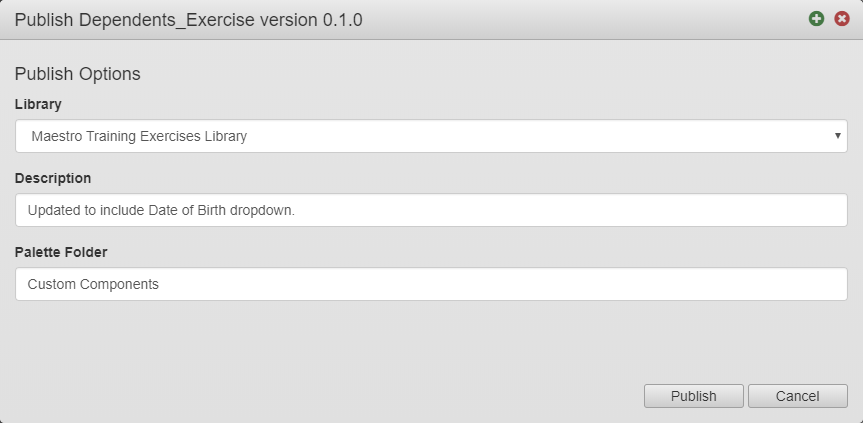
Step 7 Publish Updated Component
Once the component has been updated, Publish it so the changes are updated in forms currently using the component as well as any new uses of the shared component.
Use the image below for guidance.
Once you publish the updated component, Close the Component window and Open the Create Component Begin form to confirm the changes to the component (below).
Extra Help
Need some extra help?
Use the information below to assist you in completing the exercise steps.
Using a Repeating Block Template
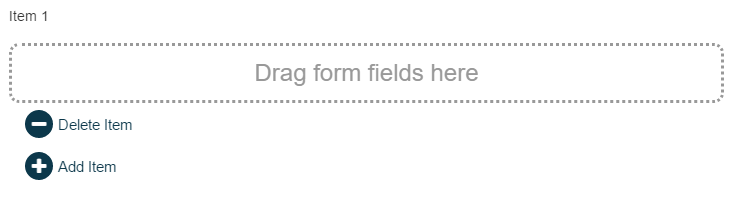
The Repeating Block Template enables you to easily setup repeating functionality.
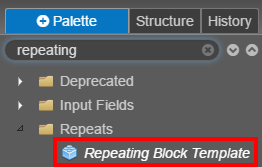
Use the Palette Search to find the Repeating Block Template.
Drag the component onto your form.
Add the components you want to repeat into the field area of the block.
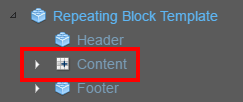
To make adjustments to the Repeating Block properties, select Content within the Repeating Block Template (Structure panel).
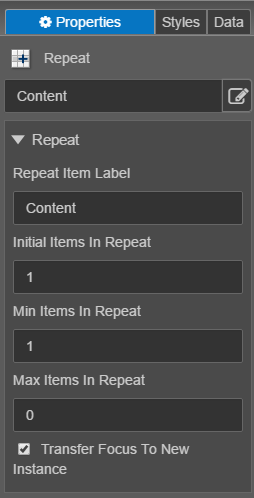
Repeat Item Label: updates the label at the top of the block, as well as the button text.
Initial Items In Repeat: determines how many repeating components are on the form by default.
Min Items In Repeat: determines the minimum number of repeating components that must be displayed on the form.
Max Items In Repeat: determines the maximum number of repeating components the user can add to the form.
Create a Show if Rule
The Show if rule allows you to show or hide a component based on the selection of another.
Start by selecting the component you want to show or hide.
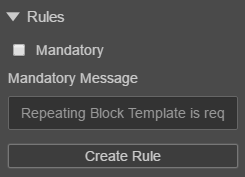
Click Create Rule in the Rules section of the Properties panel.
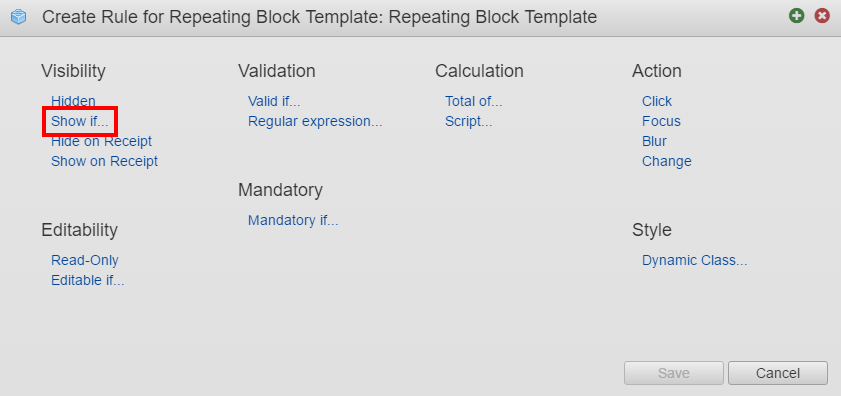
Select Show if (under Visibility).
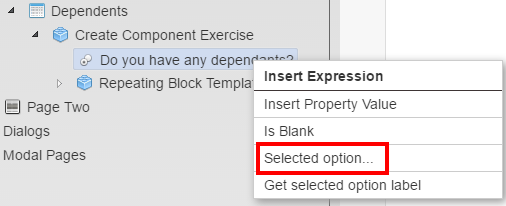
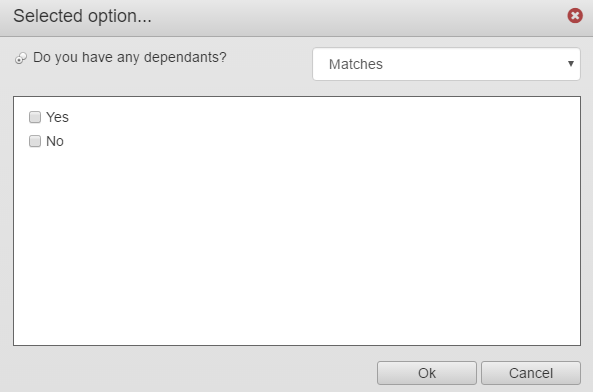
Right-click the component that determines if the selected component is displayed or hidden and click Selected option.
In the top right corner of the Selected option window, choose if the option should match or not match, then select the relevant options.
Click OK to close the window.
The script for the rule and selected components is displayed.
Click Save to continue.
Wrap Components in a Block
If a shared component is made up of more than one component, you must wrap the relevant components in a block first, then create the shared component.
To wrap multiple components in a block, select all the components from the structure panel using either SHIFT or CTRL (see below).
Right-click one of the selected items and select Wrap in Block.
The Block is created and the components are displayed within.
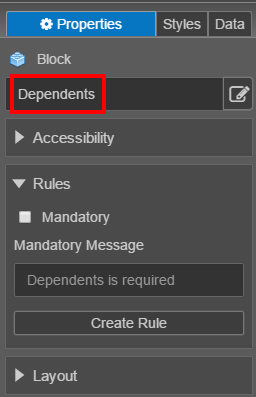
Use the Properties panel to rename the block.
Create Shared Component
Shared components are stored outside a form, in the Components folder of the project. Once a Shared component is published, it is stored in a Library. Shared components can be updated outside of a form. When they’re updated, any forms using that component are updated automatically.
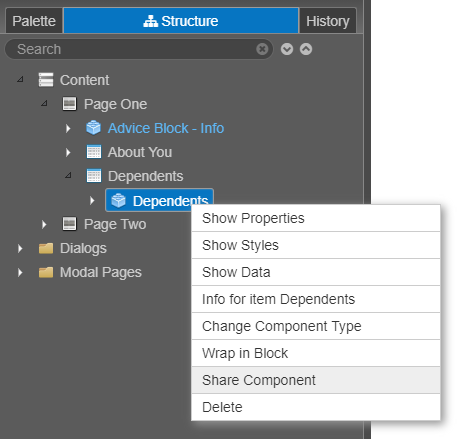
To create a Shared Component, right-click the block and select Share Component.

The Share Component window will display.
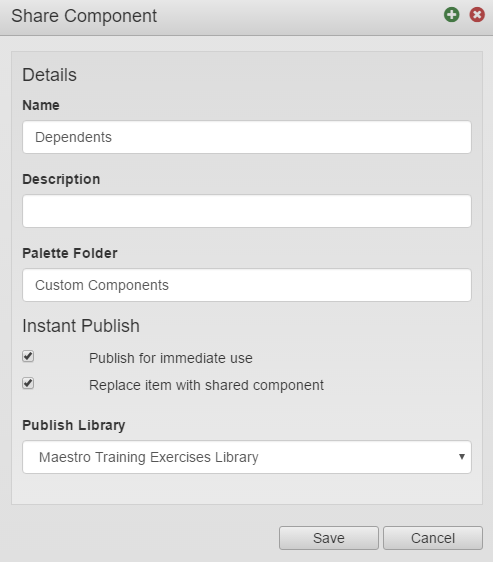
Name: is the name of the shared component displayed in the Palette panel.
Description: contains details about the shared component like the components in contains.
Palette Folder: is the folder where the shared component is stored within the Palette structure. If you enter a folder name that’s already created, the shared component will be added to the folder. If you enter a name not currently be used, a new folder will be created.
Instant Publish – Publish for immediate use: publishes the shared component as soon as you click Save. This adds the component to the library, so other forms can access and use the shared component.
Instant Publish – Replace item with shared component: removes the block currently in the form and replaces it with the shared component. This allows the component in the form to be updated whenever changes to the shared component occur.
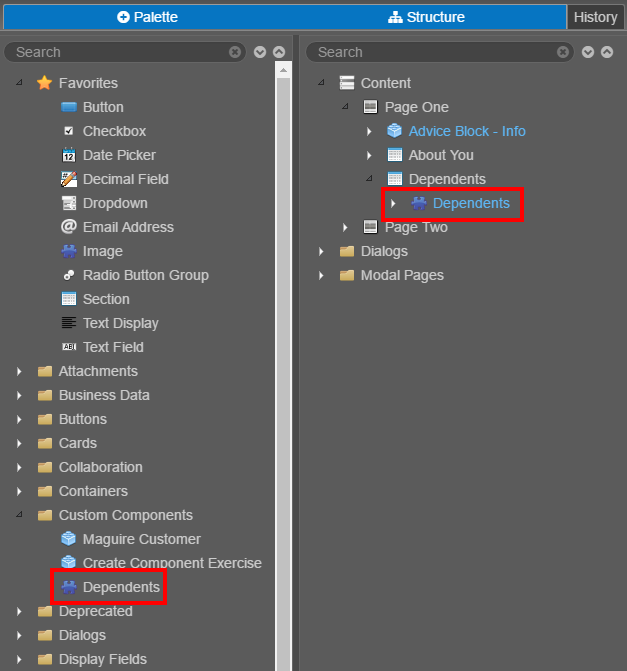
The Structure panel is updated with the new shared component and the folder in the Palette panel will contain the shared component.