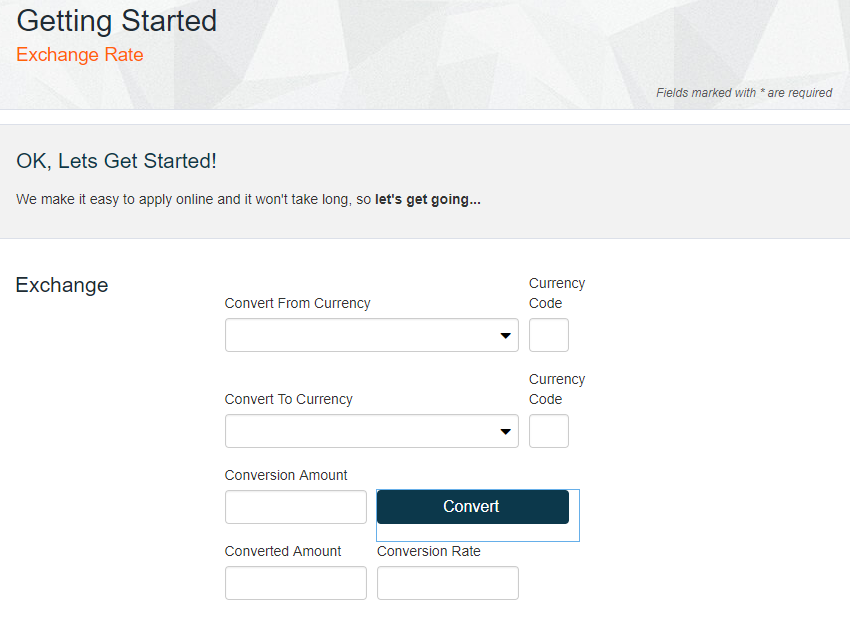
Exchange Rate Valid After Change If Rule Example
MaestroThe UI design product. | Form Builder | All versions This feature is related to all versions.
The example demonstrates the Valid after change if rule, which retrieves an exchange rate value from a Journey Manager.
To create the exchange rate rule, follow these steps:
- Select an Exchange Rate form.
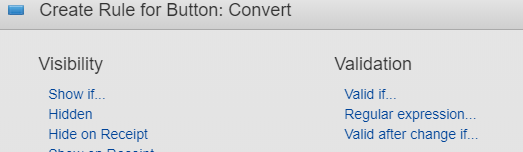
- Select the Convert button to add a rule to.
- Click Create Rule and select Valid after change if.
- Name the rule according to the functionality, in this example it is Click.
- Enter the following JavaScript code.
- Click Save.
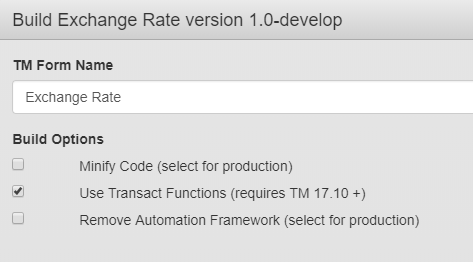
- Click Build with Options to see how this rule is displayed when the form is built and rendered. When you initially build the Journey Manager form version in Maestro, it is important that you check the Build Option Use Transact Functions as for this rule to function correctly, you will be developing with Transact Functions. See Journey SDK - Developer Guide for more details.
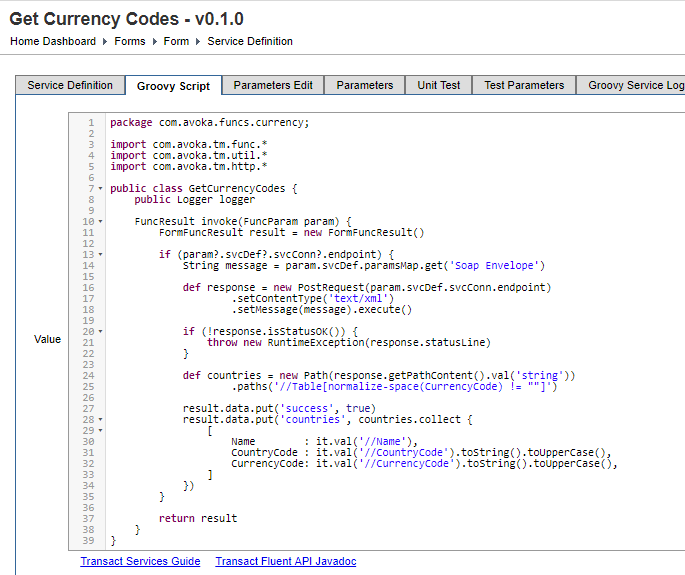
- Check in Journey Manager that the following configuration exists.
- The Exchange Rate Form is created.
- It is configured so it can be called from Maestro by service name
- Groovy code is provided.
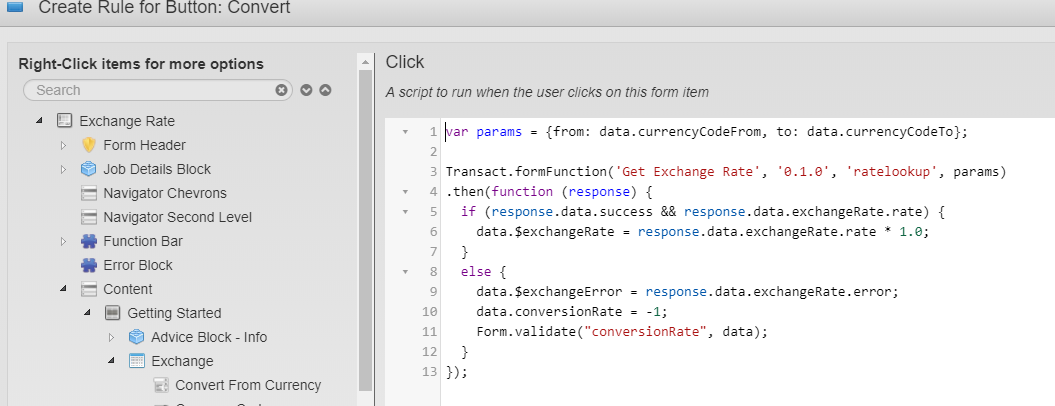
var params = {from: data.currencyCodeFrom, to: data.currencyCodeTo};
Transact.formFunction('Get Exchange Rate', '0.1.0', 'ratelookup', params).then(function (response) {
	if (response.data.success && response.data.exchangeRate.rate) {
		data.$exchangeRate = response.data.exchangeRate.rate * 1.0;
		data.$exchangeError = response.data.exchangeRate.error;
		data.conversionRate = -1;
		Form.validate("conversionRate", data);
	}
});