Jenkins CI Tutorial
PlatformApplicable to all products in Temenos Journey Manager.
Jenkins CI is one of several popular CI servers. This article covers the following topics:
- Transact Fluent SDK installation
- A Jenkins CI server configuration
- A project scaffolding
- Code type checking
- Service application packaging and uploading
- Service testing on your Journey Manager server
Prerequisites
This tutorial assumes you have already done the following:
- Downloaded the latest Transact Fluent SDK
- Installed JDK 8. You can download it at http://www.oracle.com/technetwork/java/javase/downloads/index.html
- Installed Apache Ant. You can download it at http://ant.apache.org/bindownload.cgi
- Installed Jenkins. You can download it at https://jenkins.io/download/
In a subsequent tutorial, we'll show how to hook Jenkins to a version control system so you can start to build a CI pipeline from this simple beginning.
Objectives
- Create a folder structure
- Install the Transact Fluent SDK
- Install Jenkins WAR distribution
- Run Jenkins
- Create a Jenkins admin user
- Configure Jenkins global settings
- Create a Jenkins job
- Trigger the Jenkins job
- View the Jenkins job results
Instructions
- Create the folder structure by opening a Windows CMD prompt and entering the following commands:
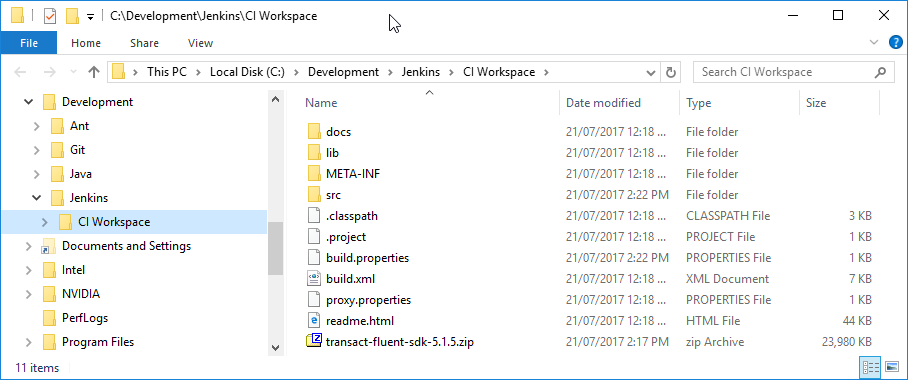
- Unzip the Transact Fluent SDK into the CI Workspace folder. Your folder structure should look like this:
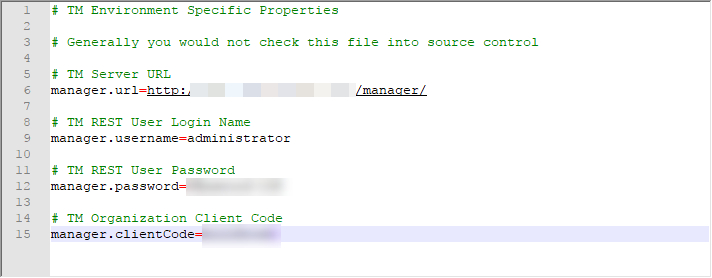
- Edit the
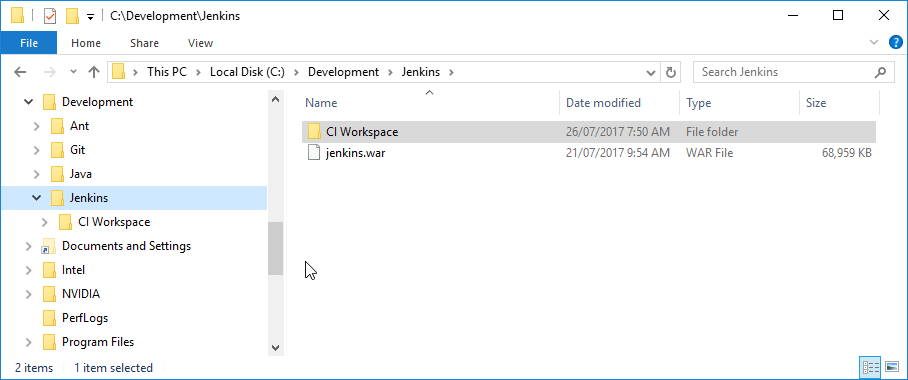
build.propertiesfile to change username, password and client code details. - Copy
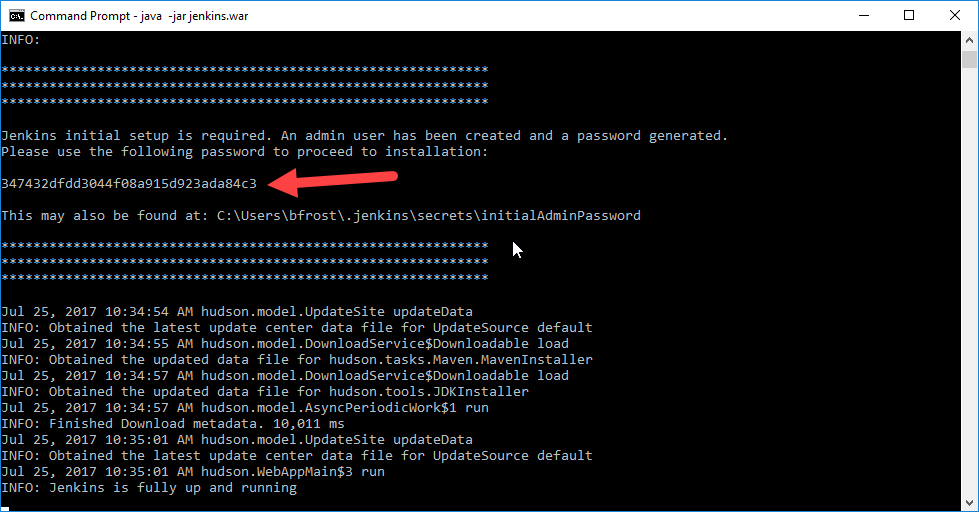
jenkins.warintoC:\Development\Jenkins. Your folder structure should look like this: - Start Jenkins from the CMD prompt with the following commands:
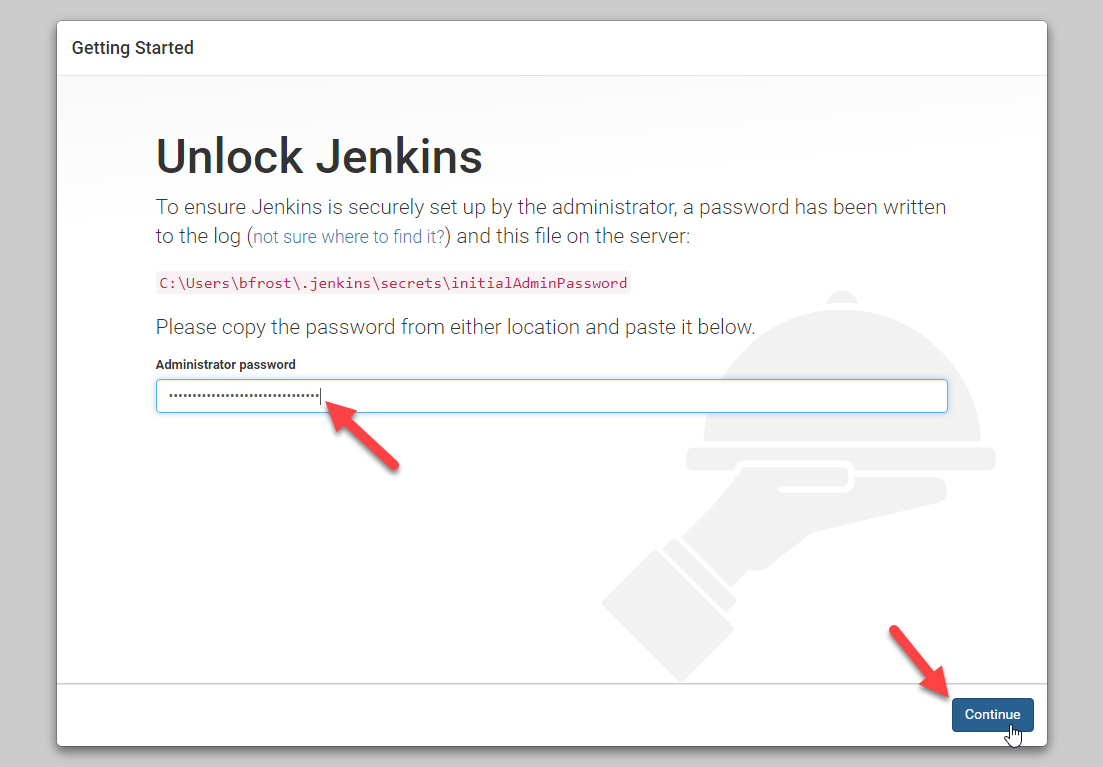
- After a few seconds, you will see a one-time password. Copy the password into the clipboard
- Open http://localhost:8080 in a browser.
- Paste the password and click Continue.
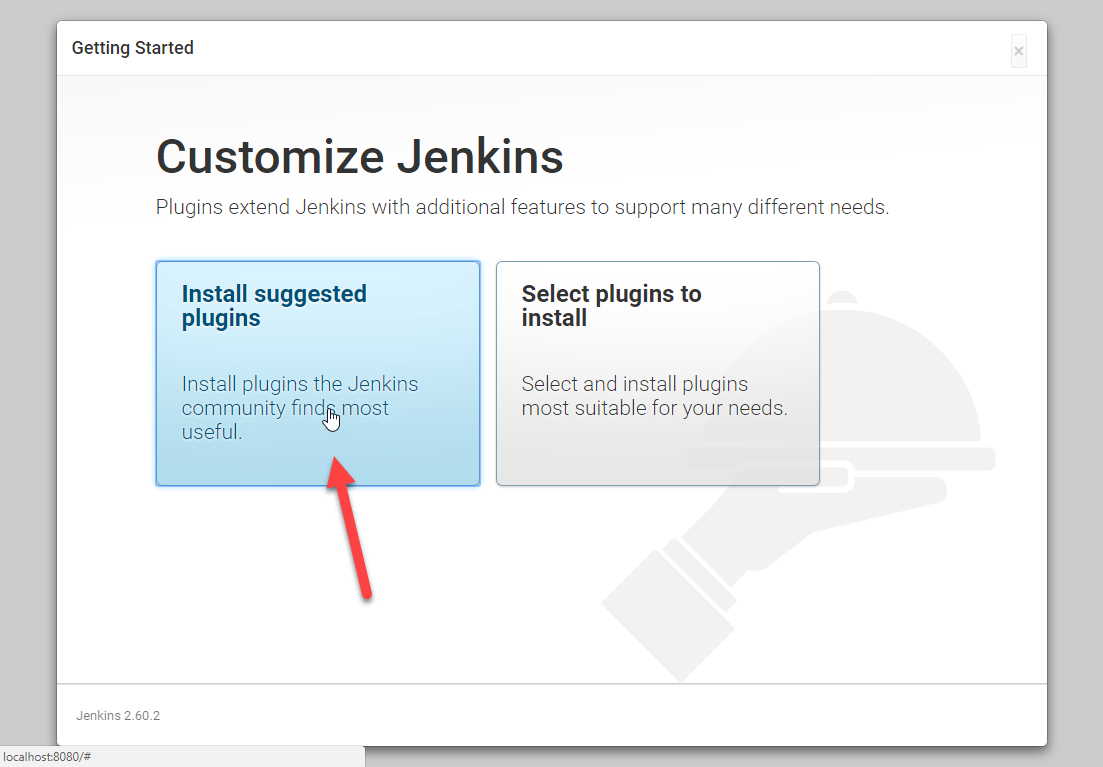
- Click Install suggested plugins.
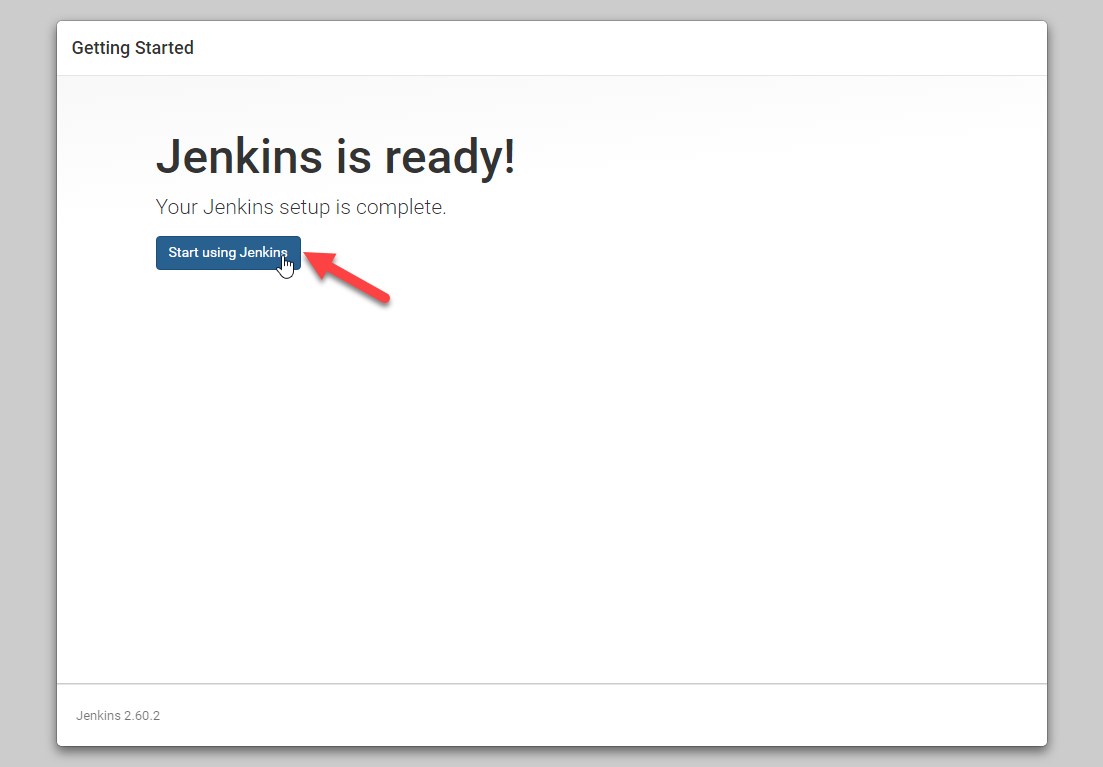
- After a few minutes, Jenkins is ready. Click Start using Jenkins.
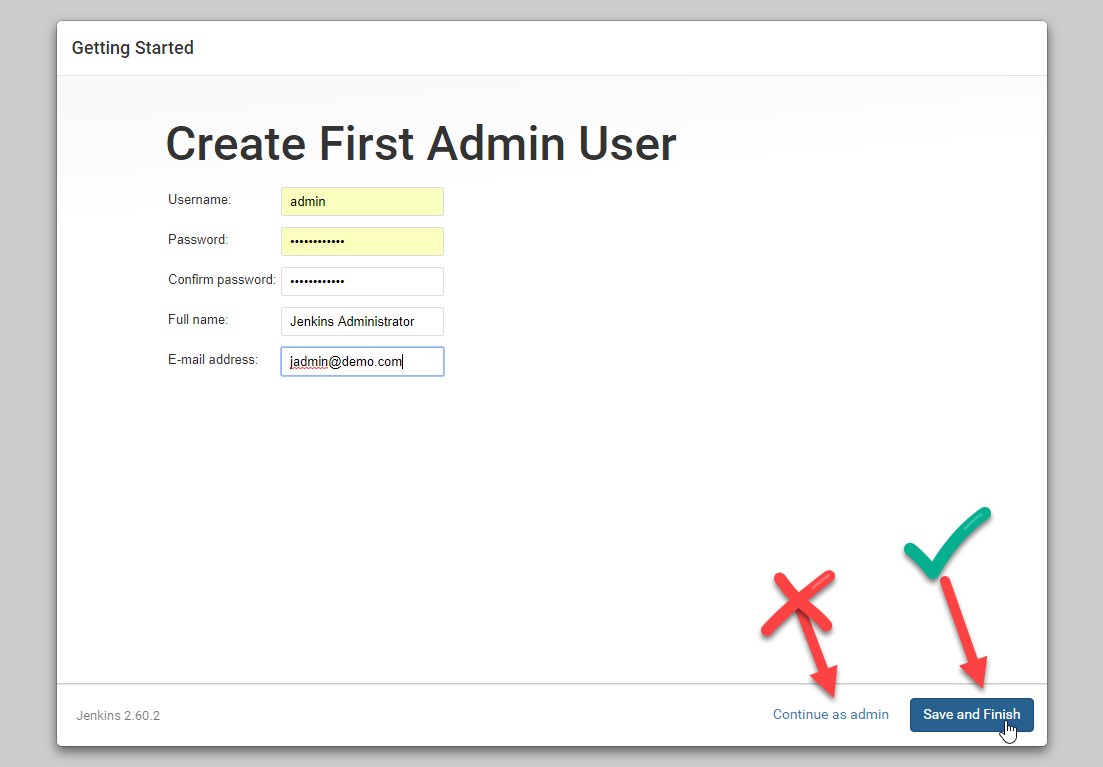
- Enter the admin user details and click Save and Finish.
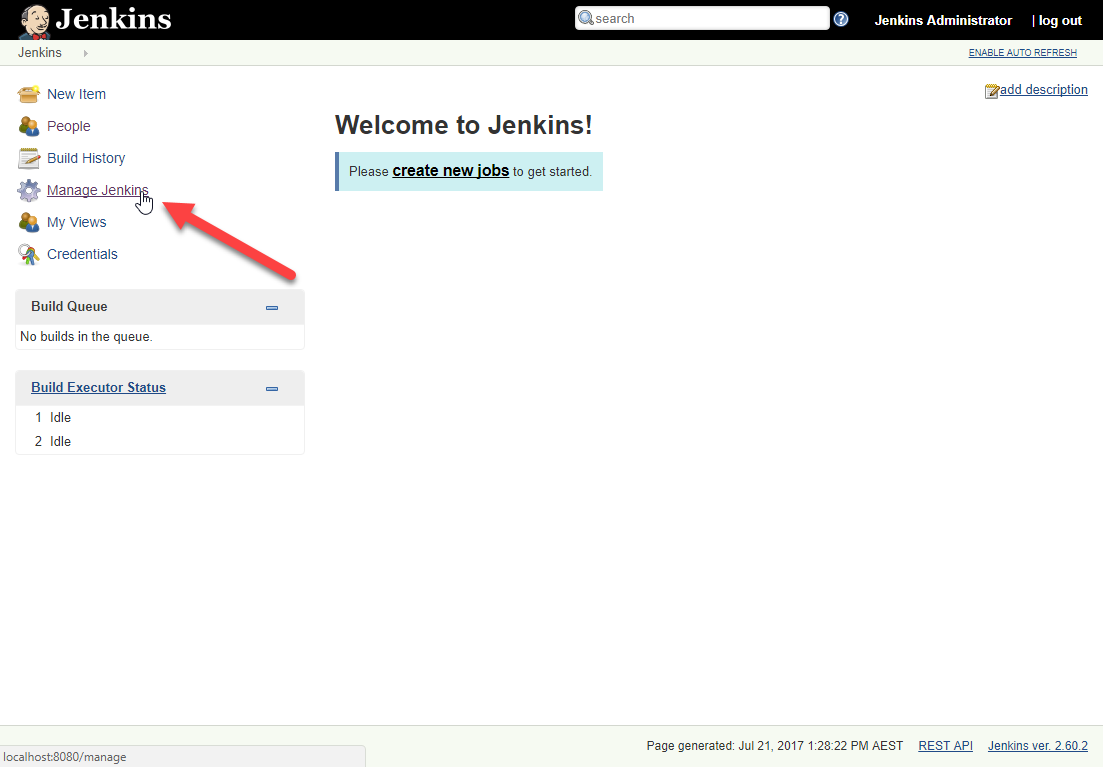
- Click Manage Jenkins.
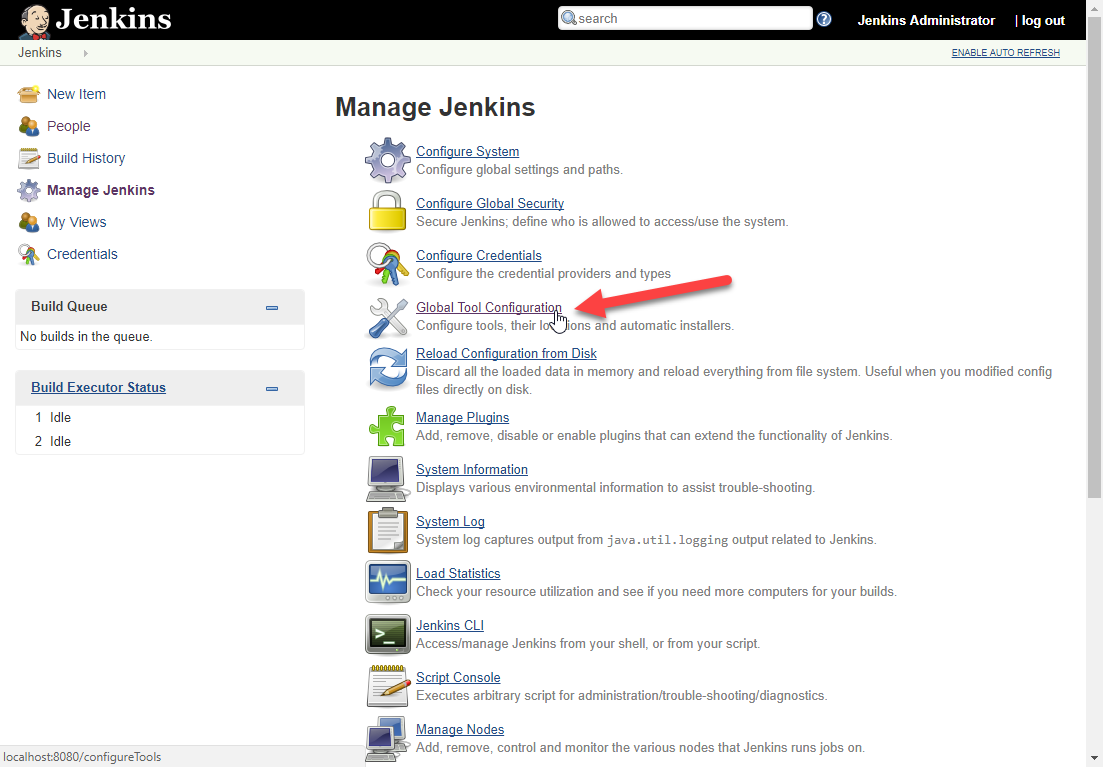
- Click Global Tool Configuration.
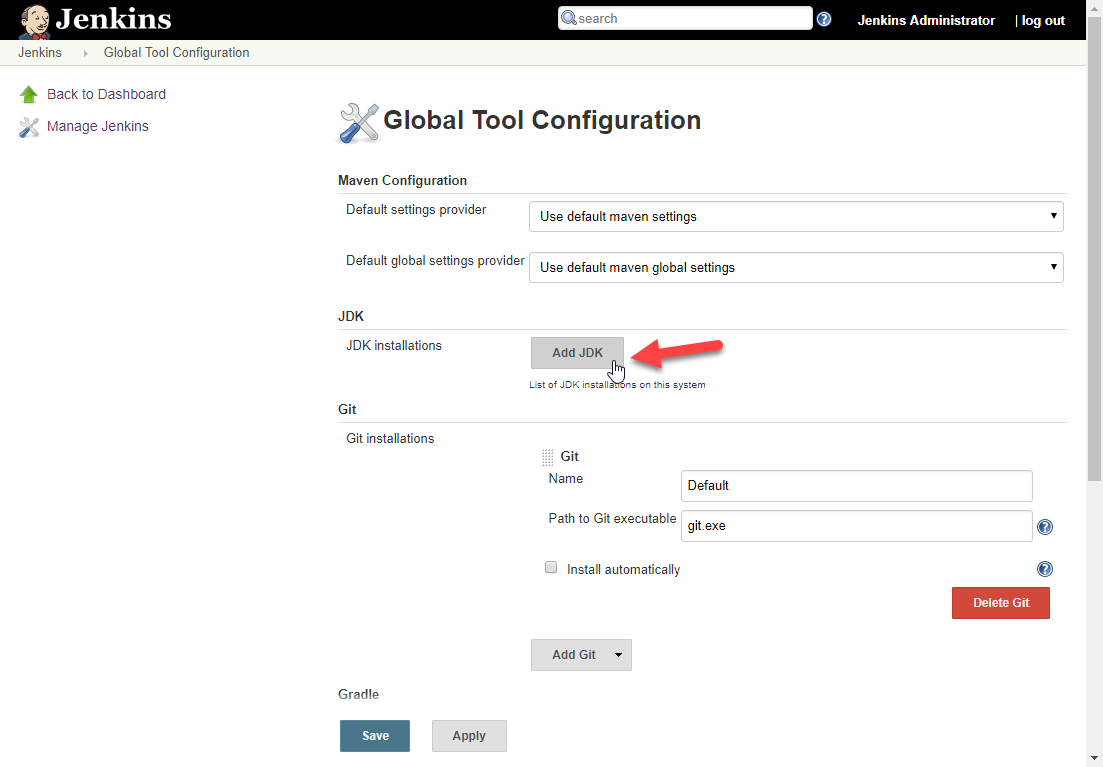
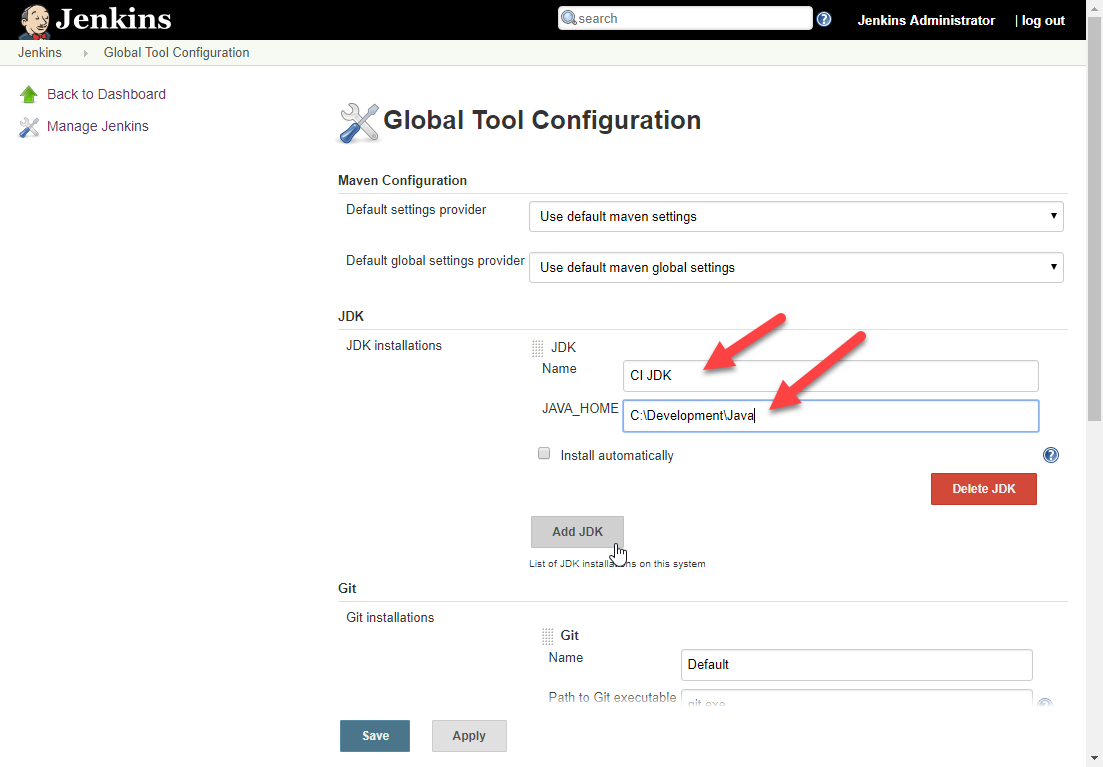
- Click Add JDK.
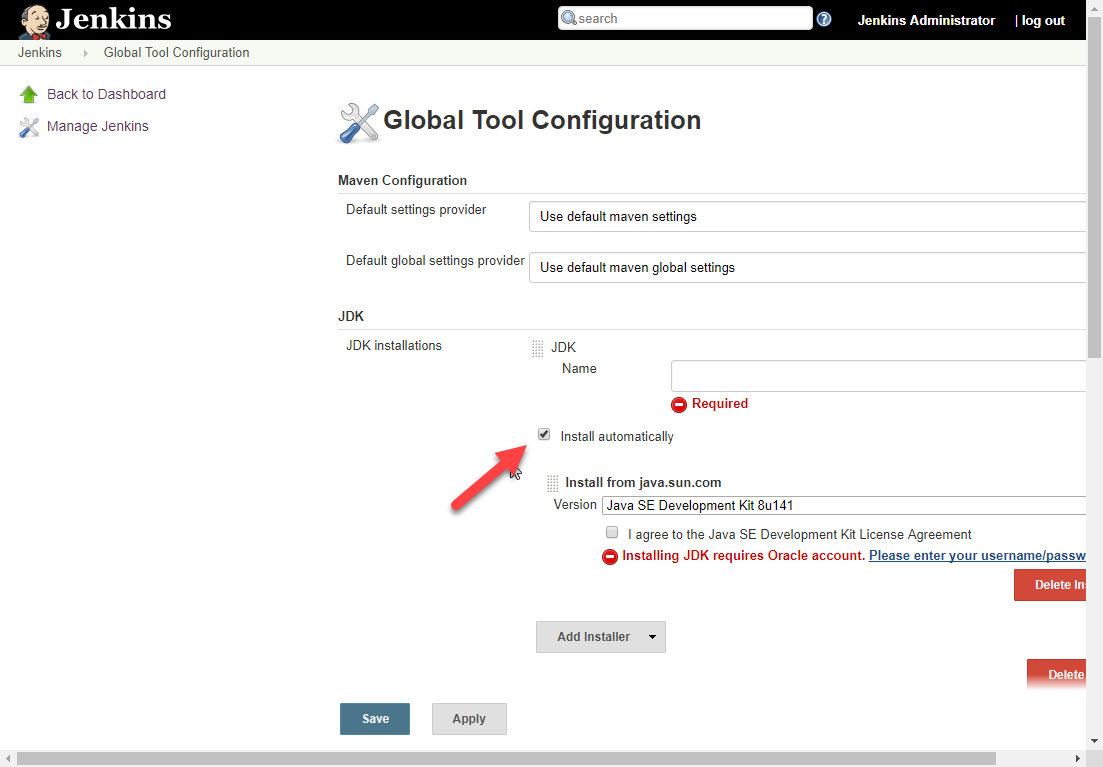
- Clear the Install automatically checkbox.
- Provide a name in the JDK Name field and specify the path to the JDK installation in the JAVA_HOME field.
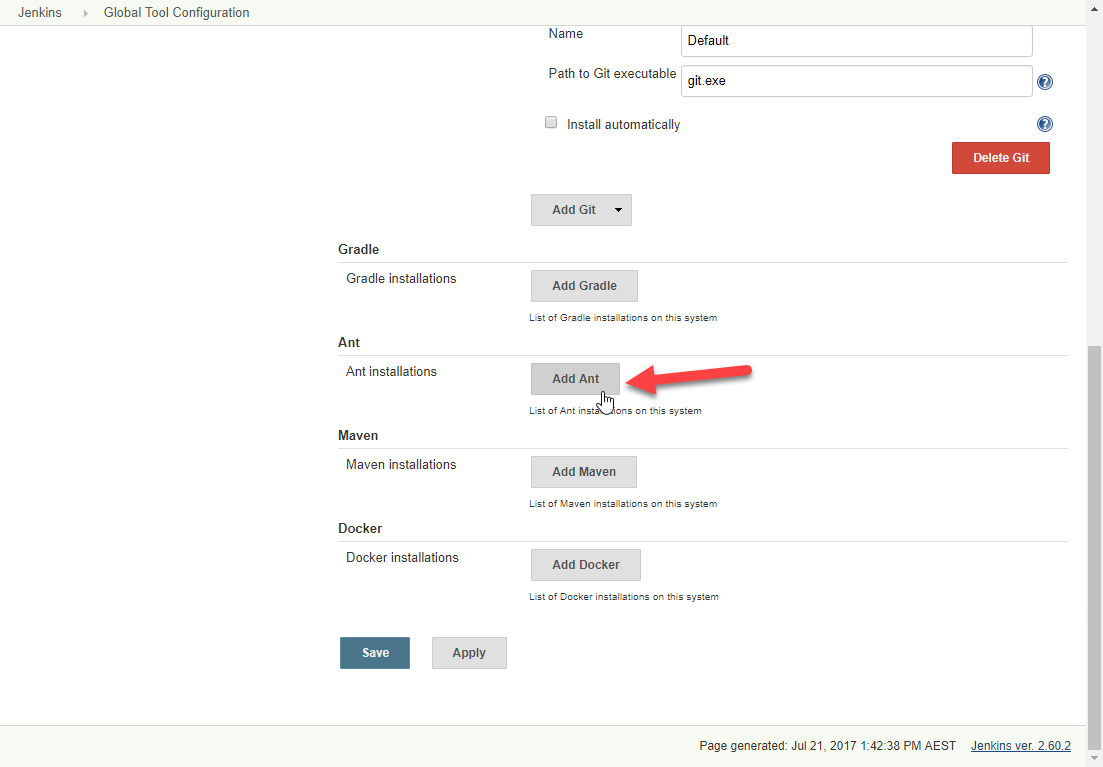
- Click Add Ant.
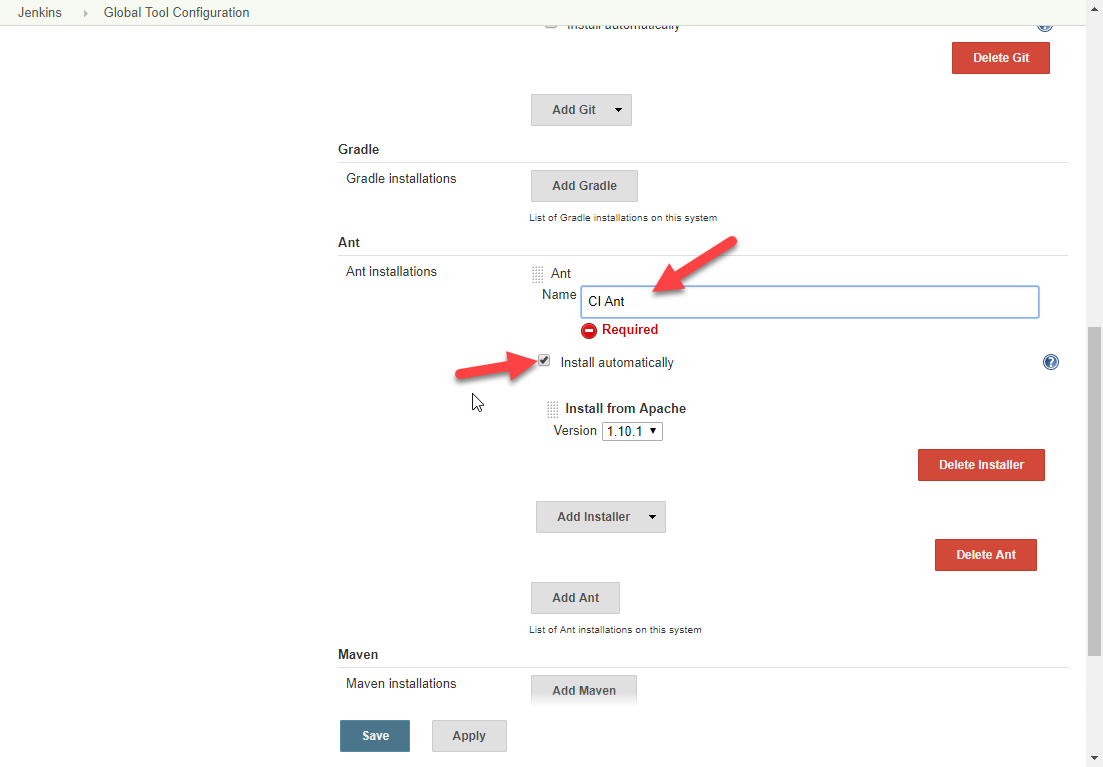
- Provide a name in the Ant Name field and clear the Install automatically checkbox.
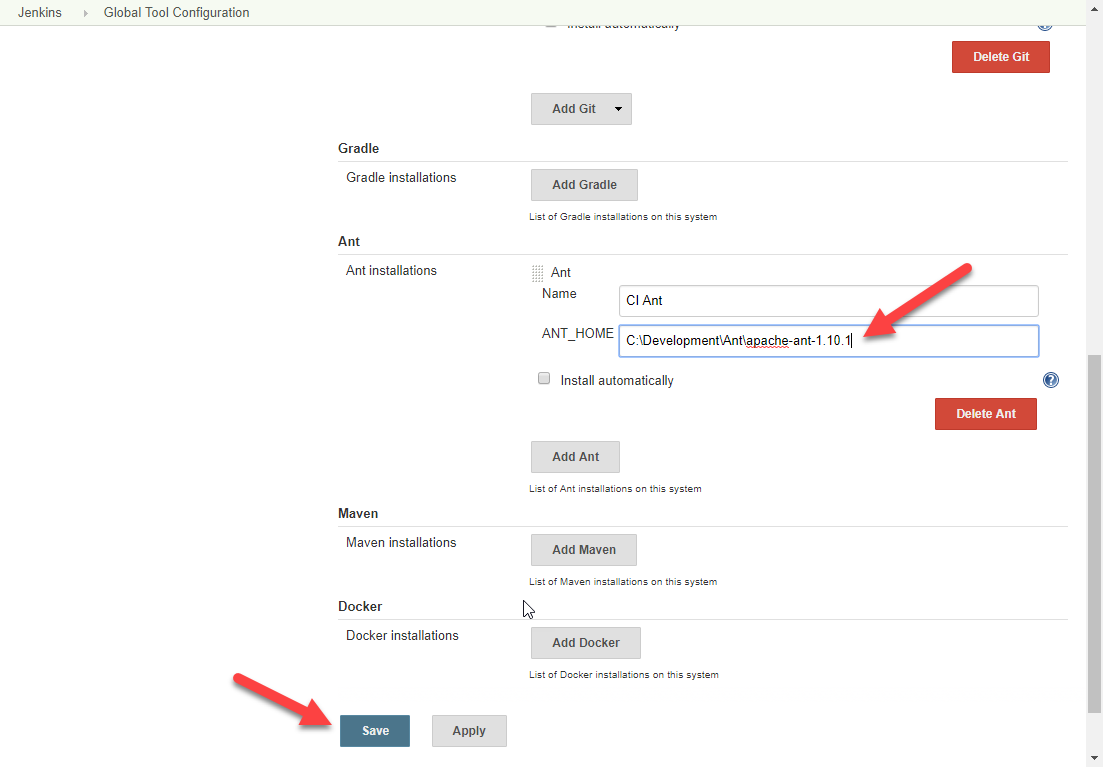
- Specify the path to the Ant installation in the ANT_HOME field and click Save.
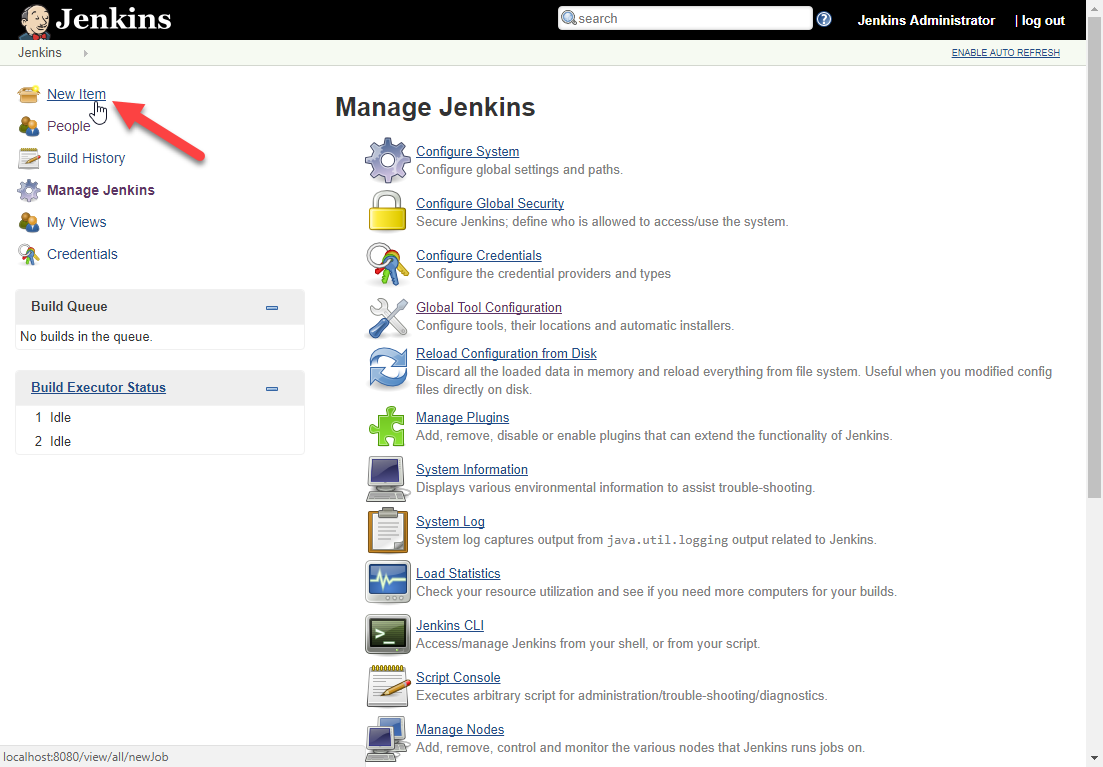
- Click New Item to create a new CI project.
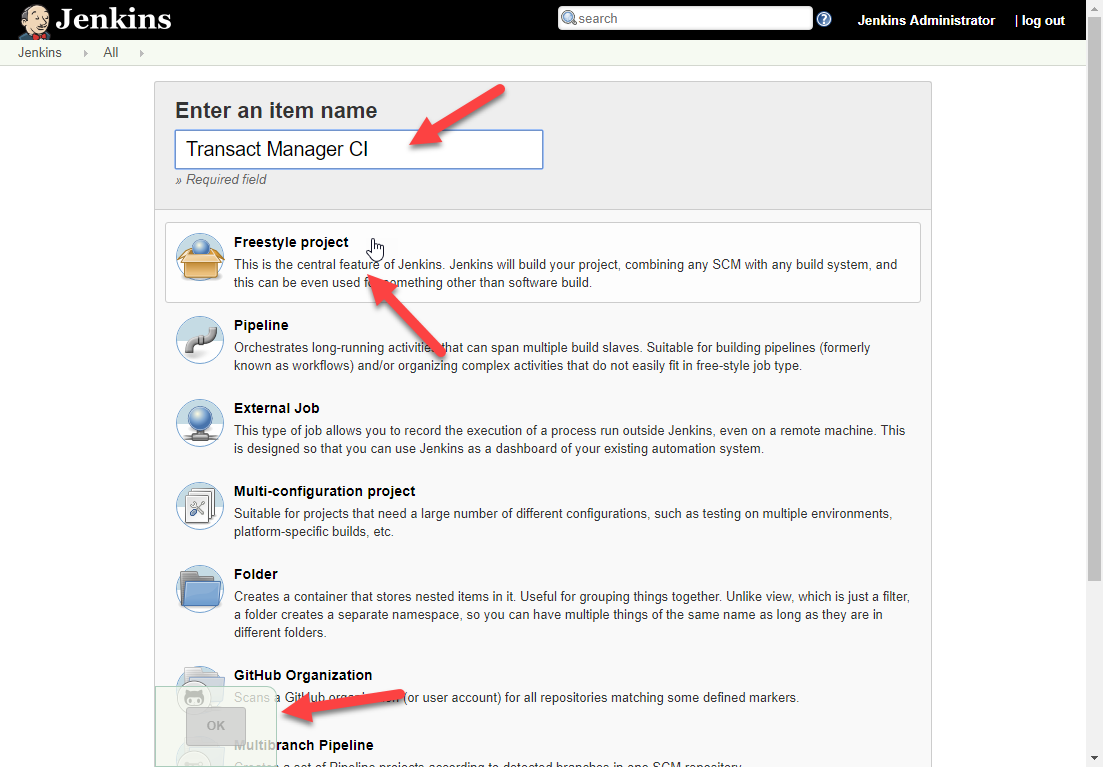
- Enter a project name in the Enter an item name and click Freestyle project.
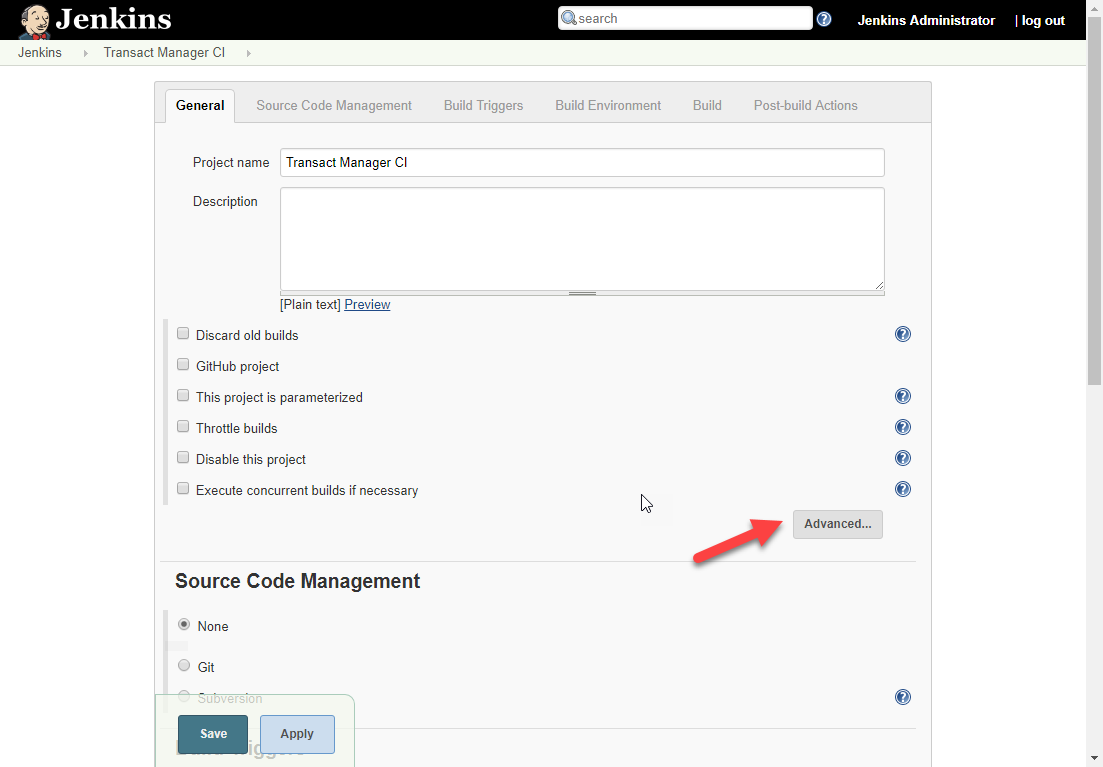
- Click Advanced.
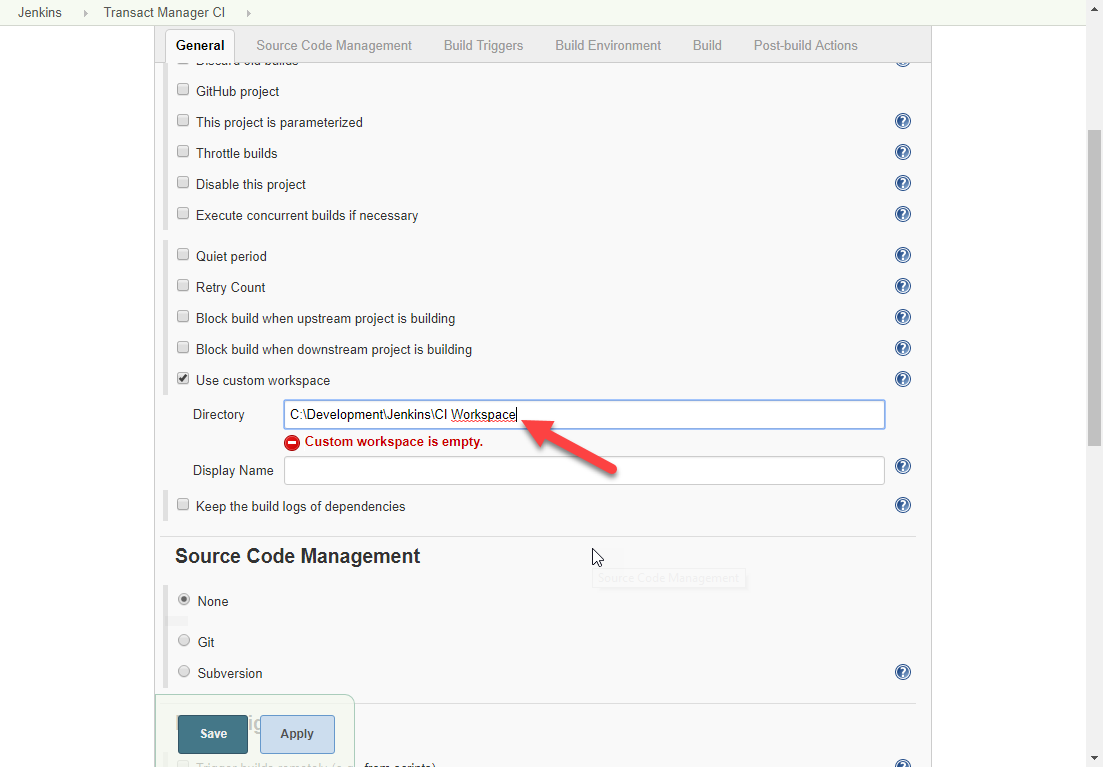
- Click Use custom workspace and enter the path where you will be storing the Transact Fluent SDK and project source files.
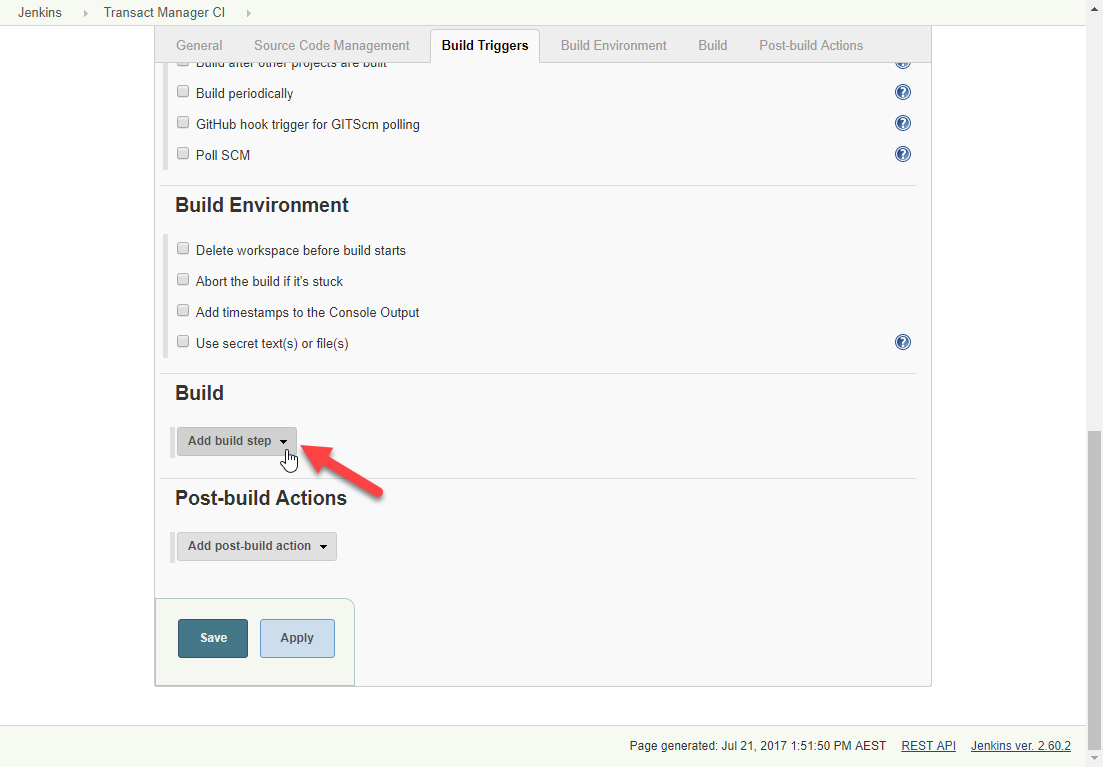
- Scroll down to the Build section and click Add build step.
- Select the Invoke Ant from the dropdown list.
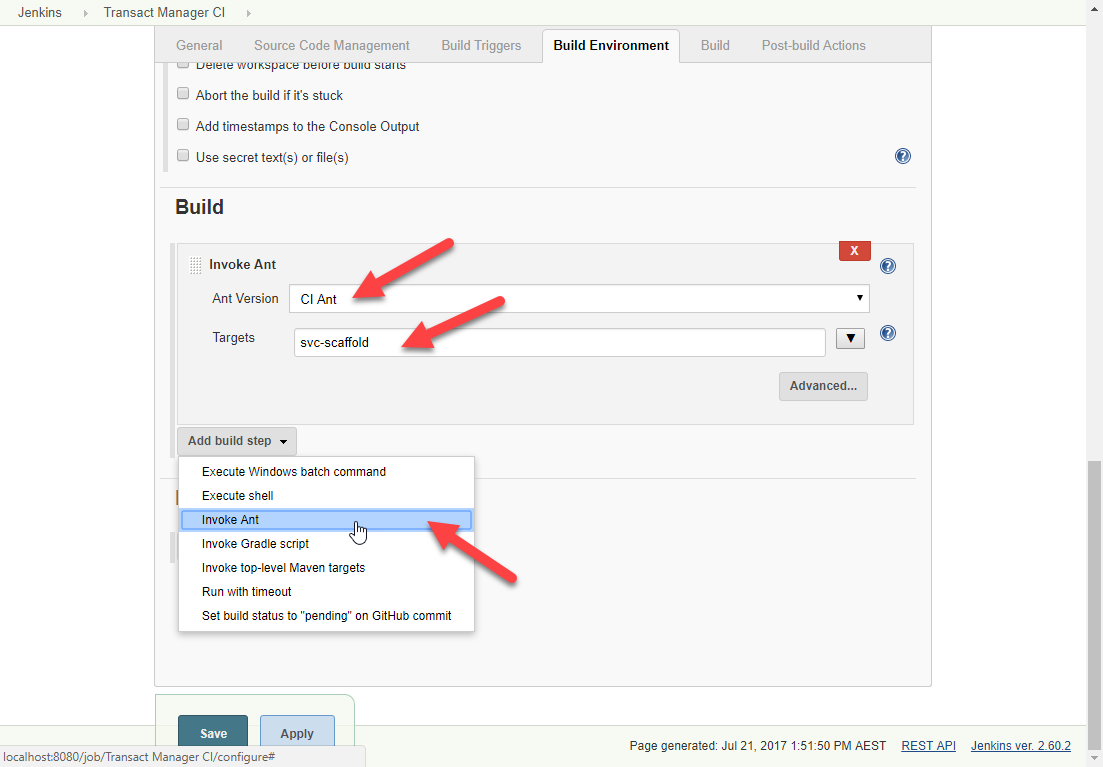
- Select the desired Ant version from the Ant Version dropdown list and type
svc-scaffoldin the Targets field. - Select Invoke Ant from the Add build step dropdown list to add another build step.
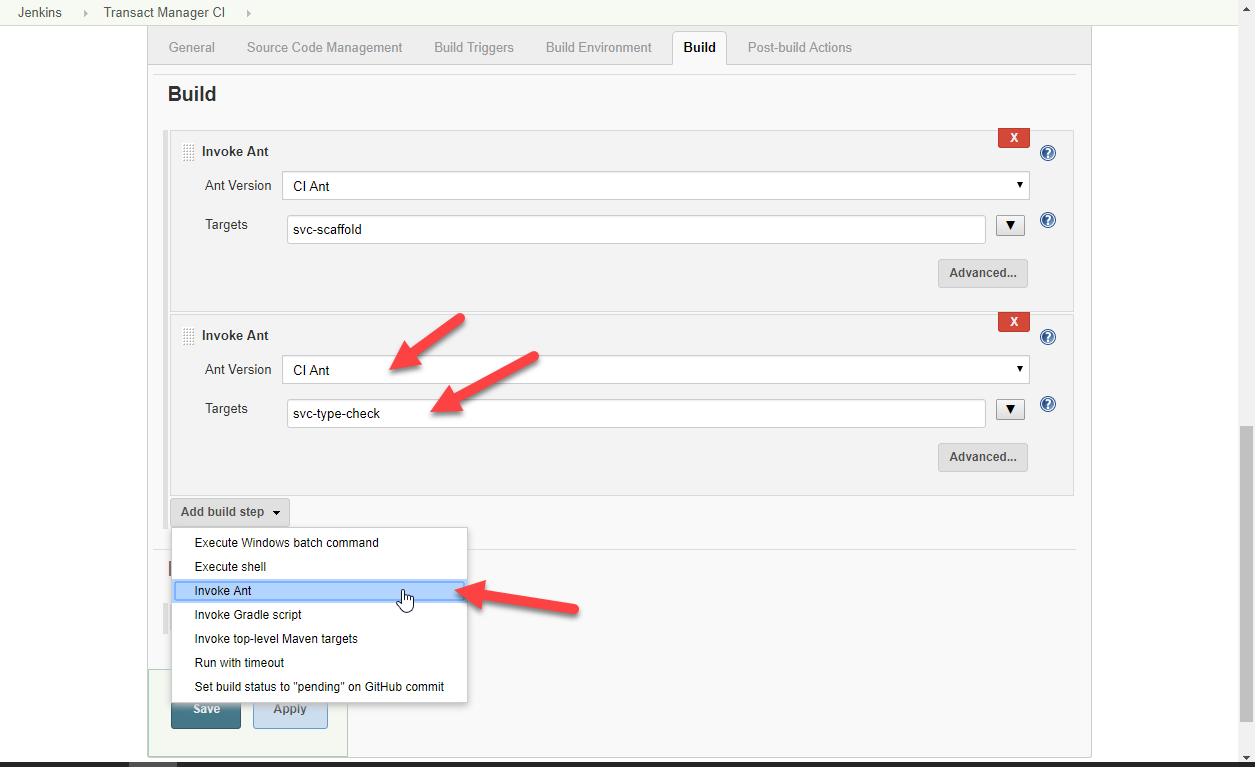
- Select the required Ant version and type
svc-type-checkin the Targets field. - Add another Invoke Ant build step.
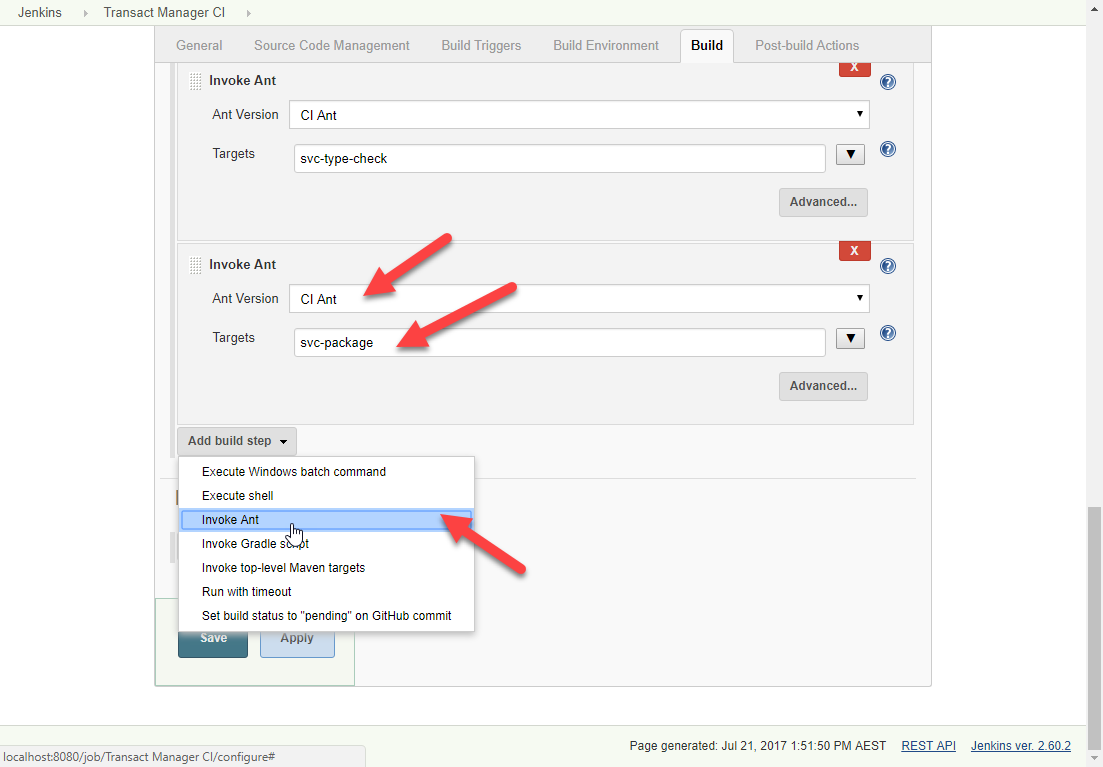
- Select the required Ant version and type
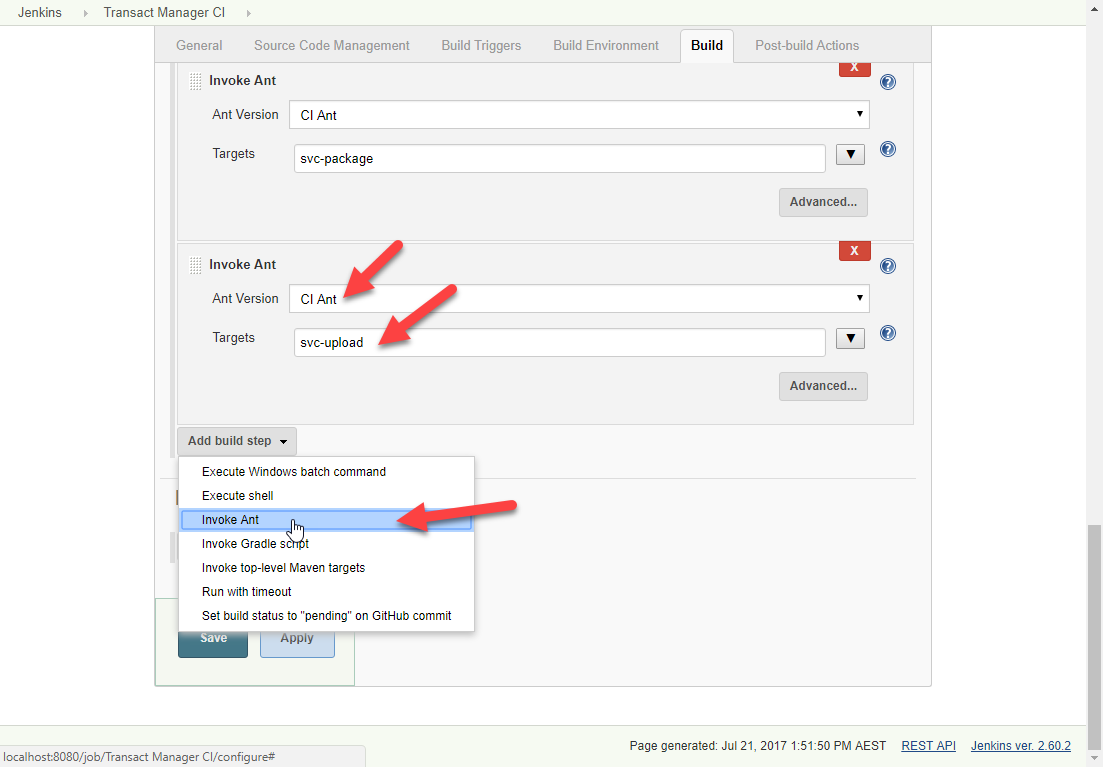
svc-packagein the Targets field. - Add another Invoke Ant build step.
- Select the required Ant version and type
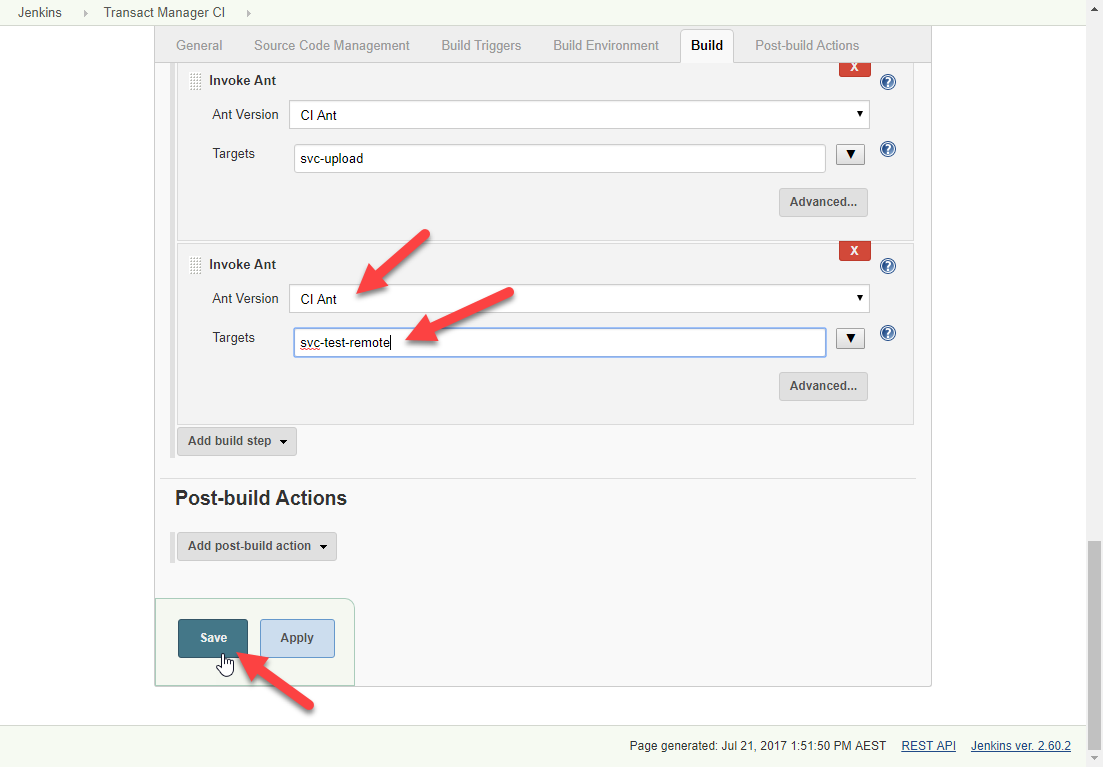
svc-uploadin the Targets field. - Add another Invoke Ant build step.
- Select the required Ant version and type
svc-test-remotein the Targets field. - Click Save.
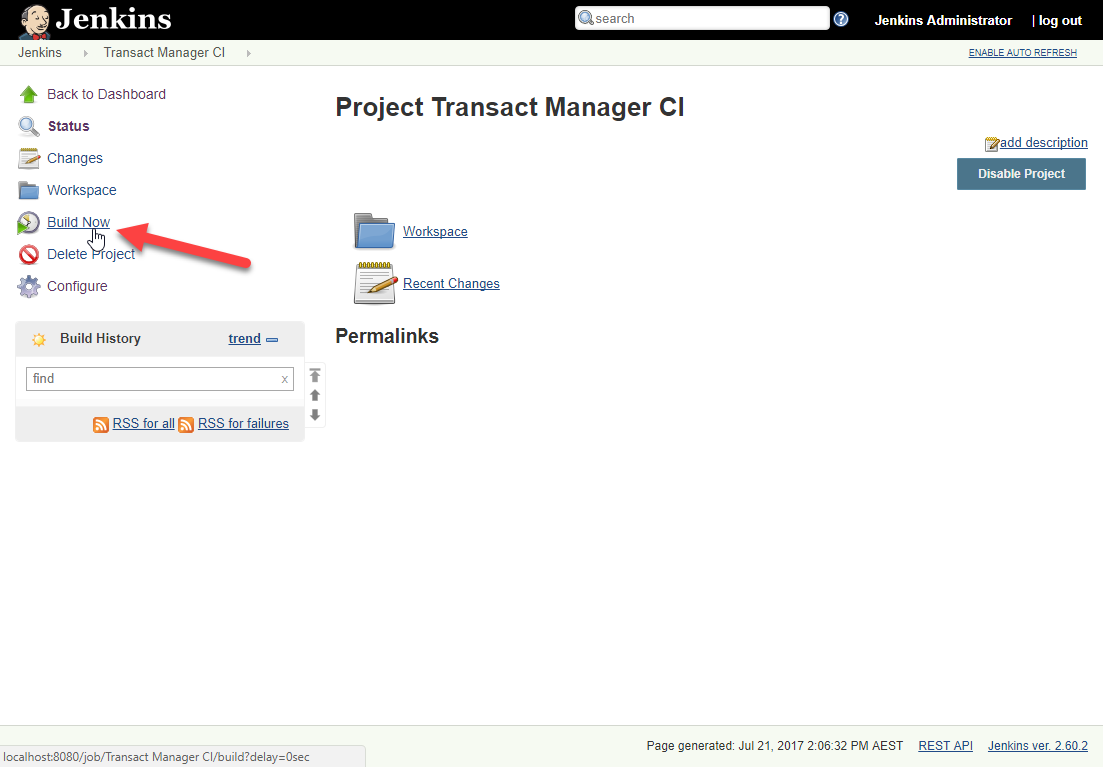
- Click Build Now.
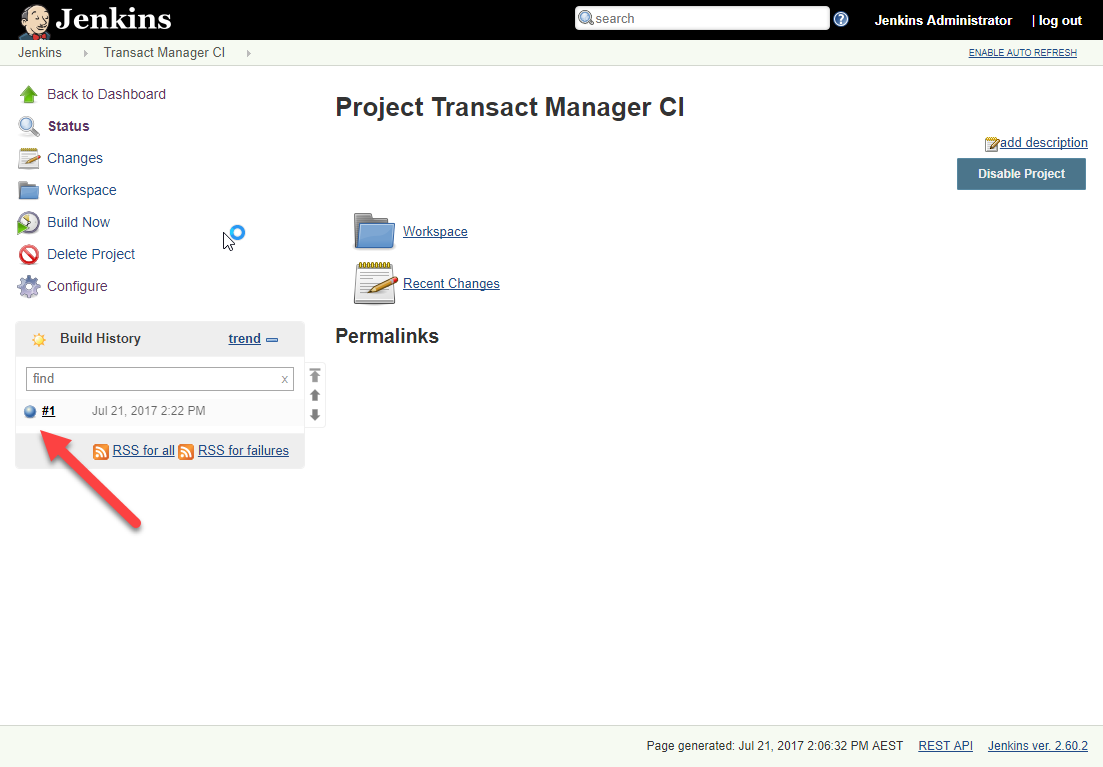
- The project will be run. Click the build number link in the Build History section.
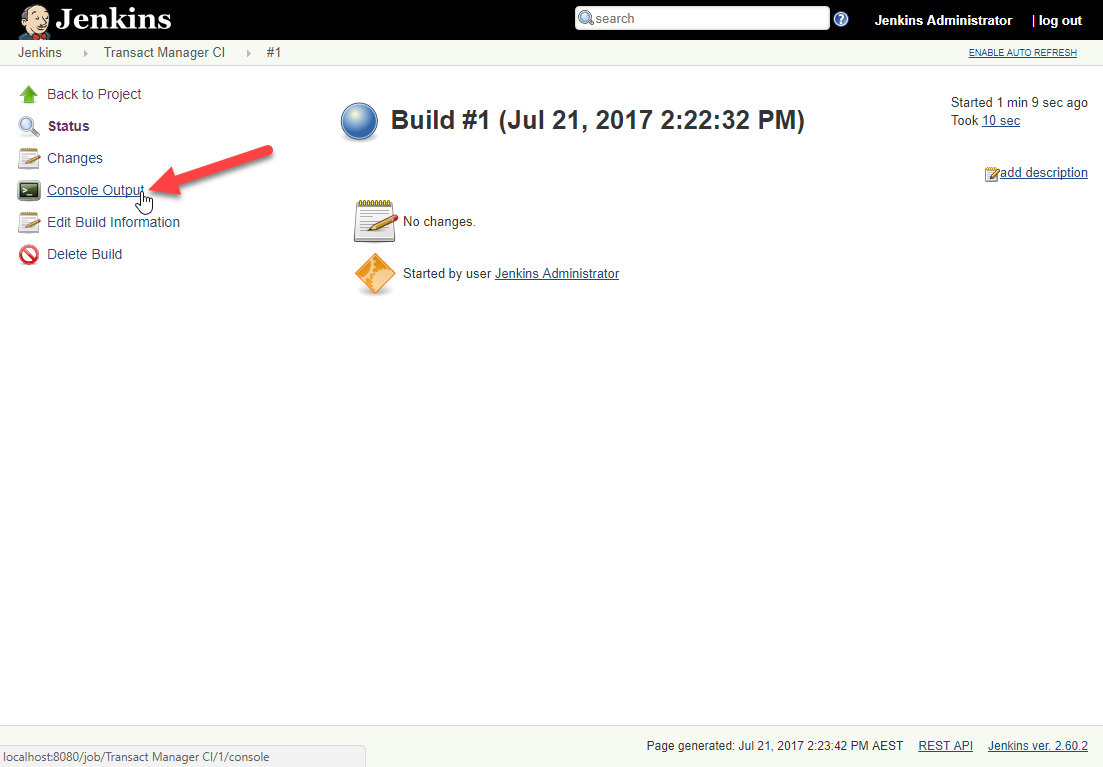
- Click Console Output to see the build output.
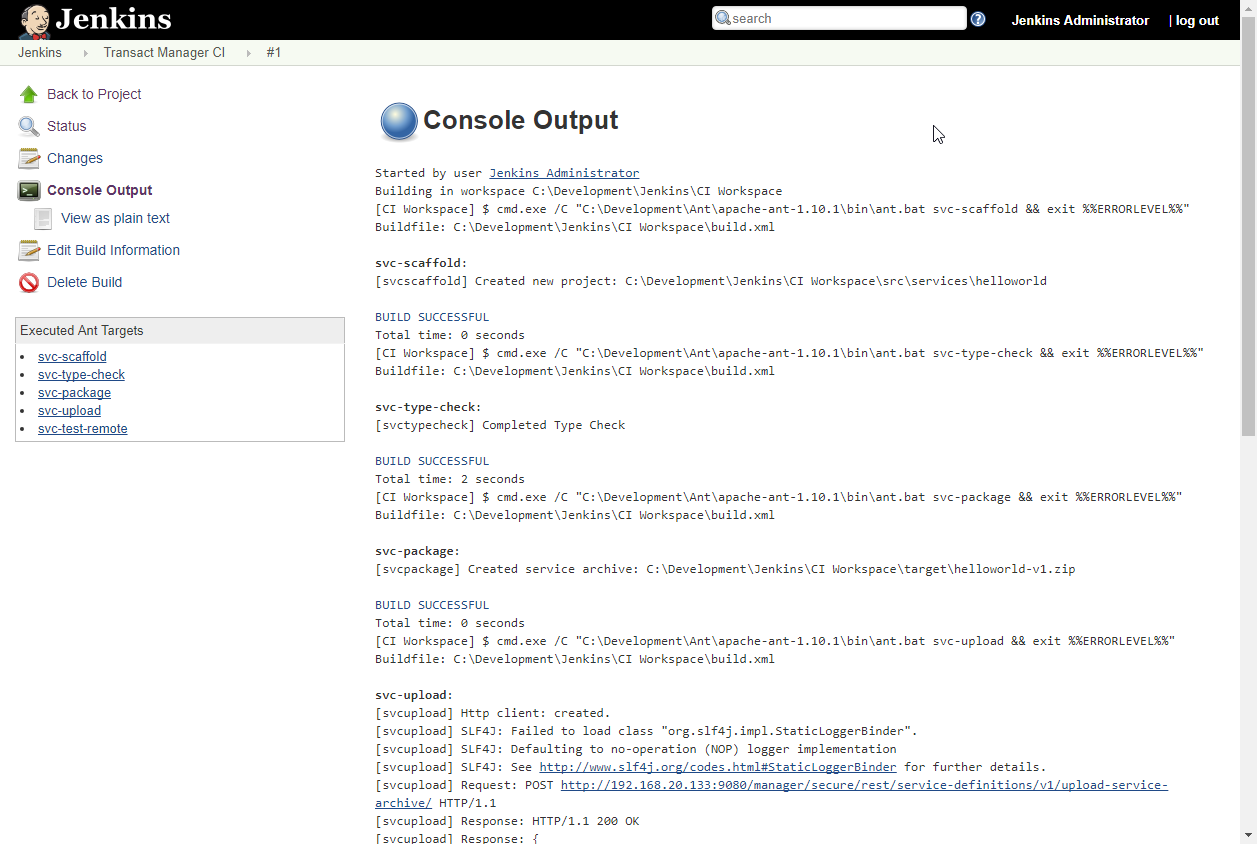
- Check the output from each Ant task.
- The build is complete now.
mkdir C:\Development\
mkdir C:\Development\Ant
mkdir C:\Development\Git
mkdir C:\Development\Java
mkdir C:\Development\Jenkins
mkdir C:\Development\Jenkins\CI Workspace
cd C:\Development\Jenkins
java -jar jenkins.jar
Don't click Continue as admin.
Now Jenkins has been configured with a JDK and an Ant installation.

Next, learn about GitLab CI.