Decision: Record a decision for a task
WorkspacesThis topic relates to Journey Workspaces | Workspaces UserIncludes bank staff, helpdesk, relationship managers, and managers | This feature was introduced in the 18.11 releaseThis feature was updated in the 23.04 release
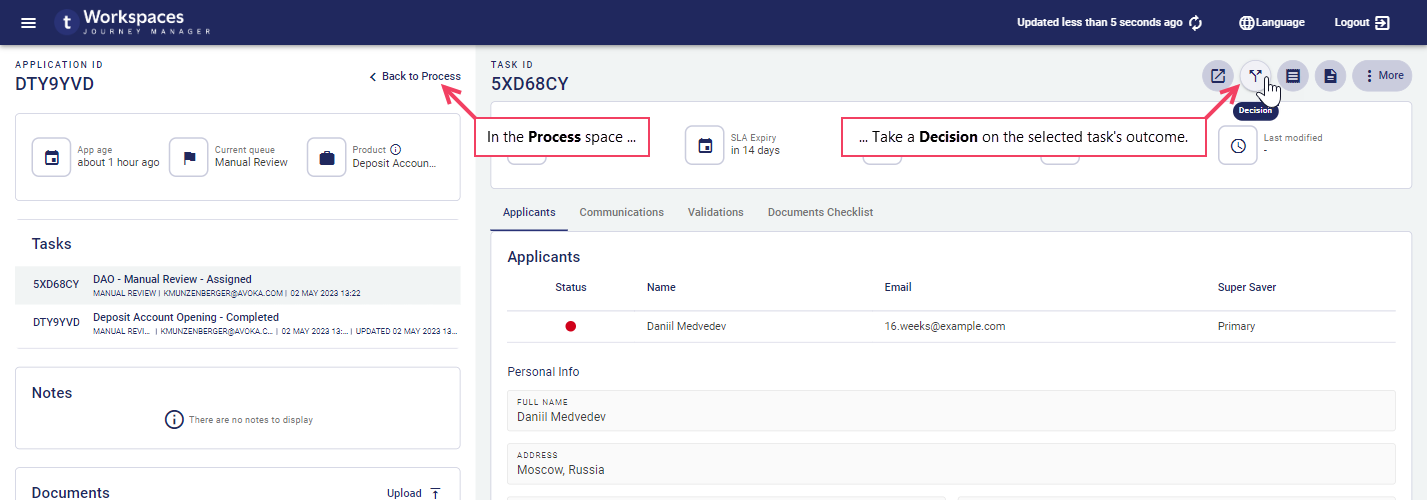
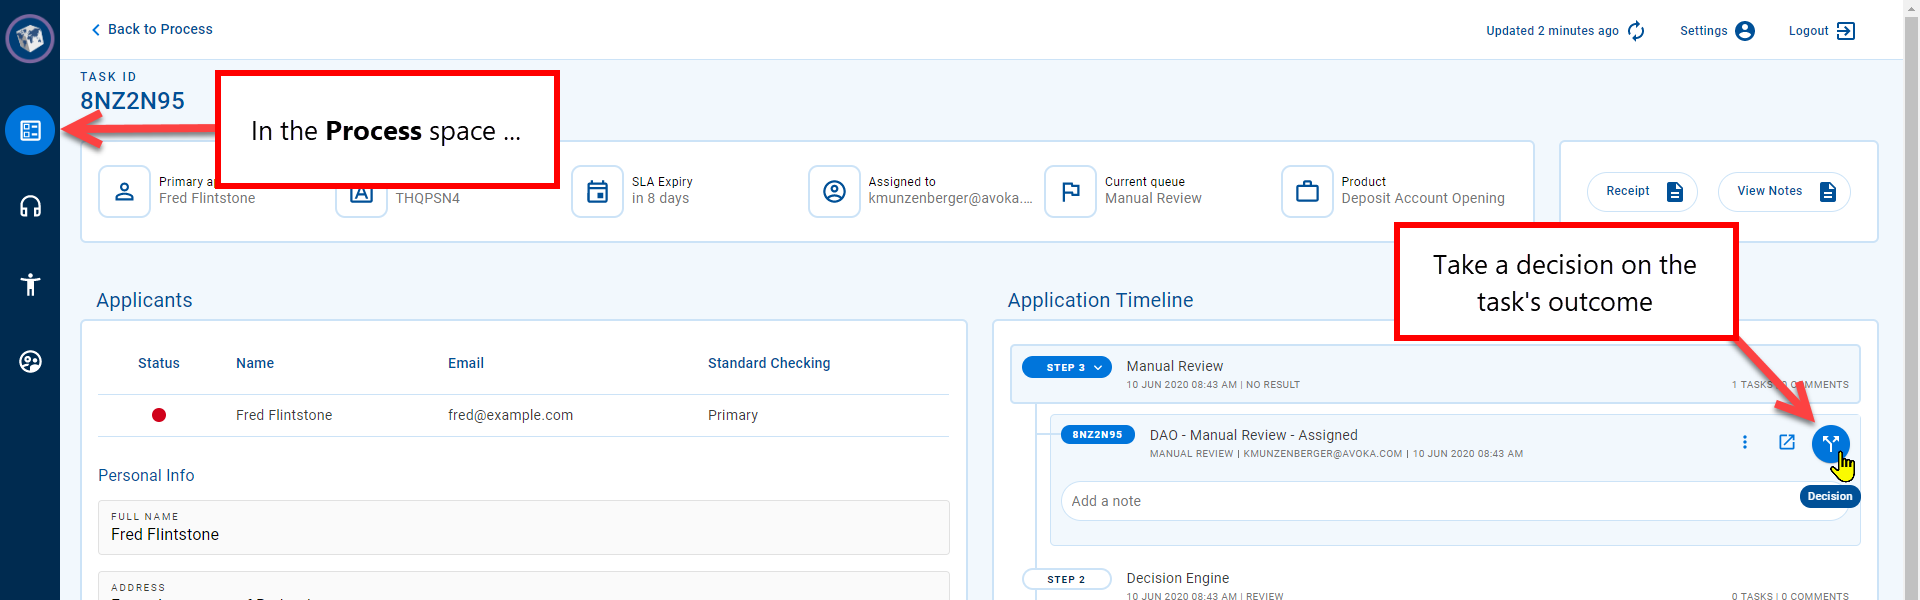
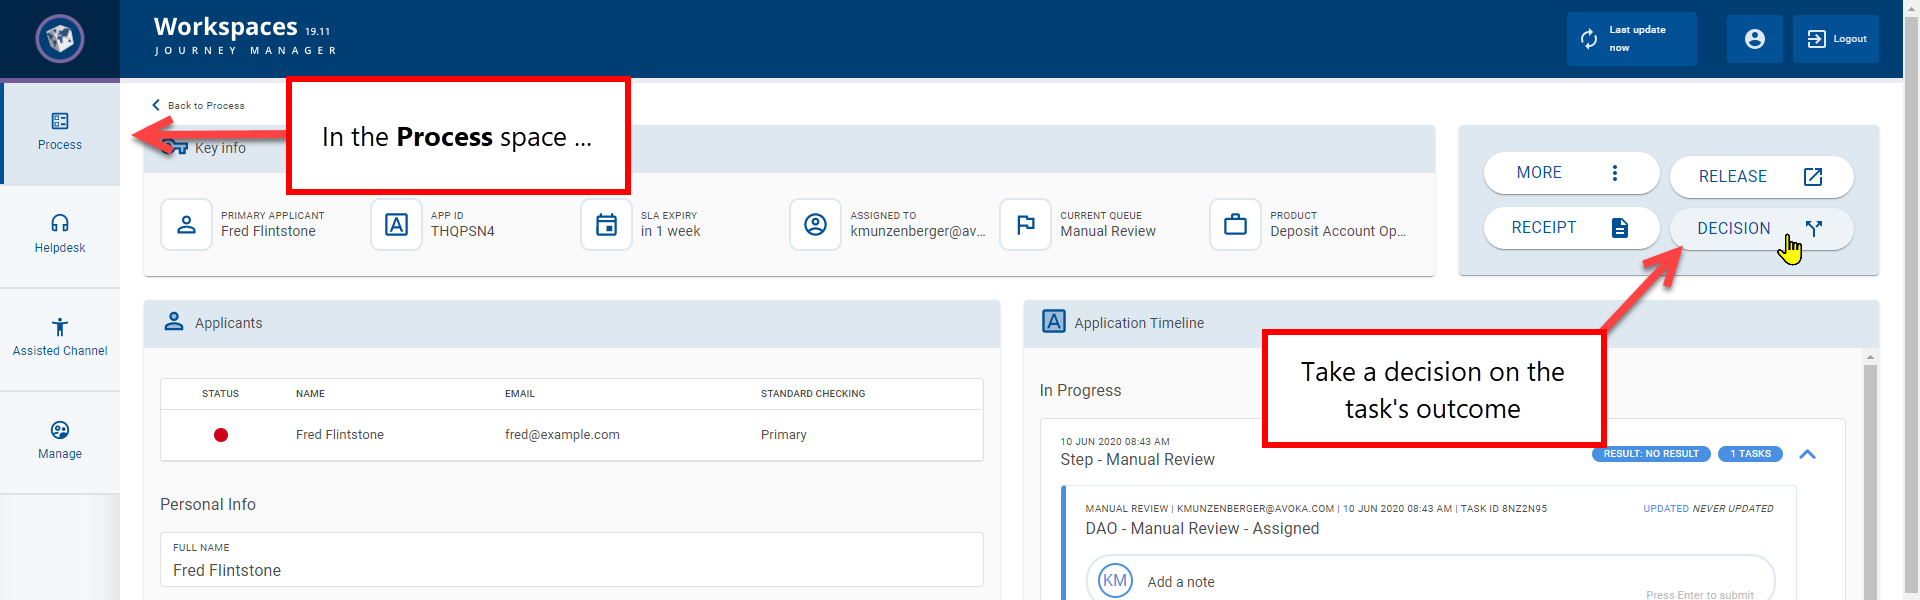
When you have all the information you need about a task, you can take a decision on the task's outcome. Taking a decision on a task completes the task and moves it along in its life cycle.
The Decision action is available only from the Details screen in the Review space, and only for tasks that are assigned to you; you cannot take a decision for a task that is assigned to someone else. When you take a decision, you must provide both the decision (representing some outcome, assessment or result) and a note supporting the decision. The note is important because it helps others to understand how you arrived at your decision, and may be prefilled with relevant information.
To take a decision on a task's outcome :
- Click the to open the , and select the Review space. The List screen is displayed.
- In the item list, locate a task that you want to take a decision on and select it. The Details screen for the selected task is displayed.
- On the Details screen, click .
The Decision modal window is displayed.
is located in the Actions group.

is located within the selected task in the application timeline.

The Decision button is located in the Action panel.

- Select one of the options in the Choose a Decision list. The decision options available in your Workspaces portal are dependent on your Journey application configuration but may include such options as Approve and Decline.
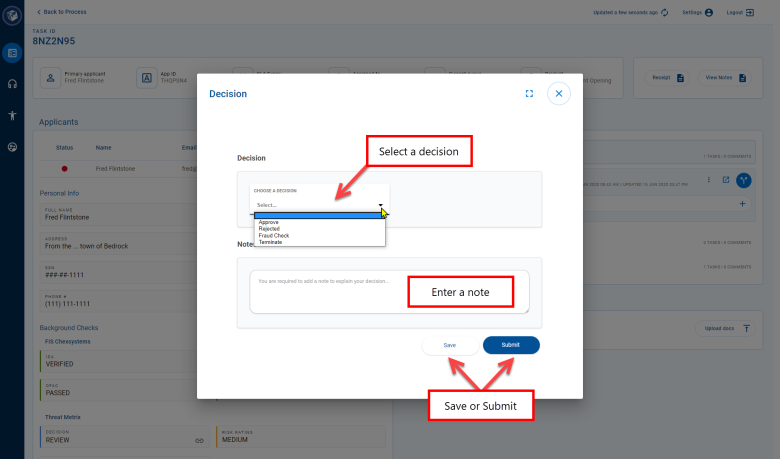
- Enter a mandatory note supporting your decision. Ensure the note includes useful details that explain the decision you have taken. Relevant information may be prefilled in the note to assist you with this.
- Finally, click Submit to submit your decision. If you're not ready to submit your decision but want to keep the information you have entered, click Save instead to save what you have entered so that it is not lost.
- Click to close the Decision modal window and return to the Details screen.

If you don't have all the information you need to complete the decision right now, you can click Save (at step 6) to save the information you have entered and complete the decision later. Subsequently, when you are ready to complete the decision, repeat the necessary steps above to return to the Decision modal window, update the Decision and Note as required, and then click Submit to record the decision you have made.