System Report Schedules
Journey Manager (JM) The transaction engine for the platform. | System Manager / DevOps | 19.05 This feature was removed in 19.05
Manager allows you to view, create new and edit existing system report schedules.
To view system report schedules, select Reports > System Report Schedules.

To filter reports by one or more criteria, specify the following settings and click Filter:
- A scheduler type
- Active Only
Click Clear to reset the search criteria.
Click Export Data to export the displayed data as a Microsoft Excel (XLS) file.
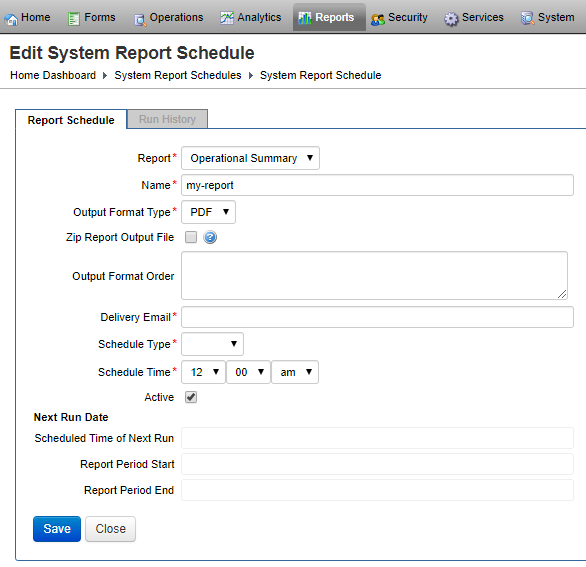
To configure a system report scheduler:
- Select Reports > System Report Schedules.
- Locate a report and click Edit or click New to create a new report.
- Select a report from the Report dropdown list.
- Edit the report name in the Name field.
- Select an output format type from the Output Format Type dropdown list.
- Select the Zip Report Output File checkbox to ZIP the generated report.
- Specify the output format order in the Output Format Order field.
- Provide a valid email address in the Delivery Email field.
- Select a scheduler type from the Schedule Type dropdown list.
- Specify scheduler time from the Schedule Time dropdown lists.
- Select the Active checkbox to make this scheduler active.
- Click Save to update the changes.
To remove a system report scheduler:
- Select Reports > System Report Schedules.
- Locate a report and click Remove ReportScheduler to delete a scheduler.
Click View the Report On-Screen to see the rendered report.
Click Trigger the report scheduler to run the scheduler
Next, learn how to view job licensing report.