Import an Acrobat PDF Form as a Receipt Template (AcroForms)
Journey Manager (JM) The transaction engine for the platform. | System Manager / DevOps | All versions This feature is related to all versions.
Some organizations have invested heavily in creating glossy PDF forms which are designed to be printed, filled, and posted in, or alternatively opened, filled electronically, and saved and emailed. Sometimes these assets can be re-used to ensure that:
- downstream manual processing processes do not need to be modified, or
- customers are provided with a copy of their application which meets marketing guidelines
- Wet signature processes can be implemented, using copy which has already been ratified by legal
This guide describes how an existing "print & fill" PDF forms can be used by Manager as a pixel-perfect, "artwork PDF" template, without writing any code. This technique requires Adobe Acrobat (additional licenses); Other techniques exist and are not covered by this guide.
What is an AcroForm?
Forms which are created in Acrobat are called "AcroForms"; some PDF readers (Including Acrobat Reader) are capable of rendering these files as interactive PDFs, with features such as fields and radio buttons, and allows saving of data within the file. These should not be confused with interactive XFA forms which function in a specialized Adobe ecosystem (Adobe LiveCycle Designer ES & only Adobe Reader).
Manager re-purposes these PDFs as Templates associated with HTML5 forms on Manager, where HTML5 field data is merged with the template after submission for use as a Document of Record.
High Level Overview of steps required
At a high level, you need to follow these steps
- Create your form in Composer, using the new form wizard. Drag and drop pages, sections, and fields, and add business rules from the palette, as you normally would. This produces your default dynamic PDF receipt, which will be discarded later. Publish your form to Manager, as you normally would.
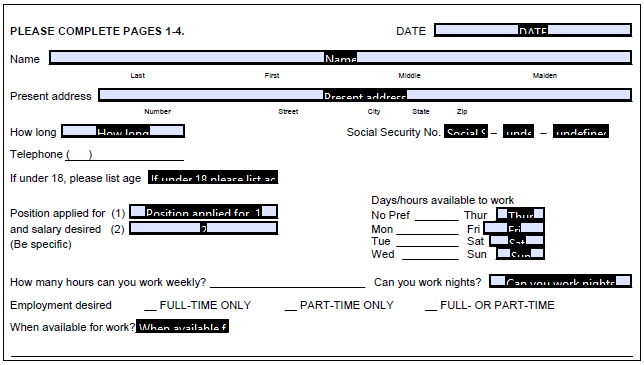
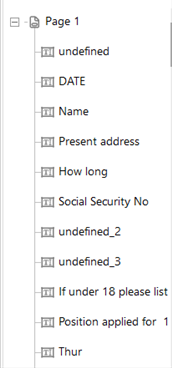
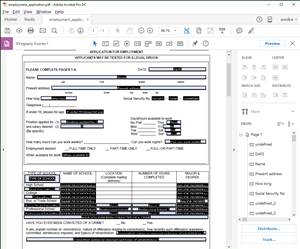
- Open the PDF form in Acrobat, and run the "Prepare Form" wizard. This will create something which looks like this:
- In Acrobat, correct any issues. You may need to manually add fields, or rename them to make more sense. If you have authorization to make changes to the form, now would be a good time to replace "comb" fields with regular fields, and remove any character place-holders such as parentheses in a telephone field, or slash characters in a date field.
- In Composer, add Data Extracts to each field. The name of the data extract must match the name of the field declared in Acrobat. Additionally you will need to add some invisible fields (Data Fields) with calculation rules to reformat any dates or other fields which need conversion before printing.
- In Manager, open the form version, and upload a receipt file. Then under Services, set the Receipt Render Service to "Static PDF Receipt".
Each of the steps 2-5 is described in detail below:
Step 2: Creating AcroForms
Adobe Acrobat Pro DC (2015 Release)
In order to create your AcroForm using Adobe Acrobat Pro DC (2015 Release) follow these steps:
- Open the PDF form in Acrobat
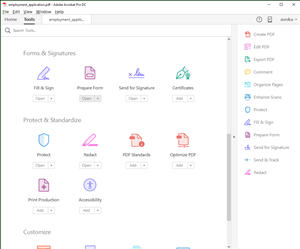
- Go to "Tools", and select "Prepare Form" (Open), under the "Forms & Signatures" heading.
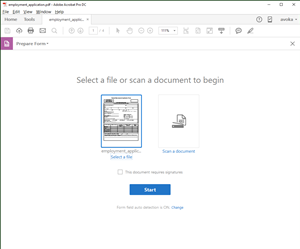
- Select "Start" (take note that "Form field auto detection is ON" is displayed under the button).
- You can now "Save As..." and continue to the next section "Prepare Form" in Adobe Acrobat Pro DC.
Acrobat XI and below
Acrobat 9 or Acrobat XI users can follow these steps:
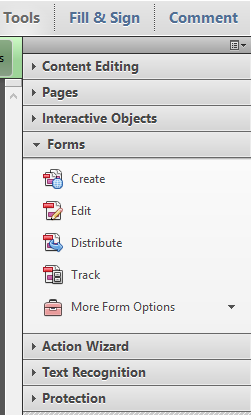
- Start, by accessing the "Forms" menu (under Tools, on the right-hand pane).
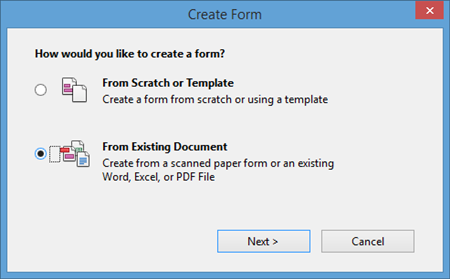
- Select "Create", to start the wizard
- You can now "Save As..." and continue to the next section.
Possible Issues & workarounds
If you have any issues with the above steps, you may need to check what type of PDF you have. There are many types of PDF, some of them may cause some issues. For example:
- Secured PDFs cannot be manipulated in any way without a password.
- XFA PDFs may have a .pdf file extension, but can only be edited with certain Adobe products (Adobe LiveCycle, not covered in this guide)
- Some PDFs may already be converted to an AcroForm, in which case you have less work to do.
The best way to get around any issues is to print the form to PDF using a non-Adobe product such as PDFcreator, CutePDF or your browser's built-in PDF engine. You may need to try some different products to see what works best for you. You can check which application was used to produce it by opening it in Adobe Acrobat (or Reader), and selecting "File" -> "Properties".
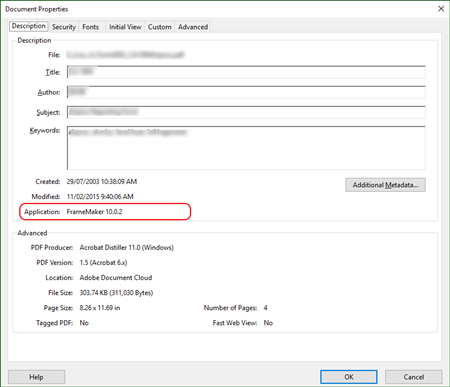
Inspecting the file properties in Acrobat
Another way around PDF security or unsupported file types is to either physically print them, or take screenshots, and then use Acrobat's OCR capabilities to scan in the pages.
Step 3: Correcting automatic conversion issues
Automatically Detected Fields
For each automatically detected field, you will need to inspect to check:
- Field size, alignment & centring
- Font (Acrobat often chooses large and ugly fonts)
- Field names (it will become helpful to correct any auto-naming of fields to be something that is human readable)
The toolbar on the right will help you quickly rename and reorganise all the interactive objects on the page. You can also bulk edit by selecting more than one field and right-clicking to access the properties panel.

Acrobat Pro DC - Fields Toolbar
Missed Fields
Sometimes the Acrobat forms wizard misses fields, and you will be required to add them manually. In Acrobat DC, there's a toolbar on the top of the page to add fields, checkboxes and radio buttons. Dropdown lists should be added as plain text field.

Adding a missing text field
When you are done, please think about "global" properties such as fonts. You can select all the fields on the form, and edit them in bulk, to ensure consistency.
Dealing with character-separated fields (Dates / phone numbers with area code)
One of the issues that you will encounter is how to deal with character separated fields, such as dates: " / / ". You have two options on how to deal with this: Override the PDF design or re-factor the data in Composer.
The easiest option and the option with the best result is to add fields with an opaque (colored) background that cover up the character separators in the original PDF design. This may not be permitted in all circumstances, as the business may mandate that no changes are made to the layout (EG: OCR in downstream processing may fail if you change the exact layout).
If you cannot override the field layout, then you will be required to add 3 separate text boxes for the date (Day, Month, Year), ensure that all values fit in the spaces created.
Re-factoring the format of field values
With some fields, you will be required to do some re-factoring of the field values. For example, Manager stores dates in a format of YYYY-MM-DD, and you will want to re-order this to be human readable, or to be displayed in 3 separate fields (pre-formatted character separators). This configuration is performed in Composer, and is described in the next step.
Check Boxes
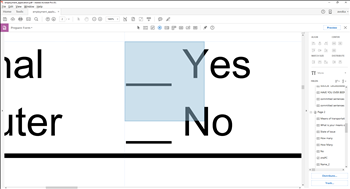
Check Boxes are quite straightforward. Simply add them, style them, and name them appropriately (Choose a convention which makes sense, such as prefixing the name with "chk"). You will need to resize them to fit in the correct area, and the best way to achieve a neat and accurate layout is to zoom right in to the part of the page where you're going to place it. Acrobat allows you to align, centre, match size and distribute objects for perfect layout. By default, Acrobat uses a check (tick) character within a box, but you can change this to a cross by editing the Check Box Properties, Options tab: Change the "Check Box Style" configuration (You may want to "Bulk edit" this setting, by selecting all your check boxes to edit). There are many layout options including border and fill color.
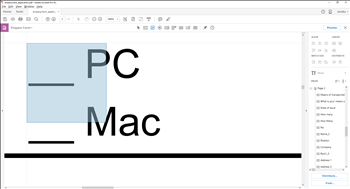

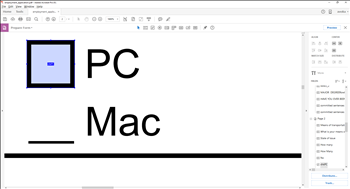
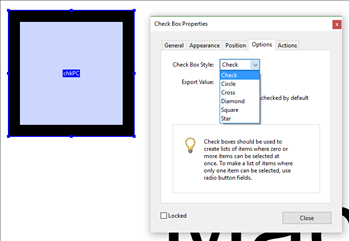
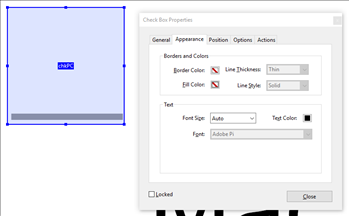
Adding Check Boxes to a form & configuring the appearance
Radio Buttons
Radio buttons require membership in a radio button group. Acrobat attempts to help you with this by providing a wizard which helps you add multiple options in a list, but you will most likely need to re-factor the configuration to fit into a structure in the "Fields" editor. There is a limitation here: The name of the Radio Button Group should not contain spaces in order to be compatible with Composer.
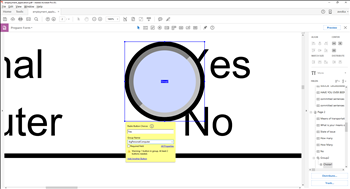
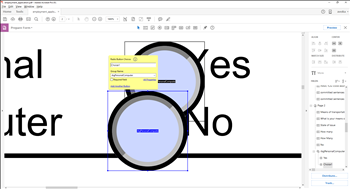

Adding a radio button group and configuring appearance
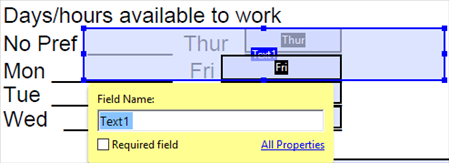
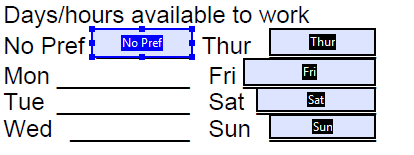
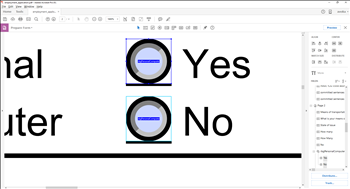
When you are done, your Fields tab should look something like this:
Step 4: Composer Configuration
In Composer, you will be required to perform two tasks:
- Bind Composer fields to PDF fields using Data Extracts
- Re-factor any formatting of field values (such as dates)
To configure a data extract, you can either inspect the form wireframe/structure, or you can use the bulk editor, which displays the form fields in a table. The bulk editor is a great way of setting Data Extract properties in a tabular interface. To enable it, select the "Bulk Editor" tab, then change the property set to "Data Binding". Scroll down past all the internal fields (at least 10 screen pages), then click in an empty space for the drop-down list to appear.
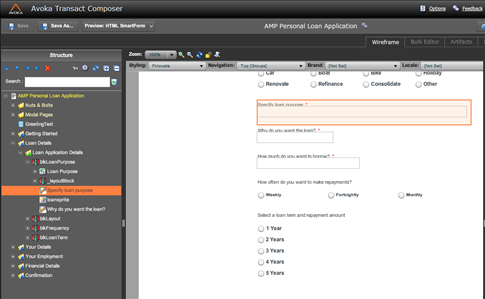
Setting the Data Extract Name using the wireframe and property editor
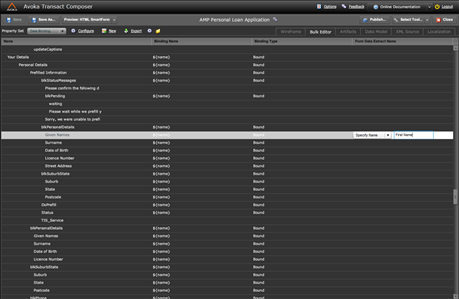
Setting the Data Extract Name using the Bulk Editor
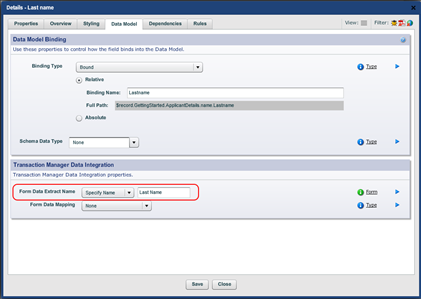
To configure data extracts from the wireframe/structure, double click on the field, then go to "Data Model", and set the "Form Data Extract Name".
Whichever process you choose, it is important to:
- Select "Specify Name" in the drop-down list
- Type in the name of the field. This name must match the name defined in the PDF form defined in Step 3 above.
Re-factoring the format of field values
With some fields, you will be required to do some re-factoring of the field values. For example, Manager stores dates in a format of YYYY-MM-DD, and you will want to re-order this to be human readable, or to be displayed in separate fields to be printed in pre-formatted fields with character separators. Follow these steps to ensure data is in the format expected by the PDF form.
- Add a "Data Field" to your form, adjacent to the field in question. A data field is just an invisible field.
- Add a scripted calculation rule to the data field.
- Add some JavaScript to perform to parse and format the date or alternatively add string operations on the dependent field (See sample code below)
- Add the Data Extract to the Data Field instead of the original user interface element
Reformatting using the Composer library
return sfc.parseDate({date},"DD-MM-YYYY").format("DD/MM/YYYY")
The above line of code encapsulates several operations in one line. If you are new to JavaScript, you may wish to analyse the sample code below, which achieves the same outcome using string operations
Example code (for beginners)
var date = {date};                  // Link to date field as a dependency
var dateArray = date.split("-");    // "YYYY-MM-DD"  ==>  Array [ "YYYY", "MM", "DD" ]

var day   = dateArray[2];           // The 3rd element in the array "DD"
var month = dateArray[1];           // The 2nd element in the array "MM"
var year  = dateArray[0];           // The 1st element in the array "YYYY"

return day + "/" + month + "/" + year;  // "DD/MM/YYYY" (adding strings will concatenate them)
You may wish to extend this example with other types of fields. E.G.: you can use the same technique to re-factor phone numbers (use str.substring(0, 1 ); to get the first 2 digits in the string).
Radio Buttons & Check Boxes
Check boxes in Composer should be configured the same way as text fields: with the Data Extract name matching the AcroForm field name.
Radio buttons require a little extra care, ensuring that:
- The Composer Radio Button Group data extract matches the AcroForm Radio Button Group name
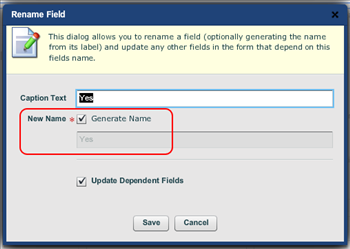
- Each Composer Radio Button name (not caption) matches the AcroForm Radio Button names exactly (check this for each radio button)
It's usually easier to perform modifications in Acrobat, conforming to Composer design.

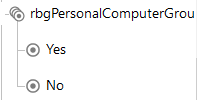
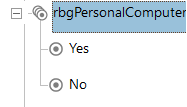
Composer structure and Acrobat structure with matching names
Note that the name of the field does not necessarily match the caption
Step 5: Manager Configuration
When you have finished editing the AcroForm, it can be uploaded into Manager for use as a PDF Template for the receipt. First though, please ensure that you have published any changes out of Composer.
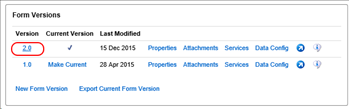
In the form dashboard, you can upload a receipt file using the form version dialog as shown below.
To import the file:
- Log into Manager.
- Under Forms, find the form you wish to update.
- When you select the form you will see the Form Dashboard. On the top-right corner, you will see the Form Versions dashboard element (above)
- Select the current version (highlighted in red above)
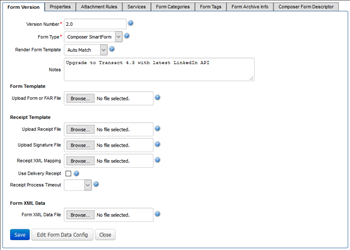
- This will display the "Form Version" dialog. Under "Receipt Template", select the browse button adjacent to "Upload Receipt File".
- Attach the AcroForm PDF file and save
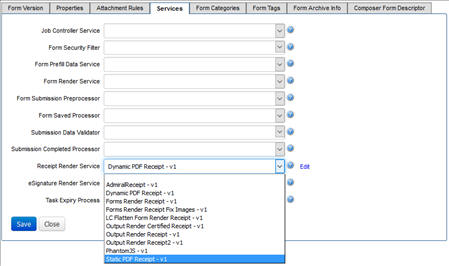
Now that the file has been uploaded, it needs to be used by the receipt service:
- On the form dashboard, in the form versions dashboard area, select the "Services" link adjacent to the latest version.
- Change the Receipt Render Service to "Static PDF Receipt"
Extending this solution
A code-free solution can be great for rapid prototyping or building business-oriented solutions quickly, without relying on developers to contribute to the project. If you have access to Groovy developers, you can skip step #3, and and build server-side scripts to link form data Xpaths to AcroForm fields. Any data value re-factoring can then be performed in the custom script, rather than in Composer. Developers then have access to an extended suite of capabilities including:
- Concatenation of receipt with other static files (EG: PDS)
- Handling of attachments (as PDF attachments or pages)
- Enrichment of content (adding data from external services)
Next, learn how to configure receipts server node.