The Exchange Publishing Process
Exchange Pre-configured Maestro services. | Platform Developer | All versions This feature is related to v5.1 and higher.
The process of publishing to the Journey Exchange involves four steps.
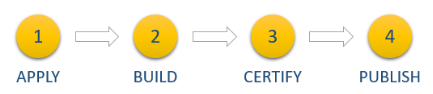
Step 1 - Apply
Apply for your Exchange Partner Account
Contact your Partner Account Manager. Your application will be reviewed and if successful you will receive access to:
- The Maestro design tool for UI development work.
- A sandbox Journey Manager environment for publishing and testing your solution.
- The Temenos Journey Manager (TJM) resources website with extensive product documentation, how-to articles and Q&A forum.
- Self-paced online training courses.
- An Exchange hosted GIT repository.
Step 2 - Build
Build your Extension Package on our platform
Develop your solution on the our platform using Maestro (our award winning UI design tool) and the Fluent SDK (our Groovy based development kit that can be used in any Java-based IDE).
Be sure to closely review the Exchange Development Guidelines as consideration of these guidelines will produce benefits when it comes to certifying your package.
You may use your own source code management system, however we recommend that you use the Exchange hosted GIT repository as your solution must be pushed to this repository before submitting for certification.
For technical support during your build phase, the Temenos Journey Manager (TJM) resources website is the best resource. You will also receive limited support from the Exchange technical team or the Support team if required.
See Exchange Developer Resources
Step 3 - Certify
Submit your Package for Exchange Certification
The Exchange team maintains a set of minimum requirements that every package must satisfy before it can be published to the Avoka Exchange. To ensure the standards are met, all packages must be submitted through the Exchange Certification Process.
To streamline this certification process and minimize any delays, make sure that your project team have reviewed the Exchange Certification Checklist and considered all items in your solution. If anything is uncertain it is better to seek clarity before submitting for certification than it is to submit a non-compliant solution and receive a certification failure.
When you submit your package for certification, all assets must be available in the Exchange GIT repository. Your submission will be added to the work queue for the Exchange team and scheduled for review. This review may take up to 6 weeks and may require one or more scheduled conference calls between the certification team and your project team to discuss aspects of your solution.
At the completion of the certification review, a report will be issued detailing the outcome of the review (CERTIFIED or UNCERTIFIED) and may contain a number of feedback items classified as either:
- Comment - A benign note made by the certification team relating to your solution. Comments do not impact the outcome of the review;
- Recommendation - A suggested (but not required) modification to the solution that should be considered by your project team; or
- Requirement - A mandatory requirement that must be satisfied by your solution before it is certified. The presence of any such items will result in an UNCERTIFIED outcome.
Any solution that does not get certified on the first submission may be resubmitted once the feedback items have been addressed.
Step 4 - Publish
Release your Package to the Avoka Exchange
When you have a certified package you will be asked to provide information required to get your package published to the Avoka Exchange. This may include descriptive content and imagery, reference links, demo videos etc. We strongly recommend you create a functional demo of your solution so that customers can try it out and see how it works before installing it. Demos can be hosted on the Exchange Demo Server and demo links can be added to your listing.
When your provider profile and package listing are ready, you can submit a request to activate your listing. Once activated, the listing will be immediately available on the Avoka Exchange for all customers.