Using GitFlow in Exchange projects
Exchange Pre-configured Maestro services. | Platform Developer | All versions This feature is related to v5.1 and higher.
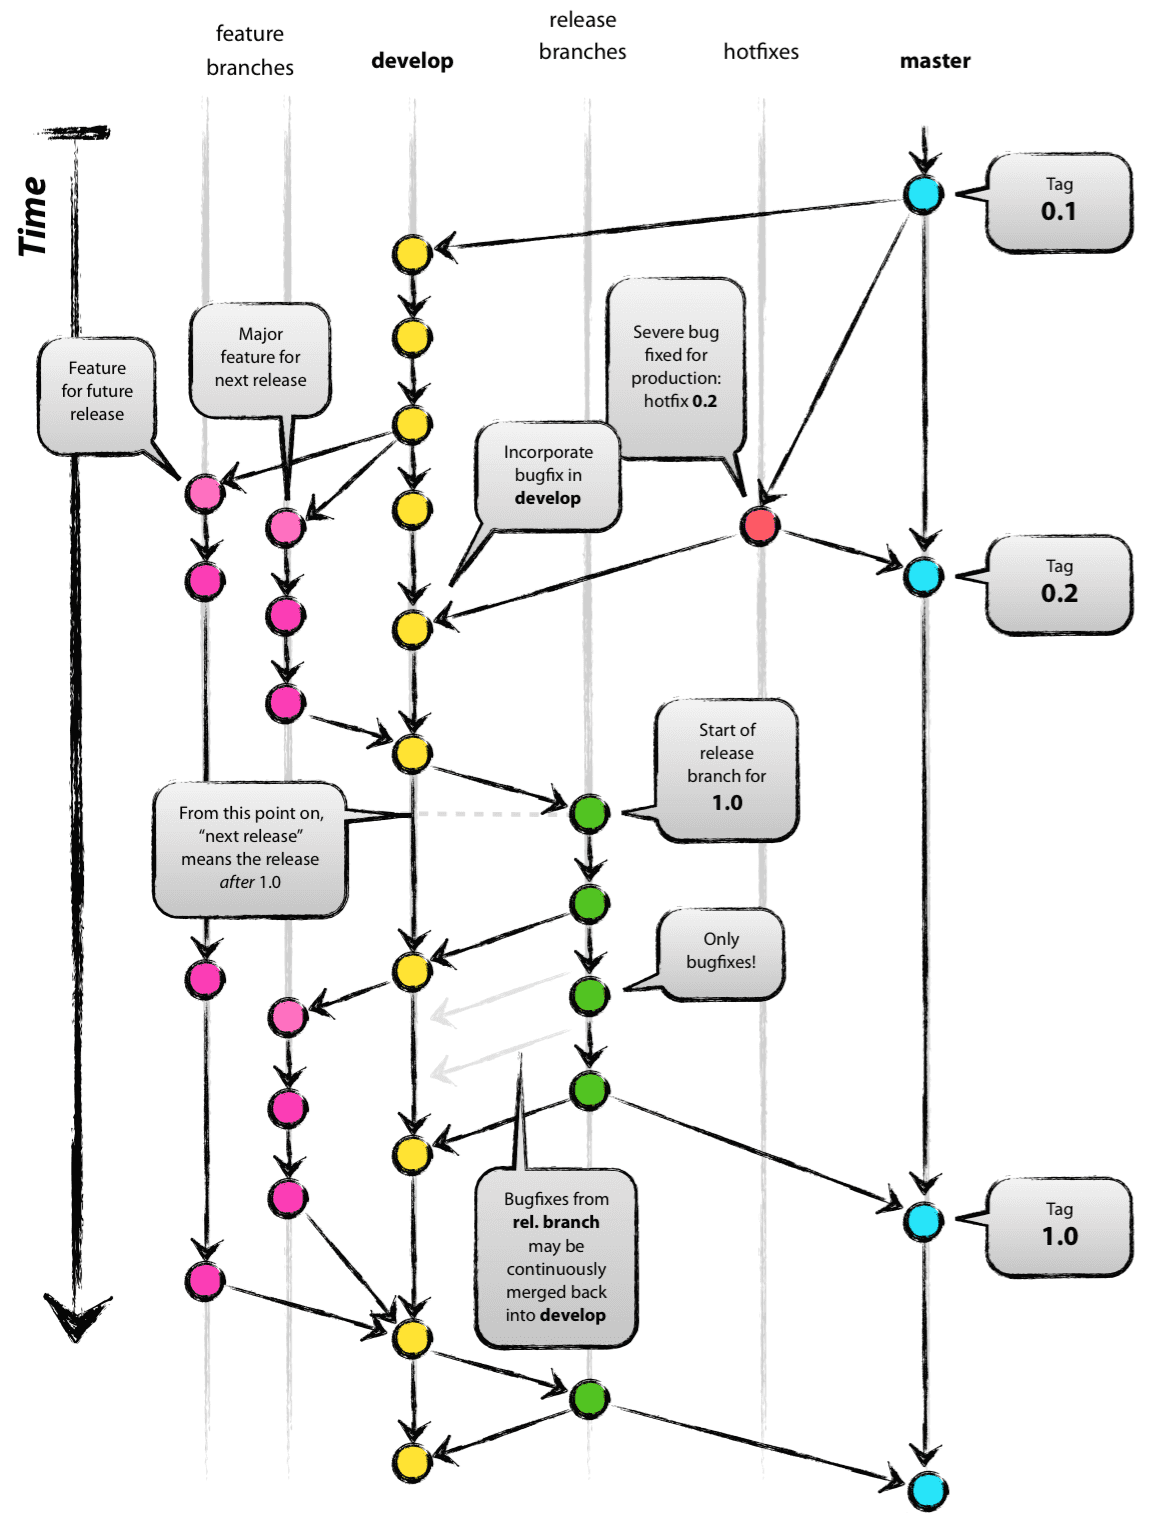
GitFlow is a branching model for Git, created by Vincent Driessen. It has attracted a lot of attention because it is very well suited to collaboration and scaling the development team. We adopt this model for all Exchange projects source code management.
Please note that it's not mandatory to use a GitFlow command to create/manage branches. It's completely valid to use normal git commands to create/merge/remove branches as long as it matches the principle of the GitFlow branching model below.
Installing GitFlow
- Windows: Git (2.10+) includes GitFlow by default
- OSX: brew install git-flow
- IntelliJ: Git Flow Integration plugin
Migrating existing projects
In some of the earlier Exchange projects, they only have the master branches. We need to gradually migrate these projects to the new GitFlow model.
When
When we need to modify the project. Could be either a bug fix or feature enhancement.
How
The main difference between the old model and new model is introducing "develop" branch. So in order to migrate to the new model, we need to create a new develop branch based on current master branch.
GitFlow command
git flow initMake sure your local repositories are synced with remote repositories. Otherwise, it may fail when you run the above command. You can do this by executing "git fetch --prune".
Also, make sure you delete any previous local branch you may have that already merged into master. You can remove local branch by "git branch -d branch_name".
Git command
git checkout -b develop masterIntelliJ GitFlow plugin
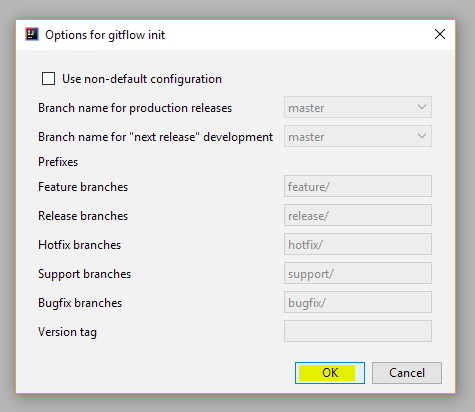
Make sure you are in the latest master branch and don't have any unstaged changes locally, and at bottom right corner, click on "No Gitflow" and select "Init Repo" in Gitflow Actions.

In the option pop-up dialog, just click OK to use the default configuration.
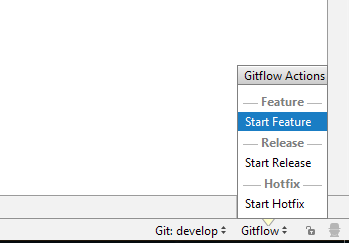
If it succeeds, it automatically creates a develop branch and switches to this branch. Also when you click on Gitflow, it will show options to Start Feature, Release, Hotfix as per below.
GitFlow Init Repo will fail if you have unstaged changes.
Make changes to the project (Enhancement or bug fix)
You should always make changes based on develop branch. GitFlow recommends creating a feature branch based on develop branch and when it's finished, merge it back into develop branch and delete the feature branch. You can do this by using GitFlow command or pure git command. GitFlow command or plugin is recommended because it automatically creates the correct prefix branch name and handles merge and remove feature branch for you when finished.
In Exchange projects, we tend to always release a newer version for both enhancements and bug fixes, hence we don't normally create a branch directly from master for bug fixes (hotfixes concept in GitFlow). Plus Exchange developers typically don't have the write permissions to the master branch, creating a hotfix branch may later on have trouble merging back to the master branch. So it's recommended to follow the same process for both bug fixes and feature enhancements as per below.
Step 1 Create a feature branch
Make sure you are on the latest develop branch.
GitFlow command
git flow feature start my-changeGit command
git checkout -b feature/my-change developIntelliJ GitFlow plugin
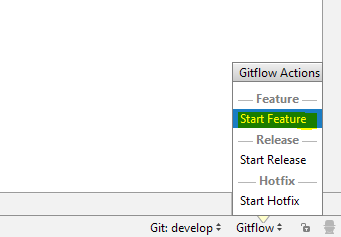
Click on Gitflow at the bottom-right corner, and select Start Feature like below.
Step 2 Make changes
Make changes to the feature branch you just created. If you are collaborating with team members, you might want to commit and push your newly created branch to remote so that other members can work on the same branch.
It's recommended to use "git pull" to get the changes from other members regularly (daily) to avoid/resolve potential conflicts at early stage rather than merging large amounts of code towards the end.
Step 3 Finalize the feature branch
When the feature or bug fix is done and tested, check out develop, merge the feature branch back into develop branch and delete the feature branch.
Make sure you've committed and pushed all your changes before performing the following command. Failure to do so may cause issues.
GitFlow command
git flow feature finish my-changeGit command
            git checkout develop
            git merge --no-ff feature/my-change
            git branch -d feature/my-change
IntelliJ GitFlow plugin
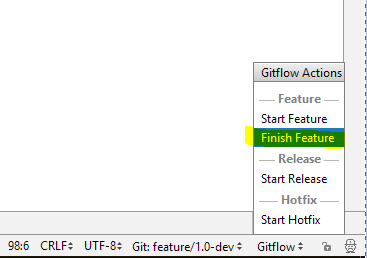
Click on "Gitflow" at the bottom-right corner, and select "Finish Feature" like below.
Releasing a version
When all the changes on develop branch have been tested and QA signed off, it's the time to create a release version based on develop branch.
Step 1 Create a release branch
We should use the TPac version MajorNumber.MinorNumber.buildNumber to be the release branch name. For example, to release TPac v1.2 build 004, use 1.2.004.
GitFlow command
git flow release start 1.2.004Git command
git checkout -b release/1.2.004 developIntelliJ GitFlow plugin
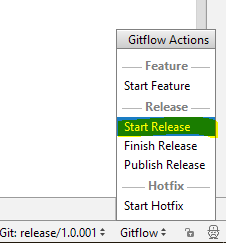
Click on Gitflow at the bottom-right corner, and select Start Release like below.
Step 2 Create distribute pack
Create the distribution package if you haven't already done so.
Please note you should avoid code changes at this stage except a documentation update. Code review, functional testing and bug fixes should be finished before creating a release.
Step 3 Finalize the release branch
To finalize the release branch, it needs to merge the release branch back into both develop and master branch. Since sometimes developers don't have write permissions to the master branch, it can create problems when finalizing the release branch using a GitFlow command or GitFlow plugin. The recommended way is to either use a user with write permissions or use the following command to merge release into develop and manually create a merge request though Gitlab to master.
GitFlow command
git flow release finish 1.2.004Git command
- Execute the following command to merge release to develop branch.
- Create a merge request in gitlab from develop branch to master branch.
- Execute the following command to tag the master and delete the release branch.
                git checkout develop
                git merge --no-ff release/1.2.004

                git push
                git checkout master
                git tag -a 1.2.004
                git branch -d release/1.2.004
IntelliJ GitFlow plugin
Make sure you have the write permission to master branch before using this function.
Click on Gitflow at the bottom-right corner, and select Finish Release like below.

After clicking Finish Release, you still need to perform the following command to push local to remote and tag the master.
            git checkout develop
            git push


            git checkout master
            git push
            git push --tags
GitFlow will create tags automatically in the local master, or you can use git push --tags to push tags to remote if you don't have any other local tags. Otherwise please use git push origin <tagname> to only push the released version tag.