Composer Form Parts
Composer This topic is related to Transact Composer. | Form Builder | v4.3 & Higher This feature is related to v4.3 and higher.
Form Parts projects introduce a special type of form known as a part-form. Within a part-form, one or more parts can be created. Inside the part, a form developer can create any content, including entire section level 1’s. The parts can then be exported from within the part-form to the organization.
Overview
In projects where there are many forms and/or larger and more complex forms, two problems can arise:
- Composer does not allow two users to work on the same form at the same time.
- Often forms contain large re-usable sections, such as a “Personal Details” section. Blocks can be used to create these sections, however blocks are generally designed for smaller entities, such as an address block. Composer isn’t optimized for creating larger blocks, especially those containing sections. The block editor is an advanced tool which is intended for power users, and isn’t suitable for editing these types of larger blocks. Instead, it would be preferable to use the regular Composer editing environment for creating these larger blocks.
Form Parts solves both of these problems.
Form Parts projects introduce a special type of form known as a part-form. Within a part-form, one or more parts can be created. Inside the part, a form developer can create any content, including entire section level 1’s. The parts can then be exported from within the part-form to the organization.
Another special type of form unique to Form Parts Projects is known as a master form. It is used to include any of the exported parts that have been created in the part-forms. A master form can override properties from the parts if necessary. Business rules can be created either within each part, or in the master form spanning multiple parts.
These new form types are shown below:
This allows multiple developers to work on different parts of a single form in a controlled and convenient way. It also allows re-usable parts to be created that can be used in multiple master forms.
Setting Up a Form Parts Project
Form Parts projects (also known as Parallel Development projects) behave differently to normal Composer projects. For this reason they are distinguished from normal projects with different icons.
Creation of a Form Parts Project is done at the Organization Level by selecting "Create New Project". In this dialog the Project Type dropdown "Parallel Development Project" must be selected.
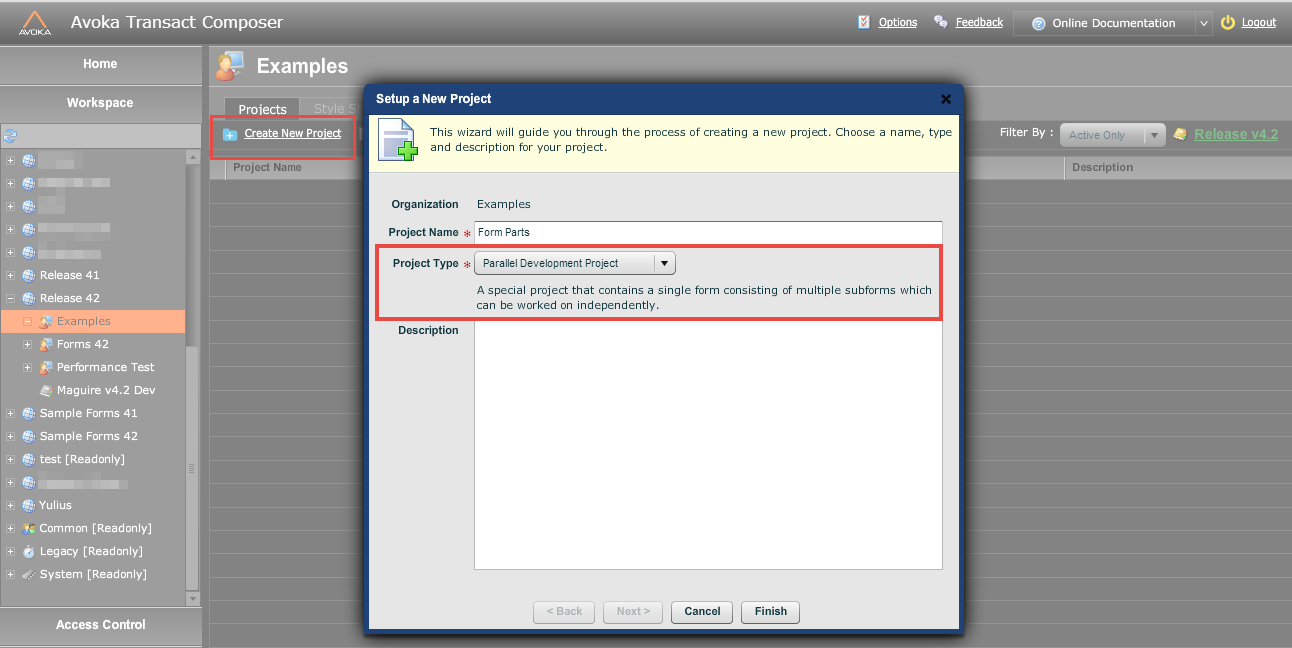
This creates a Form Parts project

Creating Master Forms and Part-Forms
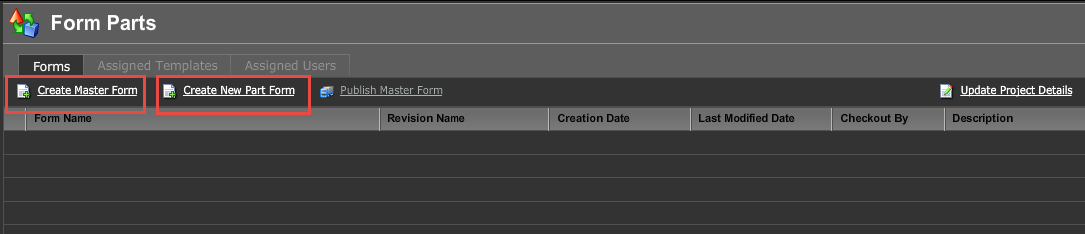
At the project level you can create the part-forms and master forms by selecting the options.This process is much the same as creating an ordinary Composer form.
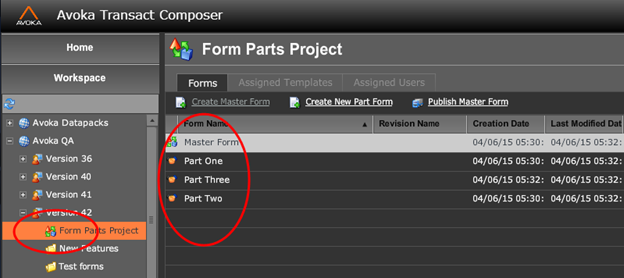
Only one master form can exist in a form part project. Multiple part forms are permitted.
The different form types are distinguished by their icons. The Create Master Form option is now disabled in the screenshot below.

There is nothing special about a Parallel Development project, or the master form or the part forms. These are really just regular project/form, which are tagged in a special way to give them different icons in the Composer user interface. They also enable some special toolbar icons in the project menu, such as Create Master Form and Create New Part Form. You can convert freely between a Parallel Development project and the Standard type of project. You can promote a regular form to a Master form using the right hand icon menu at the project level (but you can only have one master form per Parallel Development project).
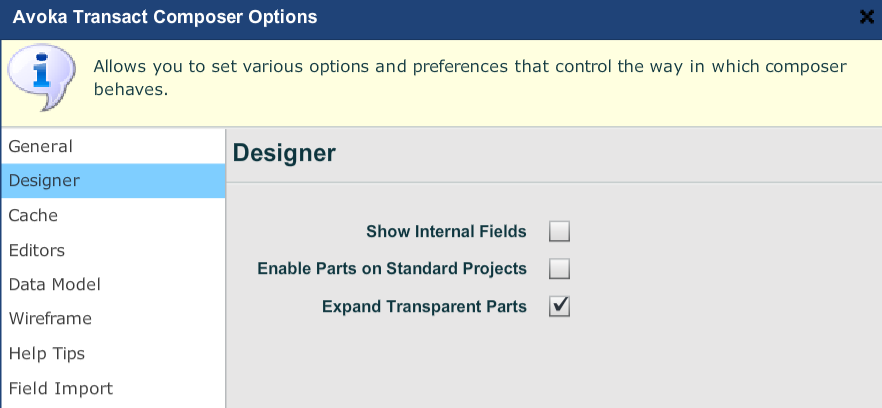
If you wish to use the special parts menu options in a regular project, then you may do so by checking "Enable Parts on Standard Projects" in the Composer Options dialog.
Generally the master form and the parts will all be in a single project. However, a master form in project B can also use parts that are defined in project A. This approach might be useful for the case where multiple forms utilize the same set of common sections, and these sections are defined in a separate common project.
Creating Parts within the Part Forms
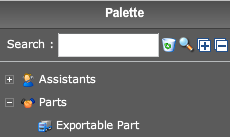
The part forms act as containers for the parts. In order to create a part, drag a Exportable Part from the Parts folder in the palette into the top level of your form.
You can have as many parts as you want within each part form.
Parts can be either transparent or opaque. This will be covered later.
You can then add any content you wish into your Part. In most cases, you will drag a Section Level 1.
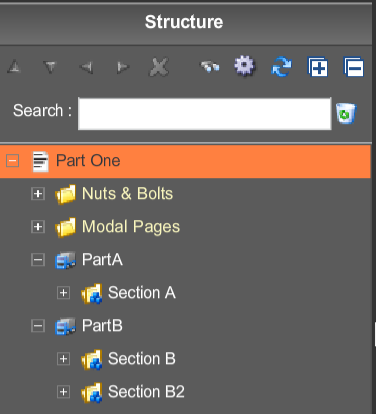
The example below shows a Part One form that contains two parts, Part A and Part B. Usually a part form will only contain one part, and a each part will contain one section, but this example illustrates that a part form can contain multiple parts, and a part can contain multiple sections if desired. The sections can contain arbitrary content, including fields, blocks and business rules. However, if your form contains multiple parts, you must not create any dependencies or business rules between the parts. Each of the parts can be developed, and tested in isolation, as it it was a normal form.
In general, it is recommended that each part form contain only one part, and that each part contains only one section. It's also usually a good idea to name parts and part forms (and even the sections they contain) using a consistent naming scheme, so that the parts and sections can easily be located.
In order to use these parts within a master form, they must first be exported from the part form. In order to export one or more parts, click on the Parts... icon which is visible in the toolbar of all part forms. This will bring up the Part Management dialog shown below.
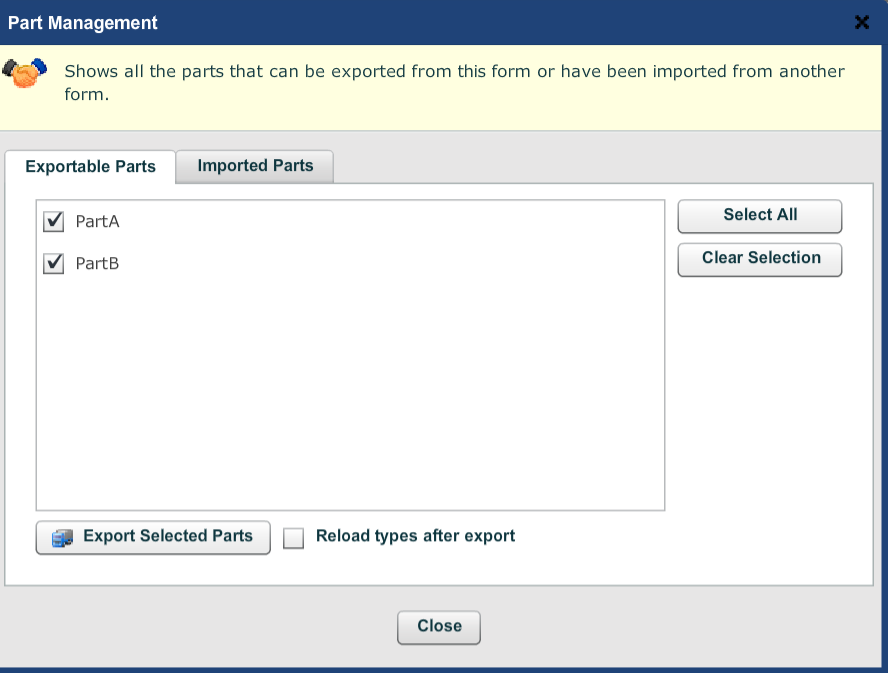
Your parts are not available to be used in a master form until they have been exported. Click Export Selected Parts in order to export the selected parts. It is not usually necessary to select "Reload types after export" - use this checkbox if you want to verify that the parts have been exported by viewing them in the component palette.
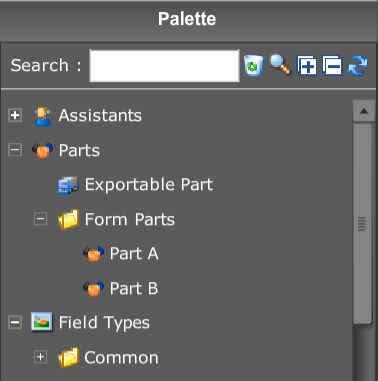
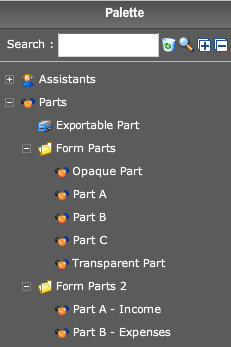
After exporting, the selected parts will appear on the component palette on the right under the Parts node, with a sub-node which is the name of the project, as shown below:
If you use parts extensively, this can result in many projects and parts under the Parts node, which can become confusing. This can also result in slower time to load the types for the organization. If you use a large numberof parts, you should either use a project and part form naming convention that allows you to easily identify the various parts, or you should create multiple organizations to group the various parts and the forms that use them.
An exported part is actually just a special type of block, similar to a block created using "Save as Custom Block" or the block editor. It is really just the way that the block is created, edited and exported that is different.
Saving the form does not automatically export the parts. And exporting the parts does not automatically save the form. This is important so that you can control when and how you update your exported parts. Each of these operations must be performed separately. This is useful because it allows you to finely control when you make your part available to others. For example, you wouldn’t want to export your part if it has a bug, or if you’re not finished developing it.
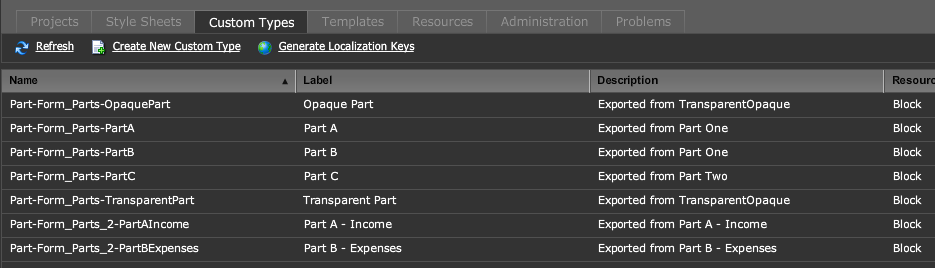
Be careful of renaming a part - the part will be exported under the new name, but the original part will be retained - this may cause confusion. You can manage the parts as in the Custom Types tab at the organization level.
Combining the Parts to Create a Master Form
In the master form, simply drag and drop the various parts that you require from the Parts folder in the palette into your master form. Because parts are generally section level 1's, you should drag the parts into the top level of the form. For parts that contain other types of content, drag them into the appropriate locations.
Parts are grouped by the name of the Project in which they are defined. You can drag as many parts as you want into your master form.
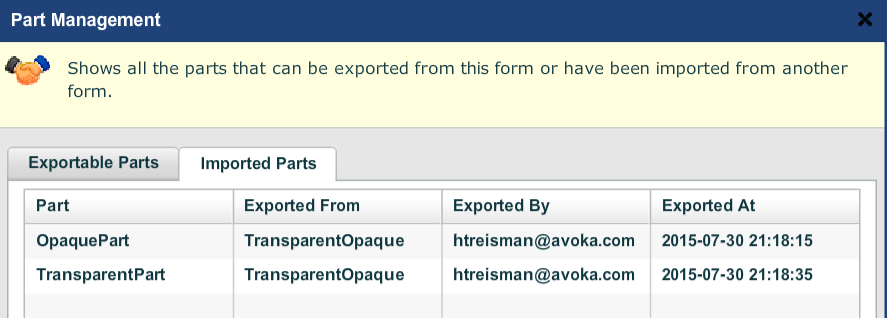
Once you have imported parts into the master form, you may view a summary of what parts have been included by clicking on the Parts,, button and selecting the Imported Parts tab. This tells you not only what parts are being used, but also which part form they are defined in, and when/who exported them.
Important: it will be important later on when we discuss cross-part business rules that all parts have the same name everywhere. The easiest way to ensure this is to accept the default name for each part when you add it to the master form.
Opaque and Transparent Parts
A transparent part is the default type of part. When imported into a master form, it looks just like a normal section of the form.
An opaque part is treated as a "black box", and is not actually loaded into the Composer designer. An opaque part's contents will not appear within the structure tree or in the wireframe. However, the contents of an opaque part will appear in the form itself, when previewed or published.
There is no real difference internally between a transparent and opaque part - it is only the Composer editor that treats them differently from a visibility perspective. You can modify whether a part is transparent or opaque in its property dialog.
The difference between an opaque and transparent part when imported into a master form is shown in the picture below.
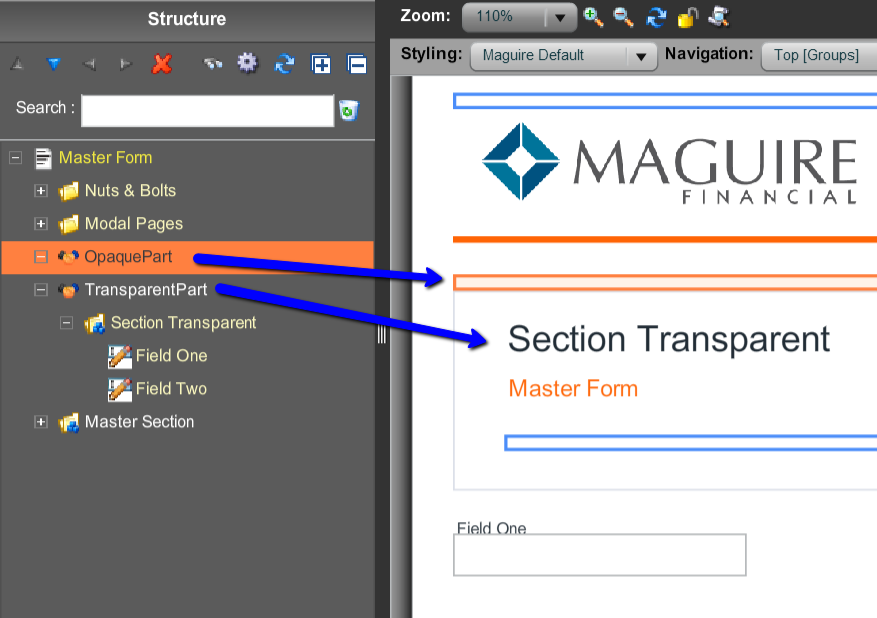
You can mark your parts as opaque in order to indicate your intention that your part should be used "as-is", and not modified. An opaque part will also mean that the form using the opaque part will load quicker.
By default, transparent parts will not have their contents displayed in the structure tree. This serves as a reminder that the contents of the part are not intended to be modified. In order to see the contents of transparent parts in the structure tree, you need to select "Expand Transparent Parts" in the Composer Options dialog.
Even if the "Expand Transparent Parts" option is unchecked, the fields in a Transparent part are always available in the rules editor, and so may be used within rules.
Parts and Versioning
Part Forms (the forms that contain the parts) are like any other type of form, and benefit from the usual Composer form versioning capabilities. However, the parts themselves, which are exported from these part forms, and which exist within the component palette, only have a single version - this being the latest version that was exported.
Under the covers, parts are exported as regular Composer blocks, and can be viewed within the Custom Types tab at the Organization level.
If you wish to revert to a previous version of a part, you must open the version of the part form that contains it, and re-export.
Cross-part rules
When business rules exist entirely within a part, then they are very easy to set up - simply define the rules within each part as normal, and the rules will be imported along with the part into the master form. However, when it is necessary to define rules at the master form level that span multiple parts, then things can get a little more complicated.
There are several different approaches to dealing with cross-part rules. The approach you choose will depend on the sophistication of the form and the business rules, as well as the sophistication of your development team. Three different approaches are discussed below. There are probably other approaches that can be used too, but these are the recommended approaches.
All of these approaches require the development teams to use discipline in the way that they use the parts capabilities. It is possible for a single project to mix and match the various techniques listed below - but this can become confusing, and it recommended that the form developers on a project consciously select a particular approach and stick to it.
Simple - All Cross-part Rules in the Master Form
All the cross-part rules are defined in the master form, as if it were just a single large form. Rules can be set up that include fields in any of the parts, and/or any of the fields that are explicitly placed in the master form. This has the advantage that it is very simple to use and understand.
However, it suffers from some disadvantages:
-
All the responsibilities and dependencies are on the master form developer. If there are a large number of cross-part rules, this limits the ability for multiple developers to be able to work independently on these rules.
-
When any of the parts are changed, the master form developer needs to fix everything in the master form. In some cases, it might be preferable for each part developer to manage their own cross-part rules.
Normal - Each Part References Other Parts it Requires.
This is a slightly more sophisticated approach, and encourages each part developer to define and maintain the rules in their own parts independently.
Let's consider the following example:
- Part A - Income Section. This section has a numeric field named TotalIncome.
- Part B - Expenses Section. This section has a numeric field named TotalExpenses.
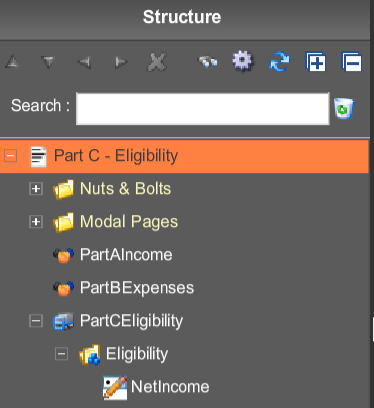
- Part C - Eligibility Section. This section contains a calculation for a field NetIncome = TotalIncome-TotalExpenses, which is in turn used to determine whether a customer is eligible for a loan.
The developers of Parts A and B develop their parts as usual. The developer of Part C, because there is a dependency on fields outside of his part, will add these parts into the part form. The Structure tree for Part C is shown below:
Note that:
- The above diagram is the structure for Part C, NOT for the master form. The master form will include parts A, B and C, but will not directly contain any business rules.
- Part C is defined and modified within this part form. But parts A and B are defined elsewhere, and simply imported so that they can be referenced.
The developer of Part C will include the calculation rule into Part C. When Part C is exported, it will contain a business rule that references Parts A and B.
When Parts A, B and C (and any other additional parts) are included in the master form, the business rule that exists in part C will reference fields in other parts. However, since these parts also exist within the master form (as imported parts), the references will be correctly resolved, and the business rule will work correctly. (This is why it was stated earlier that each part should always be given the same name wherever it it used.)
Tips:
- Within the Part C form, only add cross-part business rules to Part C (not Parts A or B). Because we are only exporting Part C, any business rules you add to parts A or B will never be exported.
- When editing a part form, use Transparent parts, but uncheck "Expand Transparent Parts" in the Composer Options screen. This will display the imported parts without any contents, as shown above. This will serve as a reminder to not add any business rules to these parts. The business rule editors will still allow you to create rules in Part C that include field from Parts A and B.
- You can preview and test your form as if it were a complete form.
- You can set the wireframe to only display Part C, using the Wireframe Options button. That way your form will load faster, and also you won’t be tempted to accidentally add rules to parts that aren't defined in this form.
- If one of the other editors makes a change to part A or B, you may need to adjust rule business rules. However, you can usually detect this using the Problems pane.
- When working in a single form, Composer will automatically refactor your business rules if you move or rename a dependent field. However, this will not be done when the dependent field is modified in a different part. It is therefore advisable to either limit the number of changes made, or to communicate well between developers when these changes are made. The Problems pane will notify you of any errors.
- Generally when using this approach, the master form just contains a series of parts, and has no content or business rules of its own. It is possible to mix the approaches, but this is not recommended, as it can get very confusing.
This approach does have a number of disadvantages in certain situations:
- Part C has a dependency on Parts A and B. It will fail if used in a form that does not have Parts A and B, and cannot be used independently of them.
- This approach may not work very well when a particular form has business rules that reference a large number of different parts - you may be better off using the Simple approach in this case.
Despite these minor disadvantages, this is the approach that is generally recommended.
Advanced - Model/View/Controller
This is an advanced approach to cross-part rules, using a well-known pattern from software engineering, the Model/View/Controller pattern. In this approach, rather than defining business rules directly between the fields of one part and those of another, an intermediate data model is constructed, which serves as the communication mechanism between the parts. In summary:
- Model = a special "data model" part containing only data fields. (A data field is a special invisible field available in the palette.)
- View = the regular parts containing sections.
- Controller = the cross-part business rules (these can be defined in a number of places, as described below).
This approach is a little more complicated than the preceding ones, and requires some discipline and rigor in the development process. However, it has the advantages of:
- An explicit definition of what data is shared between the parts.
- A software "contract" about how this data is shared and used.
- There are no direct dependencies between any part and any other part - there is only a dependency between each part and the shared data model. This means that each of the part forms only need to include the model part, and nothing else.
When creating the model, there are some interesting choices about what data elements to create in the model, and where to place the rules (or controller). For example, if we had a simple calculation of "C = A + B", where A, B and C are each in a different part, then we could have any of the following:
- A and B in the model. C exists only as a real field, and contains the calculation.
- A, B and C in the model. The business rule exists on data element C within the model. The real field C has a calculation equaling the data field C.
- Other choices are possible.
One simple approach is to only include in the model those fields that are needed for business rules in other parts, and only to include business rules in the parts. However, your project team may choose a different approach.
Once the model has been created, it is imported into each of the part forms, and then two steps need to be performed:
- Create any business rules that are dependent on data fields in the model.
- "Push" the values of any fields that need to update the values in the model. (It is up to the developers to ensure that each field in the model is only updated by a single real field.)
Note that while it is theoretically possible for the model to "pull" the values it needs from the various parts, this breaks one of the fundamental principles of model/view/controller, in that the model has no dependencies on any of the views. Views can reference the model, but the model should not reference the views.
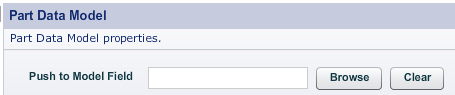
In order to do this, you can use the "Push to Model Field" property of the Part Data Model section on the Properties/Data tab of the properties dialog.
Another interesting decision occurs because you now have two fields (a data field in the model, and a real field in the view), both of which represent the same physical data element. The question becomes: How do we bind these two fields to the XML, and initialize each of the values? Remember that when a Composer form loads, each field will first have its value initialized from the XML data it is bound to, and then any business rules will be fired. The choices are as follows:
- Bind the real field to initialize it. Initialize the model field from the real field.
- Bind the model field to initialize it. Initialize the real field from the model field.
- Bind both fields. No additional initialization is necessary, because they are both bound, and will both be set from the binding values in the XML. This can be a little dangerous, because you are responsible for ensuring that the XML contains the same value in both locations, which in turn ensures that both fields are initialized to the same value. If the XML is inconsistent, you will get strange behavior, with rules not appearing to reflect the data shown. Alternately, you could selected either "Initialize Field from Model" or "Initialize Model from Field", and even though both are bound, as soon as the form loads, the second field will be set to the value of the first one.
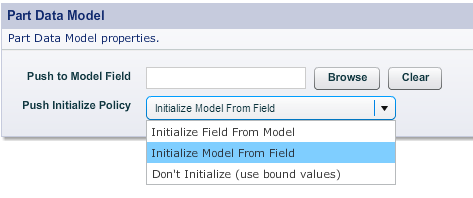
You can control which of these approaches using the "Push Initialize Policy" property, as shown below.
The decision outlined above actually occurs any time that you have two different fields that represent the same piece of data, not just in this approach to cross-part rules. The same reasoning, and the same solutions, can be used in these cases also.
When using this approach, it is recommended that you make each of the view parts opaque, and the model part transparent.