This post provides an overview of how to use the browser History API to hookup the browser’s Back and Forward buttons into your Maestro form’s page navigation model.
Maestro Single-Page Applications and the Browser Navigation Model
Journey Maestro applications have one or more Form pages. If you have looked at the URL of a Maestro application in your browser, you might have noticed that when you traverse through form pages, the URL does not change. This is because Maestro generates a single-page web application.
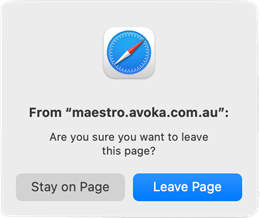
Single-page applications are extremely powerful, but they do have one small drawback: the browser back and forward buttons do not behave intuitively. If an end user navigates to the second page of a form, the user might expect that pressing the ‘Back’ button should return them to the first page. Instead, however, the browser will attempt to navigate to the page viewed before the Maestro application. Depending on your Maestro configuration, your form will either show a warning or you will lose all of the data entered into the form as you navigate away:
Browsers have a mechanism to work with single-page applications to provide a more natural navigation experience: the History API and associated window.onpopstate event.
Using the History API, developers can ensure that the Back and Forward buttons work intuitively - pressing Back on the second page of a form can be made to returns the user to the first page and pressing Back again navigates away from the form (possibly showing the unsaved data warning.)
Maestro doesn’t manage the browser’s page history because not all our customers want this behaviour. For this reason, we leave it to Form developers (https://docs.avoka.com/LandingPages/FormBuilderLanding.htm) to choose whether to use the features exposed by the History API and how to implement it.
The History API and Associated Window Navigation Event
The History API provides access to the browser’s session history; a stack of pages that the user has navigated through. For security reasons, this is tightly controlled: the API doesn’t allow the developer to query or change the entire history, only allowing access to browsing history which lies within the same domain as the Maestro App itself.
Two key APIs are provided that are used to manipulate the state:
- replaceState – replaces the browser’s history stack object for the current URL, and provides a means to store application specific state information.
- pushState – pushes a new entry into the browser’s history stack with a URL and application specific state information.
In addition, there are APIs to navigate back, forwards, and to a page particular page in the history stack. Read the History specification for the full details.
Using the APIs is straightforward – first, you replace the state History entry, and then you add additional entries with the pushState method.
Your application can receive notifications of page changes, within the same domain as your Maestro app, via the window.onpopstate event handler. This event is triggered every time the browser history changes within the same page and provides an event.state argument, giving the state object that the developer associated with the history entry.
The API name onpopstate can be somewhat confusing, but what it really means is - the user navigated to a page on the stack.
These two APIs are all you need to hook up an intuitive form navigation experience.
Hooking Up Browser Page Navigation Events
Now, it’s time to put it all together.
Firstly, we need to add a form Load rule as shown below:
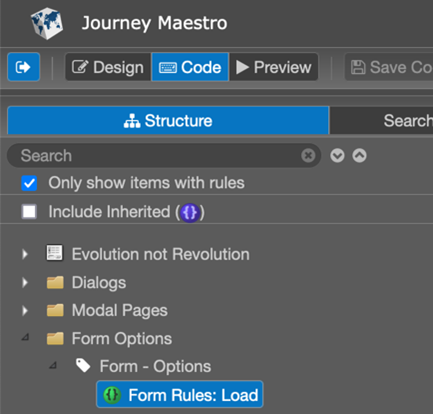
After that, add the following JavaScript to the Load rule:
// Initialise the history API
history.replaceState(
  { pageIdx: Form.getCurrentPageNumber() },
  ""
);

// Browser page change callback (navigation back or forward)
window.onpopstate = function (e) {
  console.debug("onpopstate: navigate to: %O", e.state);
  Insights.milestone("Browser Navigation");

  if( maestro.Form.data.SFMData.SystemProfile.SubmissionType === "Submitted" ) {
    console.warn("Page navigation ignored as the form has been submitted.");
    return;
  }

  let newPageIdx = e.state.pageIdx;
  let curPageIdx = Form.getCurrentPageNumber();
  console.info("onpopstate: %s navigation to page: %d history length: %d.",
    newPageIdx > curPageIdx ? "forward" : "backward", newPageIdx, history.length);

  Form.goToPage(newPageIdx, false, true);

  console.debug("onpopstate: done, state: %O page: %d requested: %s.", e.state,
    Form.getCurrentPageNumber(), newPageIdx);
}
This JavaScript code is executed once only when the Maestro application loads and it does two things:
- It binds application defined state (the first argument to the replaceState function) to the current URL. This state is user defined, so we store the initial form page in pageIdx. The second argument (empty string) is unused, and, in this simple example, we don’t pass the optional third URL argument (its use is beyond the scope of this simple article).
- It adds an onpopstate event handler, which is called whenever the user navigates back or forwards through the page history. The argument to which, e, is the state object we pushed onto the stack and contains the pageIdx of the page that the user is navigating to. All this method really does is navigate the form to this page. However, we’ve added debug information to paint a clearer picture of what’s going on. The method:
- Pushes a milestone into Journey Analytics.
- Checks to see whether the form has been submitted and, if so, returns without navigating to a different page.
- If the form has not been submitted, the Form.goToPage API is used to navigate to the required page.
Then, we need to add a page change handler to push updates onto the history stack when the Maestro form page changes, as shown below.

On page change, we must update the browser’s history by executing the following JavaScript:
console.debug( "pageChange: before." );
let curPageIdx = Form.getCurrentPageNumber();
let state = history.state;
let pages = Form.getNavPages();

console.info( "pageChange: to page: %d current history state: %o", curPageIdx, state );
if( !state ) {
  console.warn( "pageChange: no history state?" );
  return;
}

console.info( "pageChange: cur page %d state page %d", curPageIdx, state.pageIdx );
if( curPageIdx === state.pageIdx ) {
  console.warn( "pageChange: no page change detected?" );
} else if( curPageIdx < state.pageIdx ) {
  console.info( "pageChange: navigate back - no history change." );
}
else {
  console.info( "pageChange: forward page change detected" );
  history.pushState(
    { pageIdx: curPageIdx },
    ""
    );
  }
}
console.debug( "pageChange: after." );
This code performs the following tasks:
- Verifies that the history API has been initialised with state information.
- Checks whether navigation is backwards and, if so, does nothing with the history stack.
- If the navigation is forward, the new page index is pushed onto the stack via the pushState
That’s all you need to do to make your Form page navigation more intuitive!
Summary
The History API provides a means for single page web applications, like Maestro forms, to intercept back and forward navigation events. These can be easily hooked into a Maestro form or template. The result, from a mobile browser, is shown below as the user navigates backwards one page through the history, and then forwards using the browser back and forward buttons.