Configuration Editor
:::critical Experimental - Not for production use This feature is experimental and may be subject to breaking changes in the future. Do not use it in a production system.
If you do decide to try out this feature in a pre-production system, you're feedback is welcome. :::
The Configuration Editor is a new, experimental feature introduced in Workspaces 22.10. It allows you to experiment with the configuration of the internal data store in a non-destructive way, and then see the results of your configuration changes in the UI in real time. The Config Editor is based on JSON Editor Online.
Invoke the Editor
There are two ways to invoke the Config Editor:
- Click the Configure button on the page header.
- Click the Edit config icon button next to an individual UI feature.
These options are available only if the current user is a member of an "Edit Config" group in Journey Manager. To learn more about groups in Journey Manager, see Groups Overview. Once the user is added to this group, the Configure button on the page header becomes visible.
The Configure button is a dropdown with two menu options:
- Open config editor: Open the Config Editor with several tabs to configure various parts of the UI.
- Show component edit icons: Show the Edit config icon button next to each part of the UI for which this feature is enabled.
Edit and Validation
We will use the example of editing the Views part of the Workspaces Overview UI.
When you click Edit config at the top left of the views feature (red circle in the image below), the Config Editor modal is displayed.
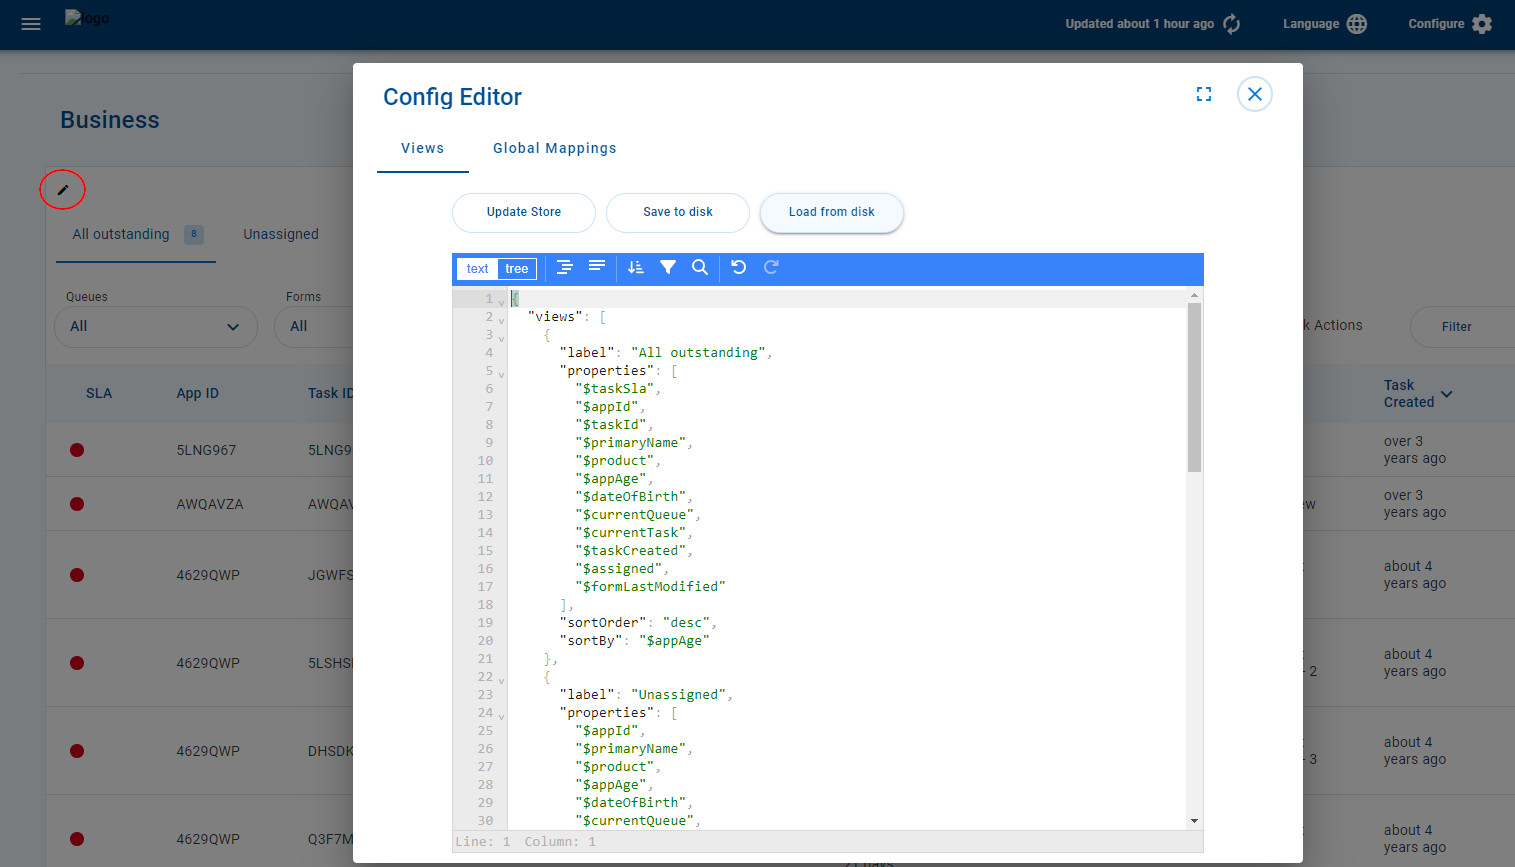
This Config Editor modal contains two tabs:
- The first tab is the feature that we're editing, which is Views in this case. This tab contains only the subset of JSON data necessary to configure that particular feature as it is displayed in the UI.
- The second tab is the Global Mappings tab, and this is displayed on every dialog.
Editing
The Config Editor supports two modes: text and tree. To learn about the features offered by each mode, see JSON Editor Online > Features.
By default, the Config Editor opens in text mode, and we recommend you use this mode. All of the examples below use text mode.
More options are available on the Config Editor toolbar, including:
- Find: Search for text in the config (Ctrl+F on Windows, Command+F on macOS)
- Undo: Undo a change (Ctrl+Z on Windows, Command+Z on macOS)
- Redo Redo a change (Ctrl+Y on Windows, Command+Y on macOS)
Validation
The Config Editor has a built-in JSON validation feature that checks your JSON against the application's internal schemas. Validation indicates that required properties are missing or not of the required format.
The screenshot below demonstrates JSON validation arising from the following deliberate errors.
- Delete the
labelproperty. - Misspell the
propertiesproperty. - Change the data type of the
sortOrderproperty from string to array (by wrapping it in square brackets).
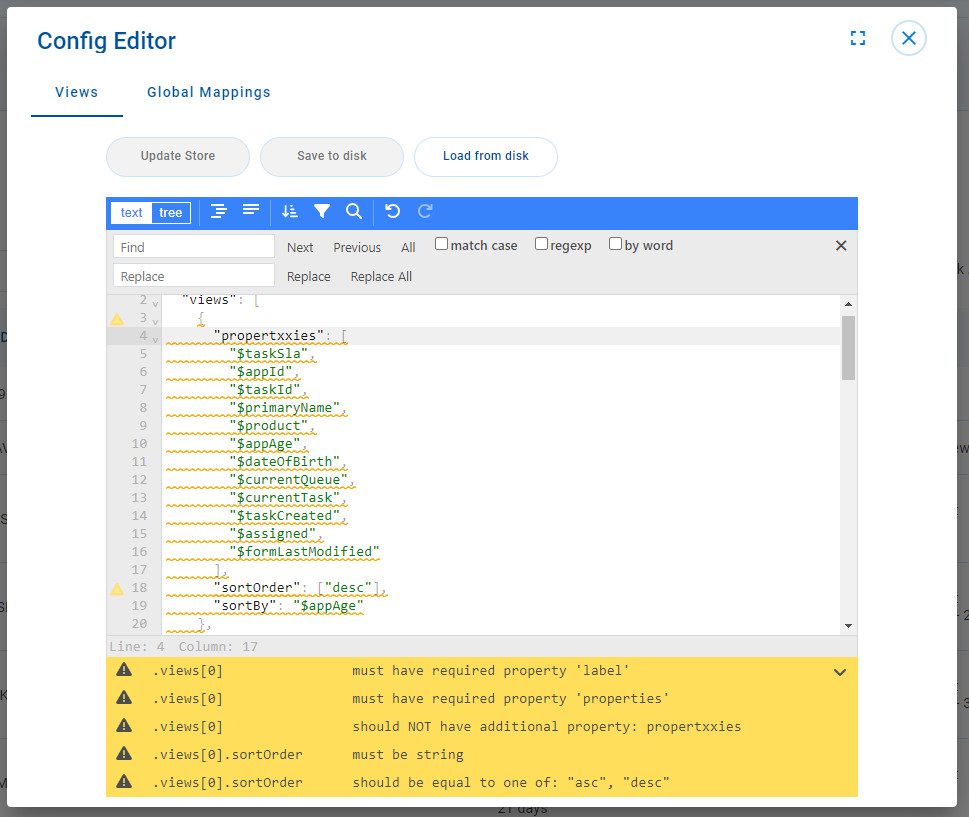
You can see how the validator has detected all of these errors, displaying appropriate warnings below the editor box. Note that for the sortOrder error, not only does it report that the property must be a string, but also which strings are permitted for that property.
Note also that the Update Store and Save to disk buttons are disabled when the JSON data is in an invalid state.
Update the Store
Once you've modified your JSON config, and addressed any JSON validation errors, you can update the internal Workspaces store with your new config using the Update Store button.
The animation below demonstrates two examples of updating the store.
In the first part of the animation, the name of the leftmost view is changed, as follows.
- Click Edit config on the views tabset. The Config Editor modal is displayed showing tabs for the Views and Global Mappings configs.
- The Views tab is selected by default. In the Views config, change the name of the All outstanding view by appending an emoji to it.
- Click Update Store. The change is reflected immediately in the UI, changing the name of the leftmost view.
- Click Close to close the modal.
In the second part of the animation, the App ID column is renamed, as follows.
- Click Edit config on the views tabset (again), displaying the Config Editor modal with tabs for the Views and Global Mappings configs.
- Switch to the Global Mappings tab.
- Use the Find option to locate the config for the App ID column.
- Change the
"label"property's value from"App ID"to"Application ID". - Click Update Store. The change is reflected immediately in the UI, changing the name of the second column to Application ID.
- Click Close to close the modal.
At the end of the animation, the page is refreshed thereby reverting to the original config and restoring the names of the changed UI elements to their original values.
Save and Load Config Files
As demonstrated at the end of the previous section, updating the store only changes a config temporarily. When experimenting with config changes, you might want to store your changes more permanently so that you can restore them later. The Save to disk and Load from disk buttons on the Config Editor modal provide this functionality.
The save and load options act on the currently selected tab only; that is, the config in each tab is stored in a separate file. When saving a config, the Config Editor offers a default file name based on the name of the selected tab. For example, when saving the Views tab the default file name is config-space-views.json, and when saving the Global Mappings tab the default file name is config-global-mappings.json. However, these file names are defaults only, and you can give your saved config files any name you like and store them in any folder.
Restrictions and Limitations
What you see and edit in the Config Editor is the internal JSON that is used in the Workspaces app's internal data store. This is not the same as the TypeScript config that you may have used to setup your app in the first place. While there are no doubt many correlations between the internal JSON and the Typescript config, and you may be able to copy and paste between the two with only minimal reformatting, there are some significant differences.
Quotes
In the Typescript/Javascript config files, object property names do not need to be quoted (such as label and icon in the example below), and their values can be enclosed in either single or double quotes.
    $taskCreated: {
      label: 'Task Created',
      icon: 'TaskCreated',
      ...
    }
In Config Editor JSON, the values and the property names must both be enclosed in double quotes (single quotes are not valid).
    "$taskCreated": {
      "label": "Task Created",
      "icon": "TaskCreated",
      ...
    }
Relative or Absolute Dates
In the Typescript/Javascript Config files, you can enter date values in a number of different relative formats, such as date('1 month ago'). Relative dates like this are converted into absolute dates, which are used by the application.
      filter: {
        type: 'daterangepicker',
        options: {
          minDate: date('1 month ago'),
          maxDate: date('now'),
        },
      },
In Config Editor JSON, relative dates are converted to absolute dates by the app and displayed using a location-independent format.
     "filter": {
        "type": "datepicker",
        "options": {
          "minDate": "2022-09-18T05:52:49.347Z",
          "maxDate": "2022-10-18T04:52:49.347Z"
        }
      }
If you need to, you can edit absolute dates using the format defined in the ISO 8601 Date and Time Standard. However, do not copy an absolute date from the Config Editor JSON into the TypeScript of your source config files.