Configure IntelliJ IDEA
IntelliJ IDEA ships with built-in Groovy and Ant so you don't need to do much to prepare your IDE.
caution
IntelliJ refers to its Java JDK as an SDK, so take care not to confuse the Journey SDK with IntelliJ's SDK.
The following steps outline how to prepare IntelliJ IDEA for Temenos Journey Manager (TJM) application development.
- Open the Journey SDK project: The SDK includes libraries and a scaffold task to create your own projects.
- Configure a JDK (if necessary): You can skip this step if you already have a JDK configured.
- Create a Journey SDK global library: This library contains the Journey SDK JAR files.
- Scaffold a new project: This new project is where you will build your TJM application.
- Add the Journey SDK libraries to the scaffolded project: This enables the Ant tasks to resolve required classes.
Open the Journey SDK project
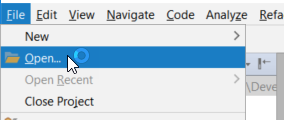
Open IntelliJ IDEA and select File > Open. Alternatively, from the Welcome page you can click the Open item.
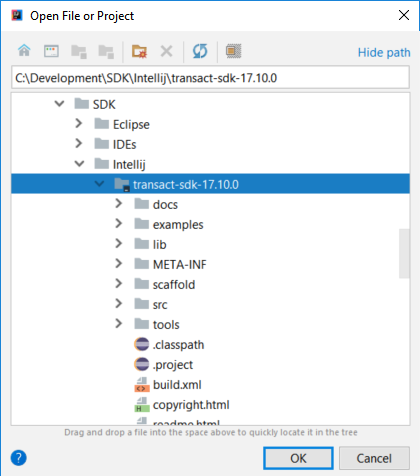
The Open File or Project dialog is displayed.
Browse to the Journey SDK top-level folder and select it, then click OK to open the Journey SDK project.
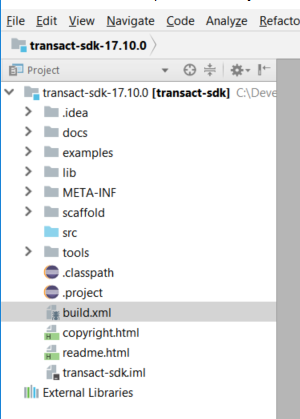
The Journey SDK project appears in the Project panel.
(Optional) Configure a JDK
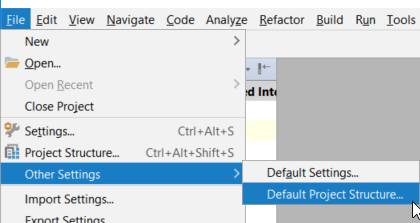
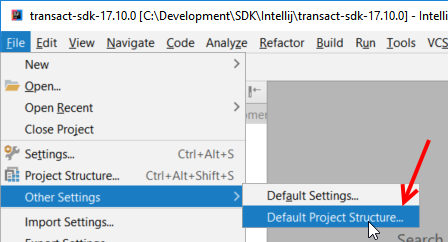
Select File > Other Settings > Default Project Structure....
The Default Project Structure dialog is displayed.
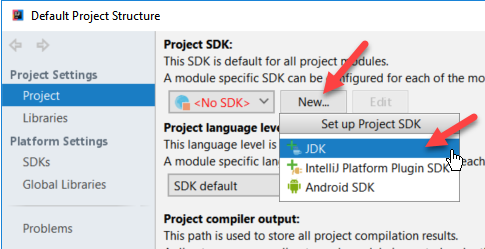
In the left pane, select Project Settings > Project to display the Project page in the main panel.
Select an SDK (i.e. Java JDK) from the Project SDK dropdown list and click OK.

tip
If your Java JDK is not displayed in the dropdown list or the only option is <No SDK>, you can add a new JDK (see below) and then select it from the dropdown list.
(Optional) Add a new Java JDK
If your Java JDK is not available for selection in the Project SDK dropdown list, you can add it as follows.
Click New... and select JDK.
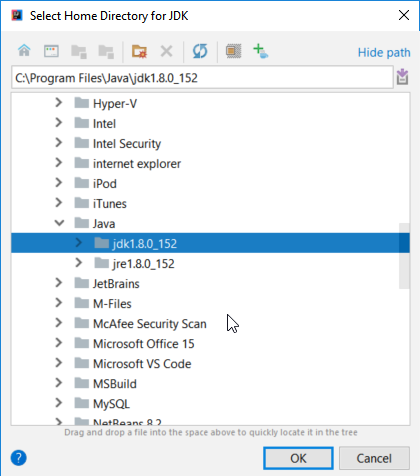
The Select Home Directory for JDK dialog is displayed.
Browse to the Java JDK's top-level directory and select it, then click OK.
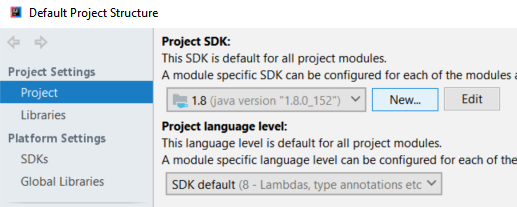
The selected JDK is shown as the Project SDK.
Create a global library containing the Journey SDK JAR files
Select File > Other Settings > Default Project Structure....
The Default Project Structure dialog is displayed.
In the left pane select Platform Settings > Global Libraries then click the New Global Library icon.
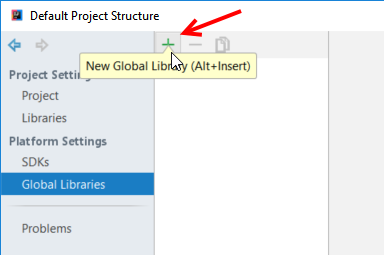
The Select Library Files dialog is displayed.
Select the
libfolder under the Journey SDK top-level folder, then click OK.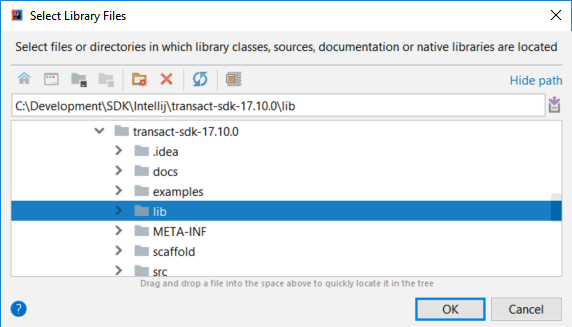
Enter
"Journey SDK"in the Name field then click OK to save your changes and close the dialog.
Scaffold a new IntelliJ project
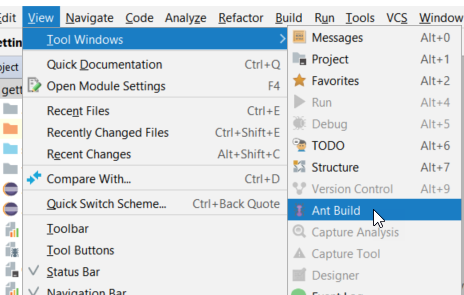
Select View > Tool Windows > Ant Build to display the Ant Build pane to the right of the editor pane.
Click the Add icon in the Ant Build panel.
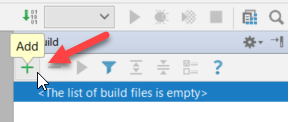
The Select Ant Build File dialog is displayed.
Browse to and select the
build.xmlfile under the Journey SDK top-level folder, then click OK.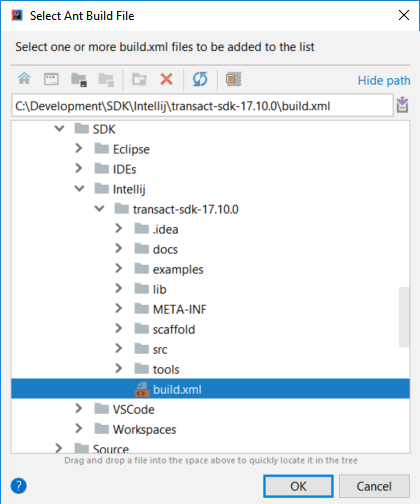
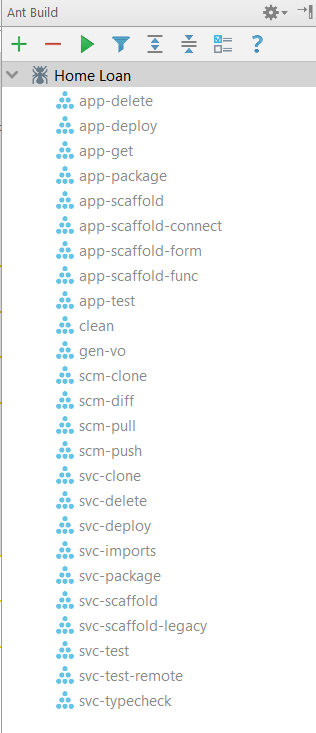
The Journey SDK tasks appear in the Ant Build pane.
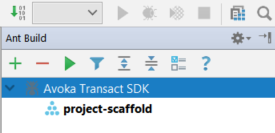
In the Ant Build pane under the Journey SDK item, select the
project-scaffoldtask and click the Run icon. Alternatively, you can double-click theproject-scaffoldtask to run it.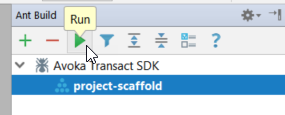
Enter appropriate values for Project Name, Project Folder and Project Layout when prompted then click OK.


A new project is created in a folder with the name you just entered at the same level as the Journey SDK root folder but it does not appear in the Project panel immediately. You need to open the new project.
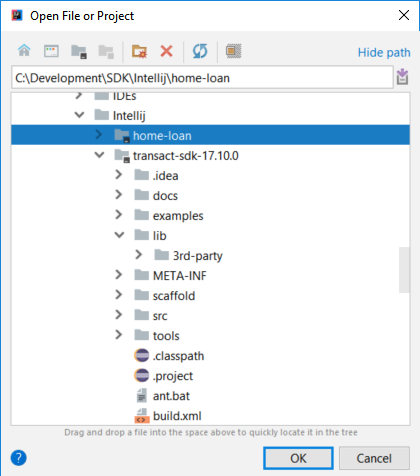
Select File > Open to open the new Journey SDK project.
The Open File or Project dialog is displayed.
Browse to the new project folder - it will be at the same folder level as the Journey SDK root folder - and select it, then click OK.
Click New Window to open the new project in a new window.

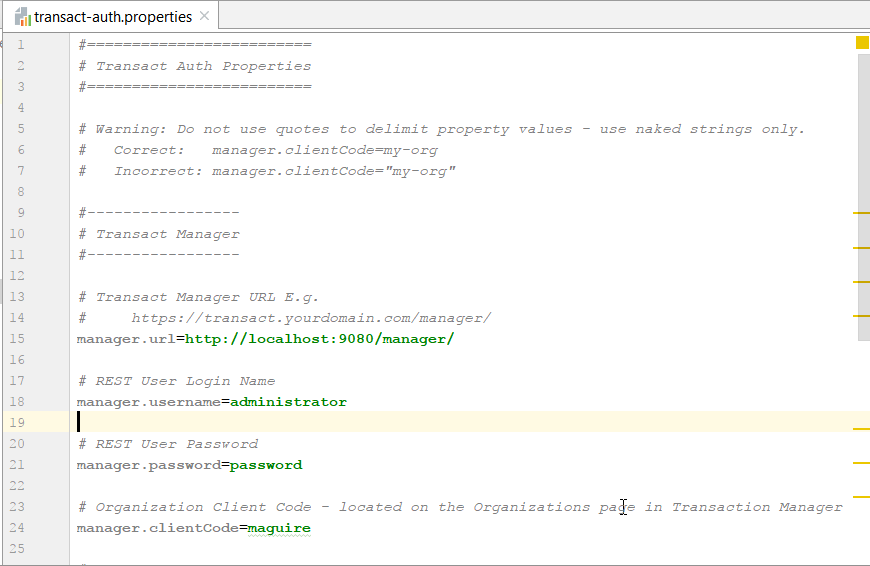
Update the
transact-auth.propertiesfile with your Journey Manager credentials.In the Project pane, expand the Home Loan project item then locate and open the
transact-auth.propertiesfile.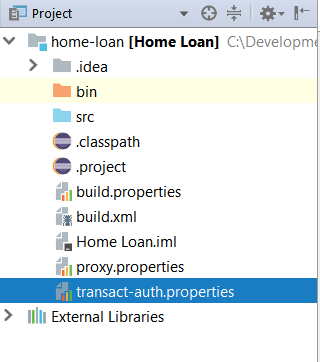
Update the file contents with your Journey Manager credentials and server details, then save the file.
Configure new project with Ant dependency libraries
Select View > Tool Windows > Ant Build to display the Ant Build pane.
The Ant Build pane is displayed to the right of the editor pane.
Click the Add icon in the Ant Build pane.
The Select Ant Build File dialog is displayed.
Browse to the
build.xmlfile under the new project folder and select it, then click OK.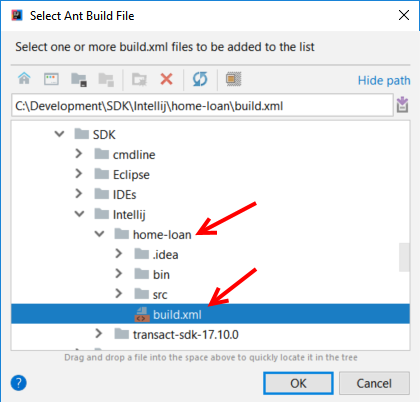
caution
Take care to add the new project's
build.xmlfile, not the main Journey SDKbuild.xmlfile.The new project's Ant tasks appear in the Ant Build pane.
Edit the Ant Build properties.
Right-click the project in the Ant Build pane and select Properties.
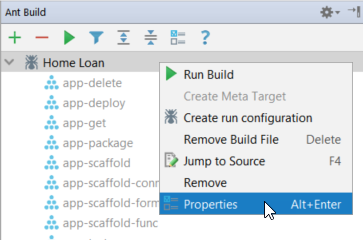
The Build File Properties dialog is displayed.
Select the Additional Classpath tab then click Add All in Directory.
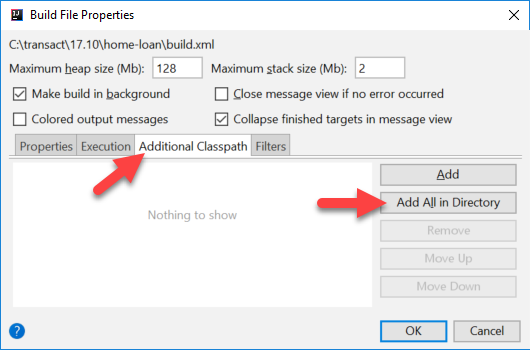
The Select Path dialog is displayed.
Browse to and select the
libfolder under the Journey SDK top-level folder, then click OK.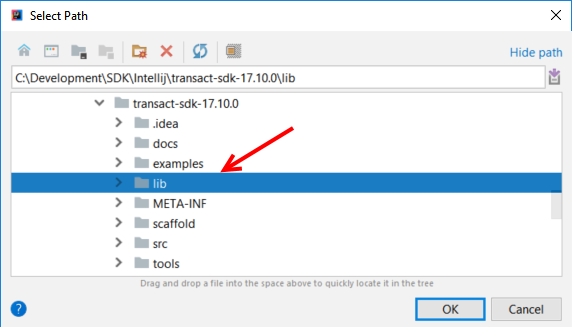
The selected
libfolder appears in the Additional Classpath list.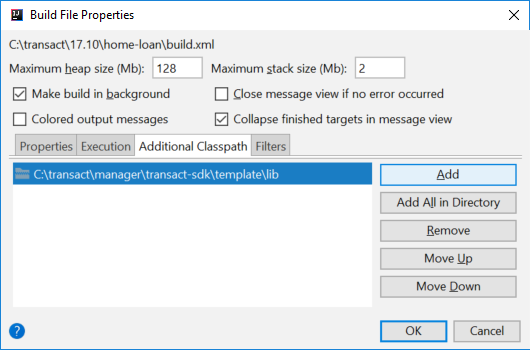
Click OK to close the Build File Properties dialog.
You are now ready to scaffold content into your new project.